Partners

Newsletter Sign-up


Lovely Sponsors


Currently Obsessed

Subscribe

Lovely Press

Disclaimer

From time to time Creature Comforts may include affiliate links to products featured in their posts and/or affiliate banner ads. However posts and featured products seen on Creature Comforts are never controlled or selected by advertisers or affiliates. Featured items are products that we personally like, and would share regardless of affiliate partnerships. If you choose to purchase an item that has been featured from an affiliate link or ad banner, we may receive a small commission on that sale.

Privacy Policy
Hosted by

Entries from December 1, 2009 - December 31, 2009

Friday
Dec182009

Free Printable: Holiday Cards by Rosemary

Hello lovelies and happy Friday!  Sweet Rosemary Eckford created these wonderful Printable Holiday Cards, Card Pockets and To/From Labels for our 18 Days Series today.  As a New Zealander, Rosemary wanted to create something festive that we all can enjoy, but that also represents the holidays on her side of the hemisphere (where it is Summery and warm).  Read on for the downloads and more from Rosemary:

My design was inspired by the Pohutukawa Tree which is affectionately known as the New Zealand Christmas tree.  It flowers throughout December and is the perfect backdrop to summer at the bach (beach house) where the BBQ is always on and you spend all day in your jandals (flip flops) and togs (swimsuit). Happy holidays to you!

Download:

You will need:

  • 1 x A4 cardstock
  • Glue stick/Double sided tape
  • Craft knife/Papercutter
  • Optional: Corner rounder, 1" Circle punch, 1 x A4 vellum

Score folds as indicated by the dotted lines and then cut around card & pocket. I made a basic square envelope from vellum so I could send my cards through the mail, Google has heaps of templates if you need inspiration.

Thank you so much for these wonderful printable Rosemary!  See more from Rosemary on her BLOG.

Friday
Dec182009

Inspiration Daily: 12. 18. 09

Image credits: 1. so cold, 2. film 35, 3. Untitled, 4. reindeer

Thursday
Dec172009

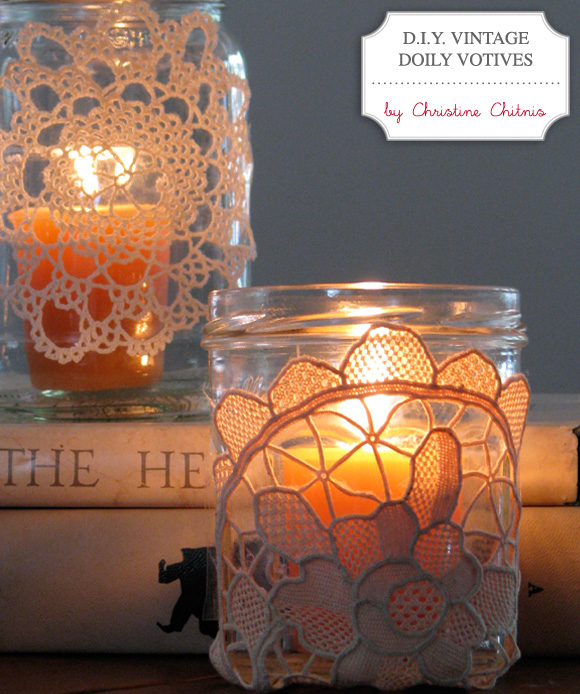
D.I.Y. Vintage Doily Votives by Christine Chitnis

Today Christine Chitnis from Lavender and Limes has created this beautiful project for our 18 Days Series.  These are so soft and romantic and would make perfect gifts.  Better still, they can be displayed in your home year-round!  Here's more from Christine about her project:

Here in New England, we have been experiencing the first signs of winter.  Frost creeps over the garden, night sets in around 4:30pm and our heavy coats have come out of storage.  These crisp, gorgeous days have inspired me to cozy up our home in preparation for the colder months ahead. When I go about setting a winter dinner table, I always feel that a soft glow is needed. Using some old jelly jars, a bit of hot glue and some vintage doilies, I crafted these pretty votives.

Materials:

  • Vintage Doilies
  • Hot Glu
  • Jelly jar
  • Tea light candles

Directions:
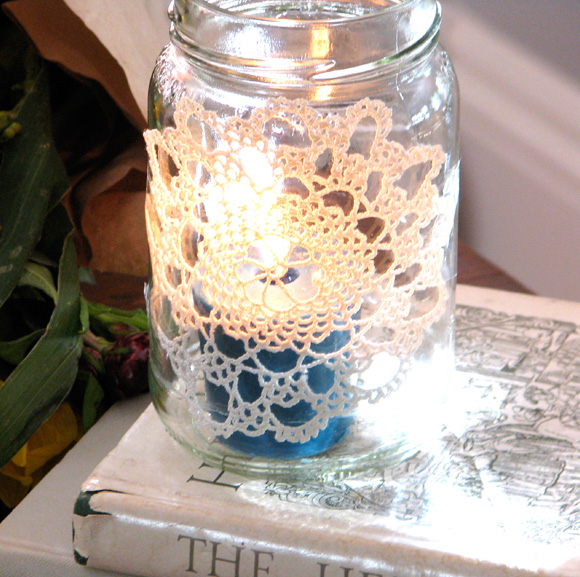
Wash and dry your jelly jars and find the doily that best fits each jar.  Try to use smaller doilies so that you don't have to cut them (this leads to unsightly fraying).  Place dabs of hot glue on the outer edges of your doily and wrap it securely around your jar, holding it tightly in place until the glue cools.  Wait for the glue to dry completely, make sure that the doily is secure (add more glue if needed) and place a tea light into the jar.  Strike a match and enjoy the ambiance!

Thank you so much for inspiring us with such a gorgeous project Christine.  To see more from Christine visit her: BLOG  |  PORTFOLIO

Thursday
Dec172009

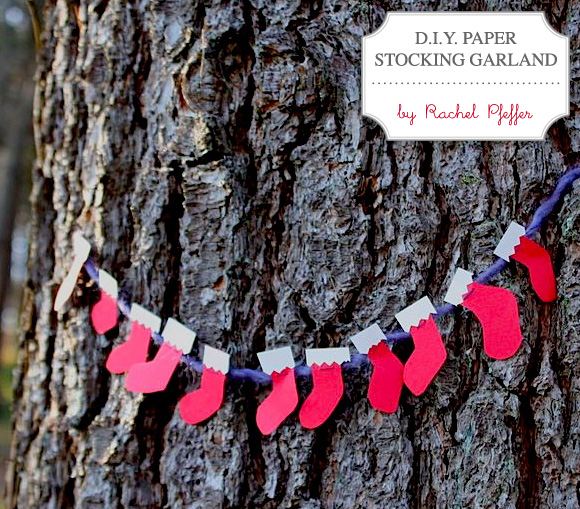
D.I.Y. Paper Stocking Garland by Rachel Pfeffer

This cute and easy D.I.Y. project for a Paper Stocking Garland was created for our 18 Days Series by the lovely Rachel Pfeffer of Luckyduct.  She's used red paper for her project, but you can use any kind you like for yours.  Red, patterned, etc.  Perhaps you can even embellish each stocking with some glitter or other festive elements.  Here is more from Rachel on how to create your own charming garland:

Materials needed:

  • Red and white construction paper (or other crafting papers of your choosing)
  • a pen or pencil
  • pinking shears (if you want to get fancy)
  • a piece of yarm, ribbon, or twine
  • glue stick or hot glue
  • needle and thread (or a small hole punch)

Directions:

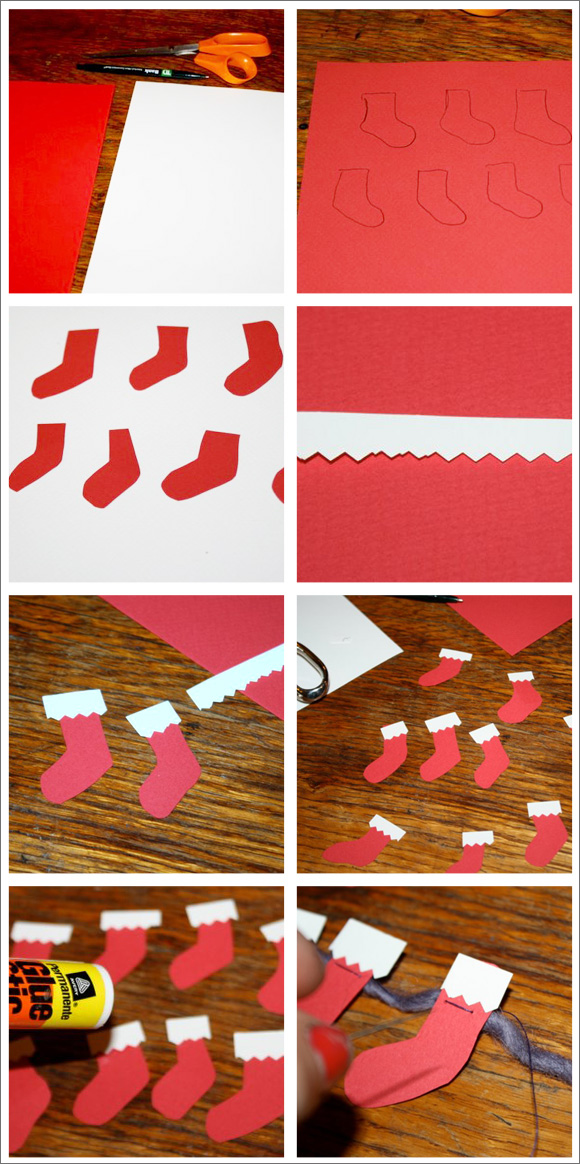
1) Gather your supplies.

2) Draw about 10 stocking outlines. I just looked up a picture online for a reference, but it's fun if they are each a little different.

3) Cut out stockings!

4) Trim a strip across the top of the piece of paper with the pinking shears, so that the top of the strip is flat, and the bottom is zig-zagged or scalloped.  Regular scissors can also be used for this part, though it will not have the scalloped edge.

5+6) Place the strip of white paper over a stocking, and cut a section that is just slightly wider than the actual stocking. Repeat for each stocking, until you have all of the top trims.

7) Using your glue stick, glue the white trims to the tops of the stockings.

8) Here is the fun (or not so fun, depending on your patience and commitment to the craft) part. I used a long piece of yarn, but a thin piece of pretty ribbon would look great, too. Using a needle and thread, simply stitch each stocking onto the piece of yarn in a row, right beneath the white paper trim. It lends the finished product a nice little touch, but it would be just as good and more efficient to use hot glue or a small hole punch (just punch two tiny holes and thread your twine through each stocking).

Ta-Da! Your strip of mini stockings is now complete. Hang it on your front door, a wall above the fire place, above your bed, anywhere you want a tiny magical little detail in your house. I strung it on the front of my wood stove door, and then on a tree. The latter wasn't very practical, nor meant for a long period of time, but it made a great picture!

Thank you so much for this fun project Rachel.  For more from Rachel visit her:

SHOP  |  BLOG  |  TWITTER

Thursday
Dec172009

Inspired By: Photographer Connie Wang

{posted with permission. ©Connie Wang}

These gorgeous photographs by Connie Wang simply take my breath away.  Aren't they exquisite!  See more in her flickr album and portfolio.

Page 1 ... 2 3 4 5 6 ... 11 Next 5 Entries »
Related Posts Plugin for WordPress, Blogger...