Partners

Newsletter Sign-up


Lovely Sponsors


Currently Obsessed

Subscribe

Lovely Press

Disclaimer

From time to time Creature Comforts may include affiliate links to products featured in their posts and/or affiliate banner ads. However posts and featured products seen on Creature Comforts are never controlled or selected by advertisers or affiliates. Featured items are products that we personally like, and would share regardless of affiliate partnerships. If you choose to purchase an item that has been featured from an affiliate link or ad banner, we may receive a small commission on that sale.

Privacy Policy
Hosted by

Entries in D.I.Y. + Projects (281)

Wednesday
Mar272013

Testing Testing: A DIY Wedding Bouquet for my Sister

Over the past few years I have been blessed to see two of my six little sisters get married. I am from a family that appreciates getting as much out of a tiny budget as possible (that's probably why I like to DIY so much), so to help my sisters cut down on expenses I served as the photographer for both of their big days. However, as much as I love taking photos...one thing I've learned is that I am just not cut out for the high-pressure world of wedding photography! Phew!

This summer my family and I will celebrate the marriage of a third sister (hooray), but this time around I'll be helping out with the floral arrangements (I might sneak in a few photos for her too...but not as the official photographer—thank goodness). I haven't worked with arranging live flowers very much, so over the past couple of weeks I've been trying to soak in as much insight into the process of bouquet / floral design as I can. Since I've been browsing around for whatever knowledge I can gain and finding a few helpful things along the way, I thought that today I'd share the best sources that I've discovered so far with you all. I hope that if you ever find yourself wishing to create a DIY wedding bouquet, that these links might take some of the headache out of the researching process for you:

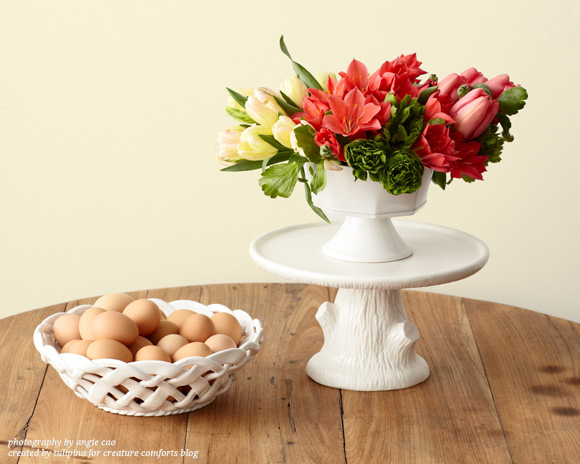
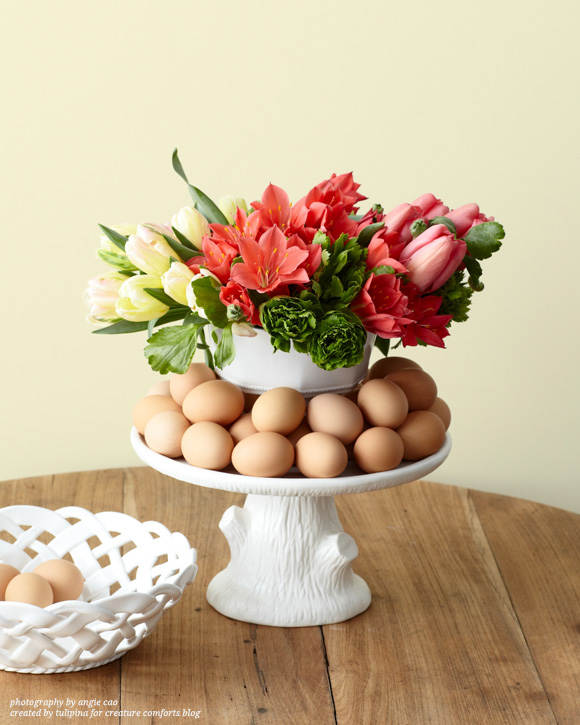
My sister first started off with a purple and white color palette (you can see my Pinterest inspiration board for her here), but we recently decided to shift the theme to include some soft peachy colors for a day that has more of a relaxed "walk in the garden" feeling about it. Before we changed the palette, the lovely Maddy from Somewhere Splendid was kind enough to put together a couple of beautiful arrangement ideas to inspire my sister. They are part of her Blooms on a Budget series and are gorgeous! 

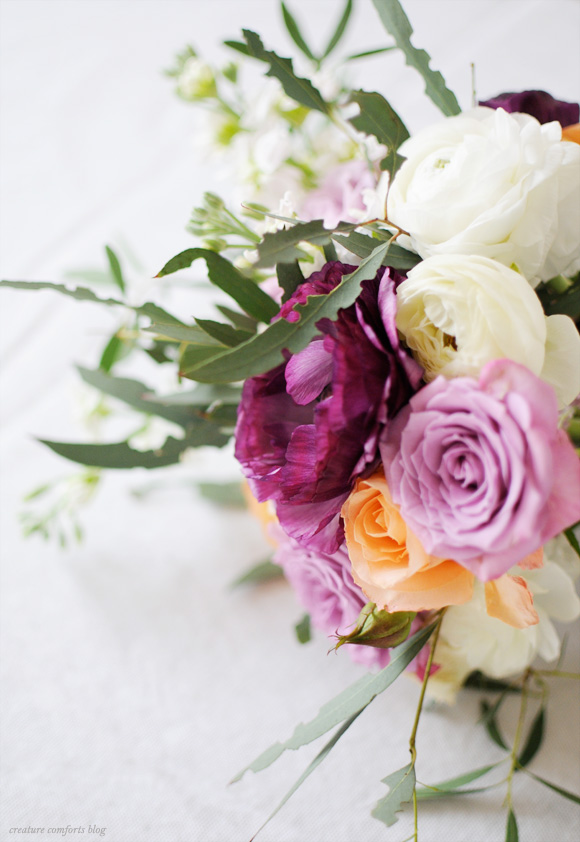
This is the bouquet that is currently serving as inspiration for my sister's wedding arrangements and decor. The versions I came up with here were limited by what was available in stores (since I was only practicing and didn't want to spend too much money hunting down specific blooms). Even still I learned a lot by just practicing with what I had...

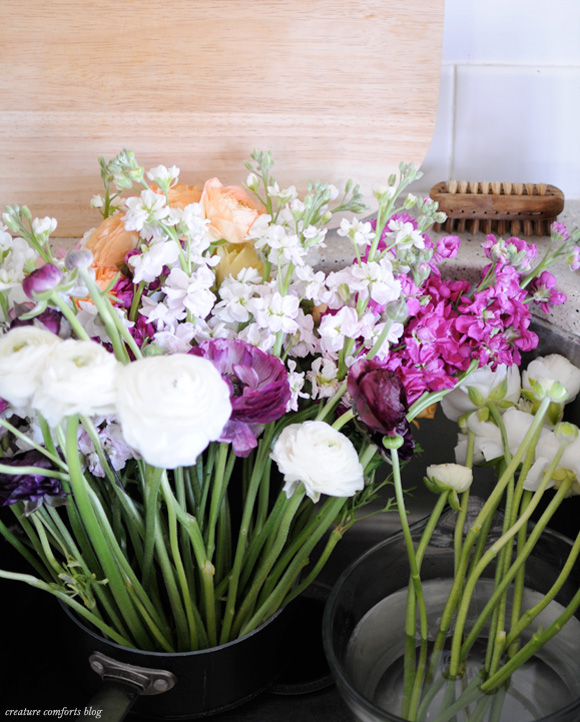
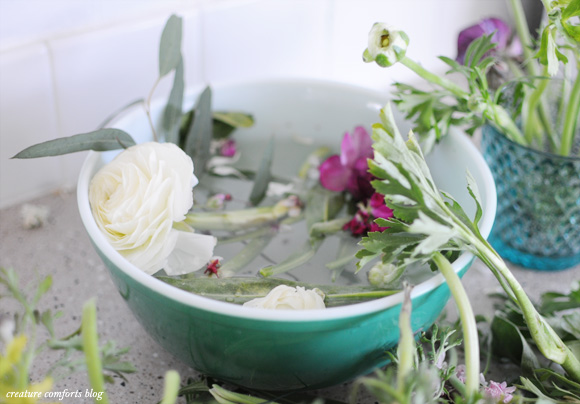
Firstly, it takes a lot of time to prep everything (removing leaves, wiring blooms, etc.) but it's worth it to have everything prepped before you start arranging. Here the flowers are in my kitchen sink, soaking inside a pot and a glass measuring bowl (whatever works, right).

Check out how messy all the prep is! Not pictured...a pile of greenery 10 inches high!

Click on the image for a larger view

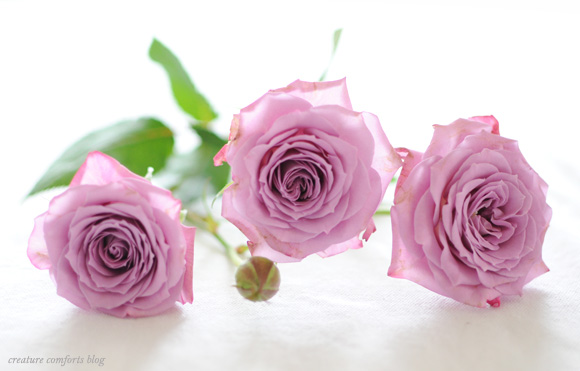
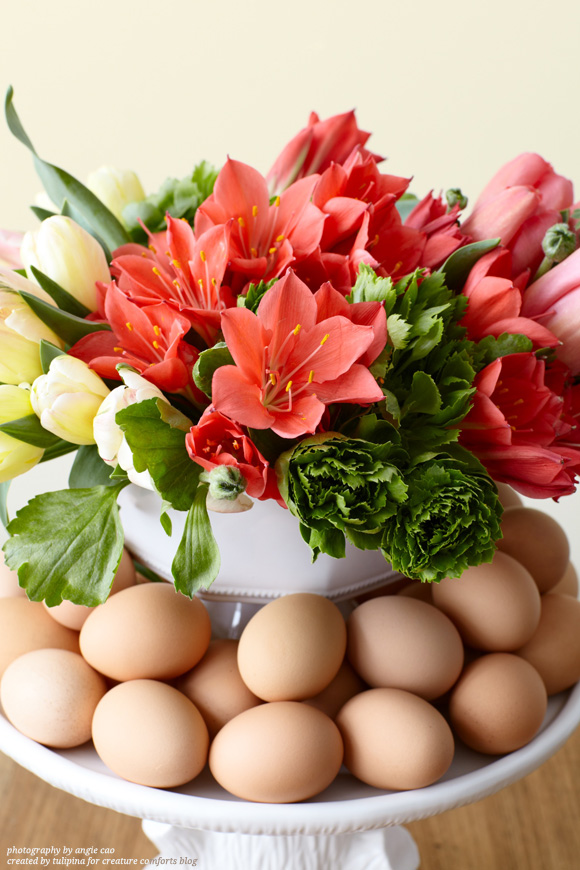
I used ranunculus in this bouquet, and they are gorgeous, but I'm not sure if they will work during the Summer season because of how delicate they are. However if I do end up using them I've now learned how to wire them and make them much more sturdy! Just insert a floral wire inside the hollow stem until it begins to pierce the head of the bloom, and trim the excess wire at the base of the stem. Voila! The blooms can even be gently bent into the direction you want them to face because of the wire hidden inside of them!

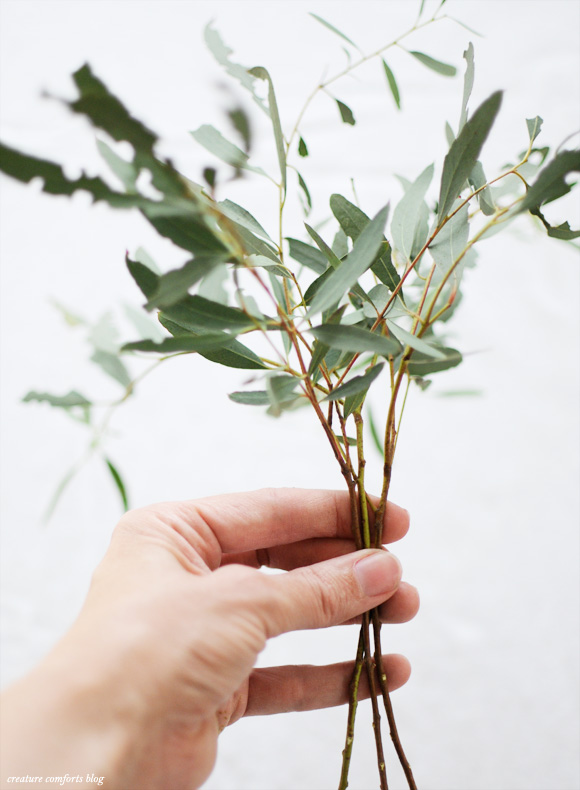
I know I want to work with a different kind of greenery (mine here had bug holes since I just picked them off a random tree). I'm thinking of using Dusty Miller, Lamb's Ear, and/or Seeded Eucalyptus for her actual arrangements.

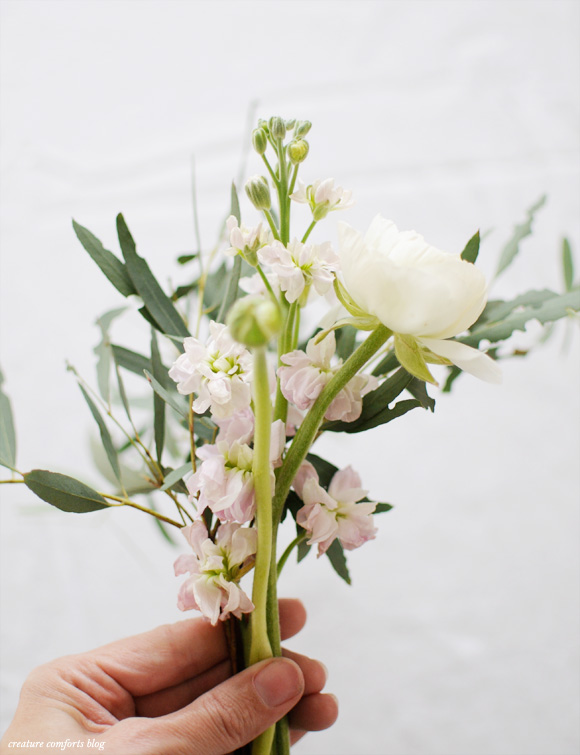
Here's how I started the bouquet...by layering several different blooms on top of a few greenery sprigs.

I continued to build onto the bouquet with additional flowers...adding three at a time and then rotating the arrangement slightly before adding more, so that I could evenly fill in the entire piece.


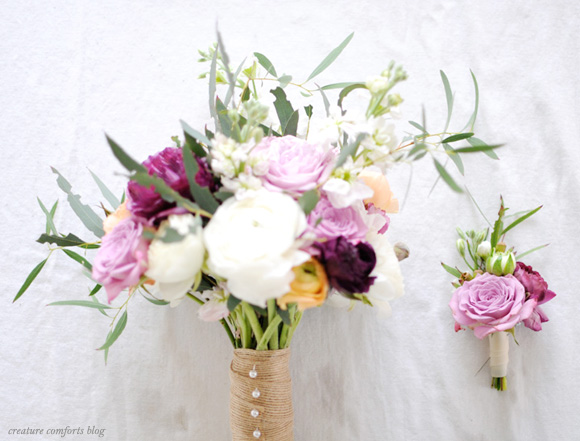
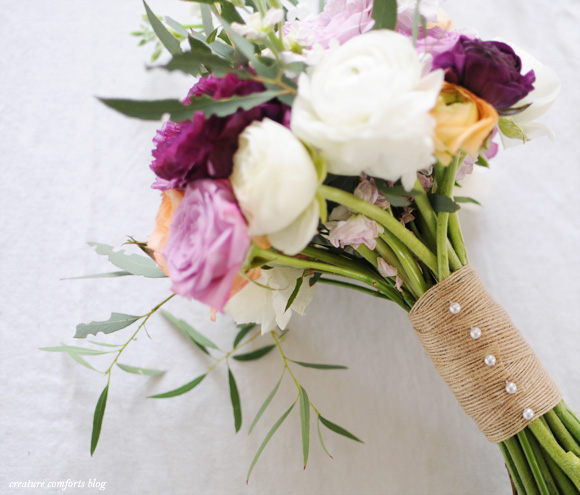
Once I was satisfied with the overall design and fullness I wrapped the stems in floral tape.

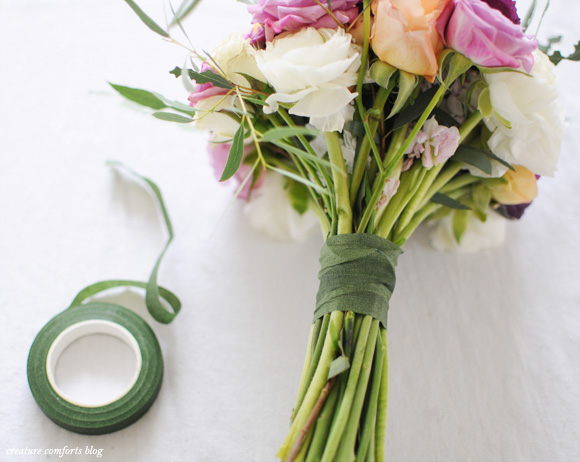
Lastly, I wrapped the stems in a natural-looking ribbon and added decorative pins for embellishment. The pins are pretty, but I will probably want to find something less sharp (maybe applied with a glue gun) for the actual wedding.

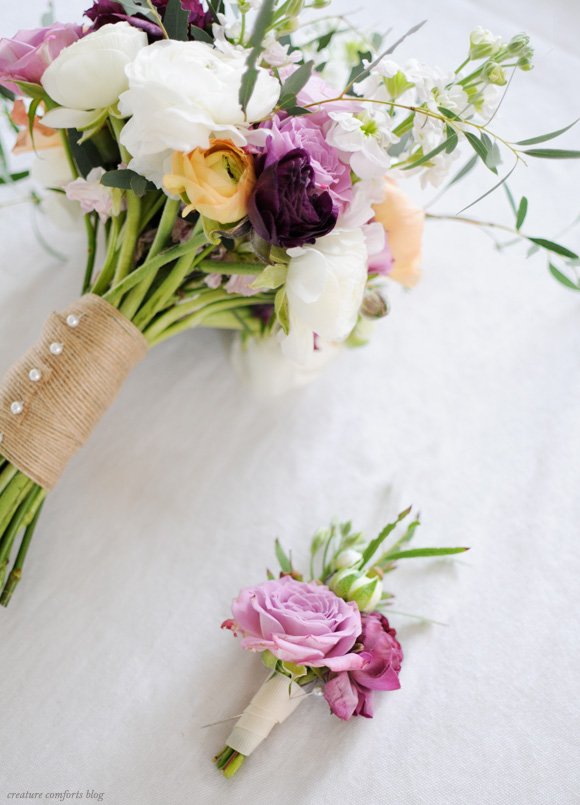
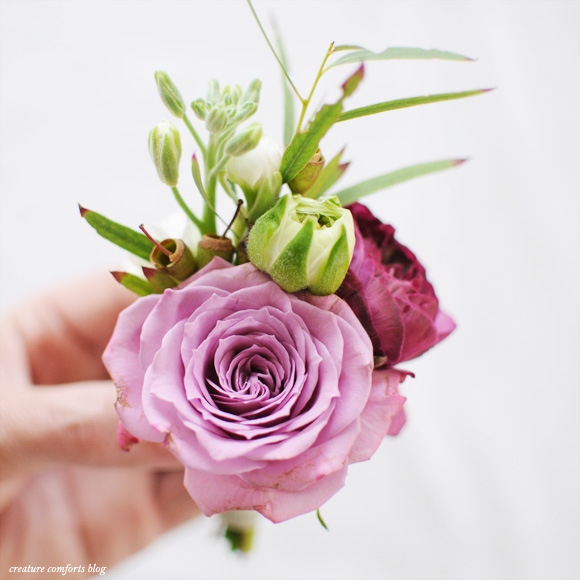
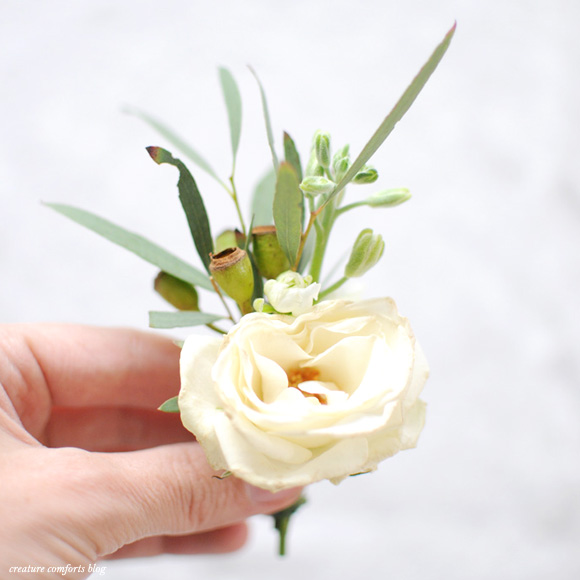
I think the bouquet and boutonniere / corsages (below) turned out pretty well for my first time! The one truly tricky thing that I'm worried about is that my sister is on a very tight floral budget (you might cry if I told you how small), so one of my biggest challenges will be completing arrangements for the huge wedding party plus all the family members (and honorary bridesmaids) that she has on her list without sacrificing style. Trust me...I have even considered buying roses from the wonderful vendor at our local farmer's market and blooms from Trader Joe's to pack in my suitcase when I head to Michigan for the ceremony! We shall see.

If you have knowledge in the world of floral design that you would be willing to share, I would love your help! I received a ton of wonderful feedback over on Instagram when I shared the photos of these arrangements that I snapped with my phone. So fantastic! I never cease to be humbled and amazed by the wonderful community we share together! xo Ez

Thursday
Mar212013

Creating a Mini Succulent Planter Oasis

O·a·sis  | /ōˈāsis/ | Noun

1. A fertile spot in a desert where water is found.
2. A pleasant or peaceful area or period in the midst of a difficult, troubled, or hectic place or situation.

With our moving truck still missing (I haven't heard from them once since they hauled my stuff away 3 weeks ago) it has become increasingly challenging to remain calm and keep focused on the positive. And it probably goes without saying, but finding entertainment inside an empty house is getting a little hard to come by as well. Fortunately the weather has been gorgeous here...perfect gardening weather!

So while my gardening skills are pretty much maxed-out with silk plants and pre-cut blooms from the grocery store, I decided to give succulents (real plants!) a try. Rumor has it they are pretty difficult to do away with. After watching a handful of YouTube videos on how to plant succulents and feeling only marginally more prepared, my daughter and I trekked off to the local hardware / nursery store and dove right in.

Time to create a mini oasis! Back home I poured my special cactus mix soil (supposedly good for succulents...but we'll see) into the large pot I'd picked out and started arranging the plants in the soil. I didn't really have a rhyme or reason for where each plant ended up...I just wanted there to be nice contrast and a bit of a wild feel about the finished look.

The thing is, that even though I have been a horrid gardener up to this point in my life, I have always had a deep affinity for succulents. They will forever remind me of childhood visits with my grandparents here in California. As a kid who lived neck-deep in snow most of the year in Minnesota and Montana, stepping off the airplane and into a place warm with sun and brimming with plants and flowers was something more than just a little bit magical to me.

So now that I have my very own little spot of planted magic, I'm going to be keeping a watchful eye on it...and will hopefully have nothing but good news to report about it's progress as the year goes on. Maybe one day soon I'll even have a chair (what a novel idea) to prop beside it where I can watch the sun set in our neighborhood. How beautiful would that be?!

By the way, I'm by no means a plant expert. But after sharing a photo of my little succulent plantings over on Instagram a request for plant identification came in. So since most of the pots that my plants came in were not labeled, I made a trip back to the store and wrote down all the names that I could find to share with you here today (hence all the succulent identification above). If you notice that I got anything wrong, please feel free to send the correct details my way! I hope they will come in handy for you if you decide to create your own little succulent oasis someday soon. xo Ez

P.S. For those of you wondering...it turns out that we legally have to give the moving company 21 "business days" (not 21 actual days) to return our things to us. This is why you haven't yet seen me calling these horrid people out all over social media. When the time comes I promise to tell you know exactly who they are so that you can keep yourself and everyone you care about as far away from them as humanly possible!

Wednesday
Mar202013

DIY Springtime / Easter Tulip & Egg Centerpiece

To welcome the first day of Spring today, we have a special guest post to share that was created for us by the amazingly talented floral designer Kiana Underwood of Tulipina. Enjoy!

-----

With Easter, the possibilities for creative expression are abundant. This particular design incorporates the staples of spring and Easter (colorful flowers and eggs) in a unique and easy way. The green ranunculus are amazing in the texture that they bring to the design, and the colorful pop of the tulips and lilies scream cheer and happiness. A few ceramic rabbits on another cake plate finish the Easter motif. I hope that you enjoy trying your own version of this DIY.

What you will need:

Begin by placing the pedestal bowl on top of the cake platter and start arranging the tulips so that they hang over the side of the bowl. The tulip leaves (attached to the stems) create a nice fill as well.

Continue by placing the lilies in the same manner next to the tulips.

Add the ranunculus and additional tulips. 

Continue by filling in with additional numbers of each variety. This arrangement works well by having a reasonable segregation between the floral varieties.

Stack the eggs carefully around the platter and voilà - you have a lovely Easter centerpiece. 

Kiana Underwood is the owner of Tulipina, a boutique floral design studio in San Francisco, California specializing in chic events. Kiana’s unique approach to design blends a natural and organic garden style with creative and eclectic design. She is also the editor of floral blog Naked Bouquet, which focuses on design and creative DIYs. When not designing, Kiana enjoys reading, playing the piano, and being a busy mother of three. In addition to her website and blog, you can also find her on Facebook, Twitter, and Pinterest.

All photography by Angie Cao

Additional props used: Woven Ceramic Round Basket | Ceramic Bunnies (purchased from a grocery store)

Monday
Mar182013

Learning a new Skill: Digital Illustration with Brad Woodard

Hi friends! I just wanted to quickly pop by to share my excitement with you. Earlier this morning I enrolled in designer/illustrator Brad Woodard's Skillshare online class where he will be teaching Digital Illustration: Communicate with Color, Pattern, and Texture...and I couldn't be more jazzed.

I love Brad's illustrative style, and am hopeful that even without all the usual tools (my digital tablet, scanner, etc. are all stuck on our missing moving truck) I can learn a ton through his tutelage. The best part...after a discount code (offered via Brad's blog) the full class is only $15! No reason not to sign up, right?! I hope that if you have been curious about illustration or have been wanting to add the skill to your long list of talents, that you'll consider joining so we can be classmates!

Why not Today? Lessons begin tomorrow! I hope to see you there! xo Ez

All illustrations by Brad Woodard

Thursday
Mar142013

DIY Embroidery Thread Wrapped Earrings

This is a special guest post was created by Anne Weil of Flax & Twine. Find more handmade lovelies, simple design and beautiful inspiration on her inspiring blog.

-------

Hi everyone!  I’m so happy and honored to be a guest poster on Creature Comforts today. I’ve been following along with excitement as Ez has shared her big move with us. Having just moved across the country myself, I am empathetic to the anxiety and discombobulation that comes along with the thrill of a moving adventure. To pack up all your stuff and leave your known environment, only to arrive in a place that needs a lot of settling can overwhelm anyone! Ez has handled this transition seamlessly and gracefully on the blog. She makes it all look so easy. Nonetheless, I am hoping this post eases her blog burden ever so slightly in the transition. I adore this fun jewelry tutorial. I hope you do, too!

I originally made a neon green version of these hoops for an 80's Halloween party­–perfect under the black lights. When I went to pick colors for this tutorial, however, I pulled this more gentle color palette with a punch of black. I think it's so lovely. These hoops are simple to make, yet such a fun splash of hand made in your wardrobe. Add the ability to customize every pair and you might just not be able to stop making them. I adore these little black and white ones.

These hoops make for a fabulous last minute, personalized gifts, too!  Here's the tutorial:

Supplies needed:

  • Embroidery thread (I suggest DMC 6-strand floss for a smooth finish)
  • Inexpensive hoop earrings (I found these at Target)
  • Craft glue
  • Scissors

Cut 40” of chosen embroidery thread colors for a large hoop, less for smaller hoops. If you place the hoops in your ear before you start, it will help you decide where to change colors and place the majority of your design color work (remove hoop from ear before next step).

Start by placing a small bit of craft glue at the end of the hoop.  

Take desired embroidery thread colors and line them up parallel to the hoop, placing the end of the thread in the bit of glue. Choose the thread color you want to start with and begin wrapping it around the hoop...the other colors you aren’t using they go along for the ride (make sure they are being hidden by the thread color that you want to have showing). Keep wrapped thread snugly side-by-side so you can’t see the hoop or other colors underneath.

When you want to change colors, drop the first color parallel to the hoop and start wrapping with the next color you’d like. Repeat to change colors again. Change as many times as you'd like.  

When you get to the end, place another small bit of glue. Wrap thread directly over that glue, using your finger to wipe away any excess. Trim the embroidery thread colors that you are not using first as close to the hoop as possible. Then place a little extra glue to secure the remaining thread over the ends of the other colors, and trim excess. Repeat the finishing process on the other side of the wrapped hoop. Repeat full process for your other earring. Voila!

To create the striped earrings, simply wrap the embroidery threads together at the same time, as if they were one. Keep them in the same alignment as you wrap, and finish with the same process as used above.
 

So fast, easy and fun! Happy Hooping!

-------

Don't forget to visit Flax & Twine for more DIY projects and inspiration.

Related Posts Plugin for WordPress, Blogger...