Partners

Newsletter Sign-up


Lovely Sponsors


Currently Obsessed

Subscribe

Lovely Press

Disclaimer

From time to time Creature Comforts may include affiliate links to products featured in their posts and/or affiliate banner ads. However posts and featured products seen on Creature Comforts are never controlled or selected by advertisers or affiliates. Featured items are products that we personally like, and would share regardless of affiliate partnerships. If you choose to purchase an item that has been featured from an affiliate link or ad banner, we may receive a small commission on that sale.

Privacy Policy
Hosted by

Entries in Weddings + Events (111)

Wednesday
Mar272013

Testing Testing: A DIY Wedding Bouquet for my Sister

Over the past few years I have been blessed to see two of my six little sisters get married. I am from a family that appreciates getting as much out of a tiny budget as possible (that's probably why I like to DIY so much), so to help my sisters cut down on expenses I served as the photographer for both of their big days. However, as much as I love taking photos...one thing I've learned is that I am just not cut out for the high-pressure world of wedding photography! Phew!
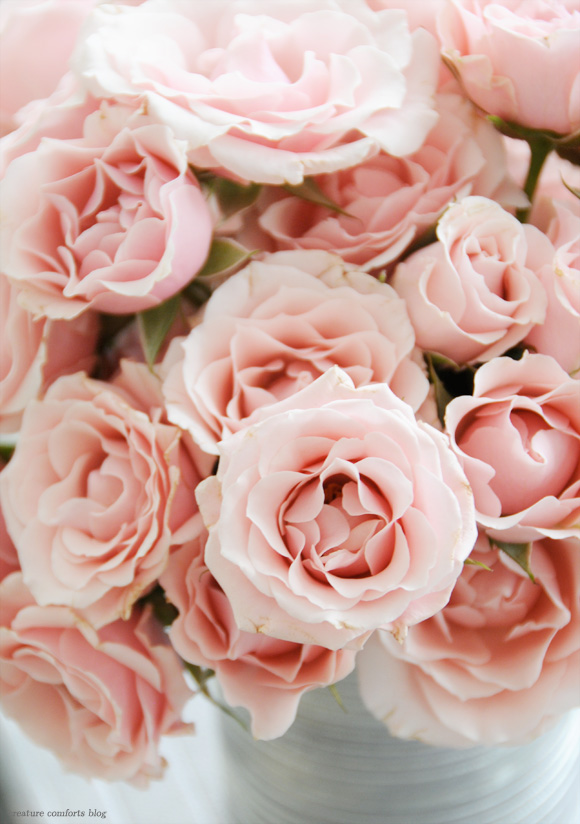
This summer my family and I will celebrate the marriage of a third sister (hooray), but this time around I'll be helping out with the floral arrangements (I might sneak in a few photos for her too...but not as the official photographer—thank goodness). I haven't worked with arranging live flowers very much, so over the past couple of weeks I've been trying to soak in as much insight into the process of bouquet / floral design as I can. Since I've been browsing around for whatever knowledge I can gain and finding a few helpful things along the way, I thought that today I'd share the best sources that I've discovered so far with you all. I hope that if you ever find yourself wishing to create a DIY wedding bouquet, that these links might take some of the headache out of the researching process for you:

My sister first started off with a purple and white color palette (you can see my Pinterest inspiration board for her here), but we recently decided to shift the theme to include some soft peachy colors for a day that has more of a relaxed "walk in the garden" feeling about it. Before we changed the palette, the lovely Maddy from Somewhere Splendid was kind enough to put together a couple of beautiful arrangement ideas to inspire my sister. They are part of her Blooms on a Budget series and are gorgeous! 

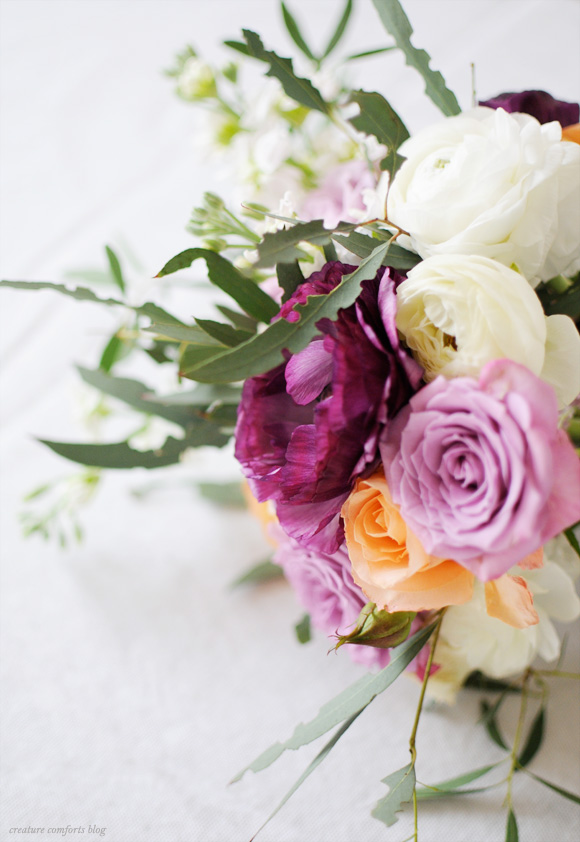
This is the bouquet that is currently serving as inspiration for my sister's wedding arrangements and decor. The versions I came up with here were limited by what was available in stores (since I was only practicing and didn't want to spend too much money hunting down specific blooms). Even still I learned a lot by just practicing with what I had...
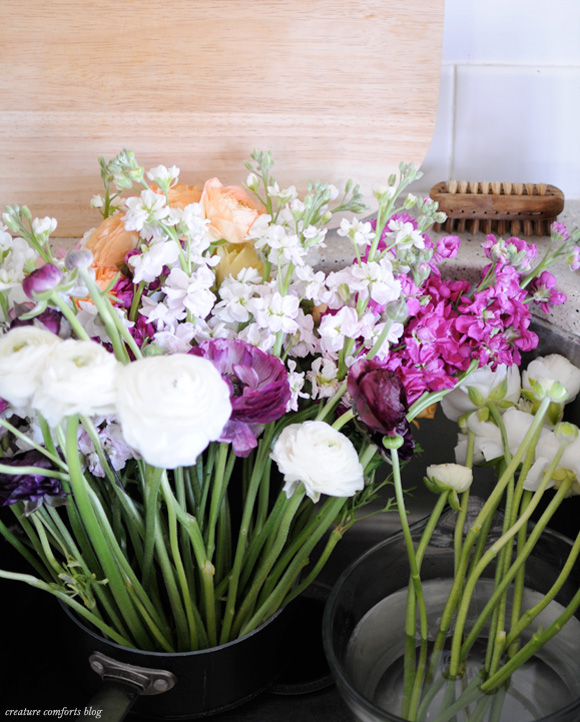
Firstly, it takes a lot of time to prep everything (removing leaves, wiring blooms, etc.) but it's worth it to have everything prepped before you start arranging. Here the flowers are in my kitchen sink, soaking inside a pot and a glass measuring bowl (whatever works, right).
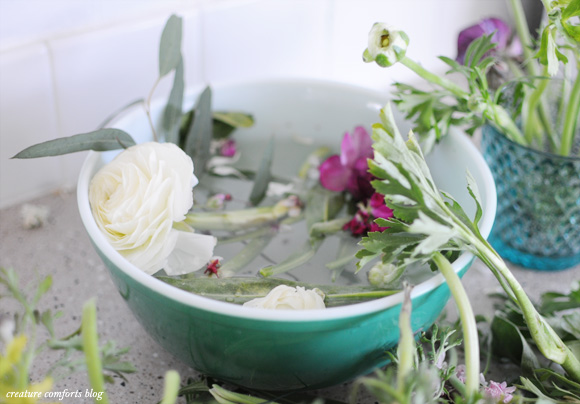
Check out how messy all the prep is! Not pictured...a pile of greenery 10 inches high!
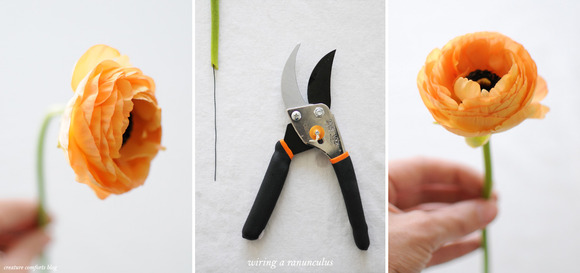
Click on the image for a larger view

I used ranunculus in this bouquet, and they are gorgeous, but I'm not sure if they will work during the Summer season because of how delicate they are. However if I do end up using them I've now learned how to wire them and make them much more sturdy! Just insert a floral wire inside the hollow stem until it begins to pierce the head of the bloom, and trim the excess wire at the base of the stem. Voila! The blooms can even be gently bent into the direction you want them to face because of the wire hidden inside of them!
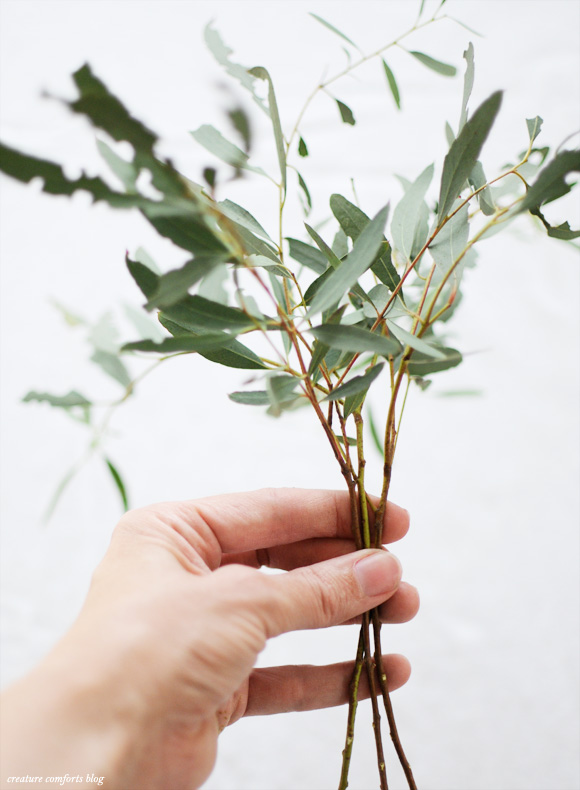
I know I want to work with a different kind of greenery (mine here had bug holes since I just picked them off a random tree). I'm thinking of using Dusty Miller, Lamb's Ear, and/or Seeded Eucalyptus for her actual arrangements.
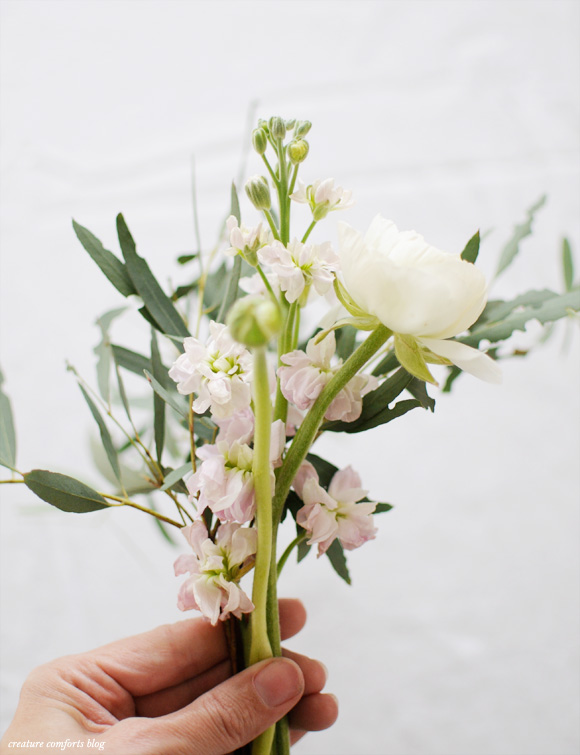
Here's how I started the bouquet...by layering several different blooms on top of a few greenery sprigs.
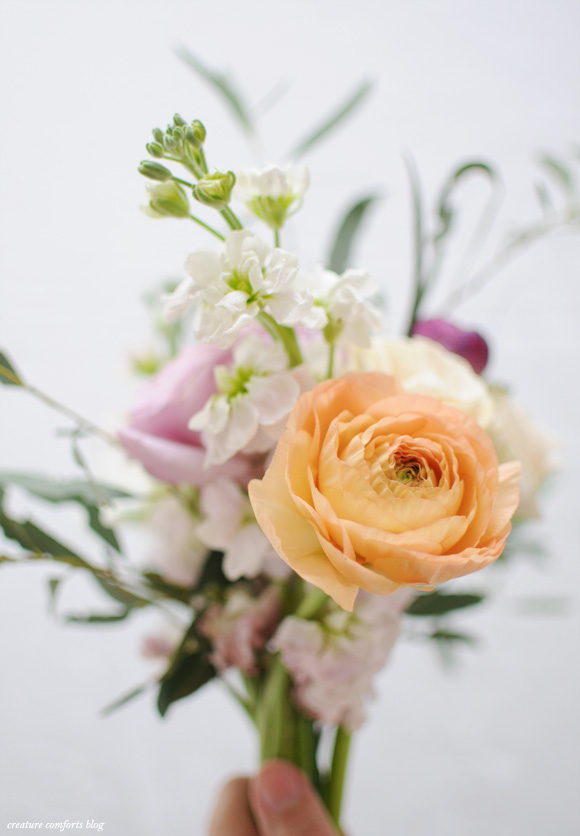
I continued to build onto the bouquet with additional flowers...adding three at a time and then rotating the arrangement slightly before adding more, so that I could evenly fill in the entire piece.
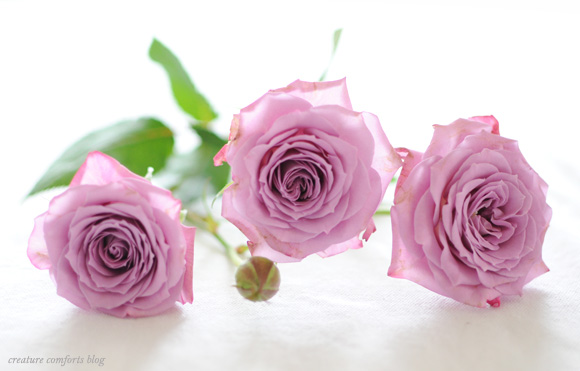
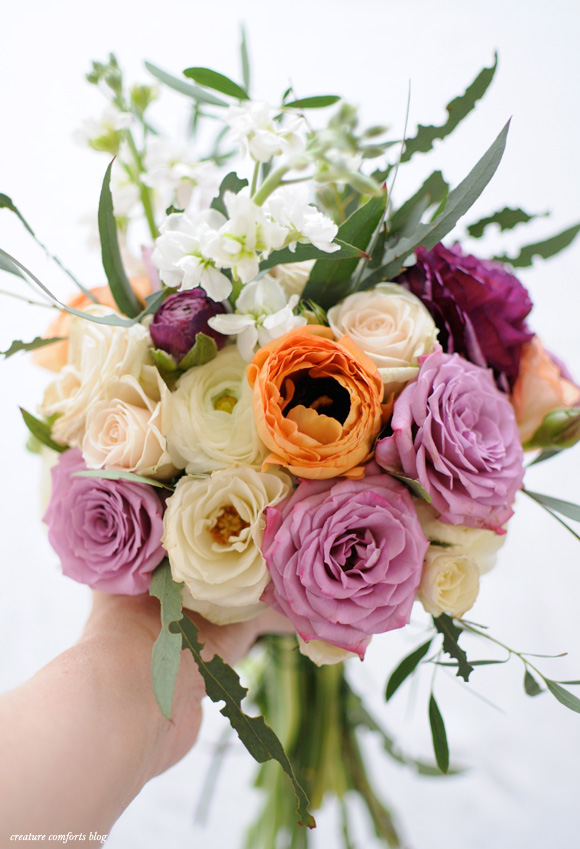
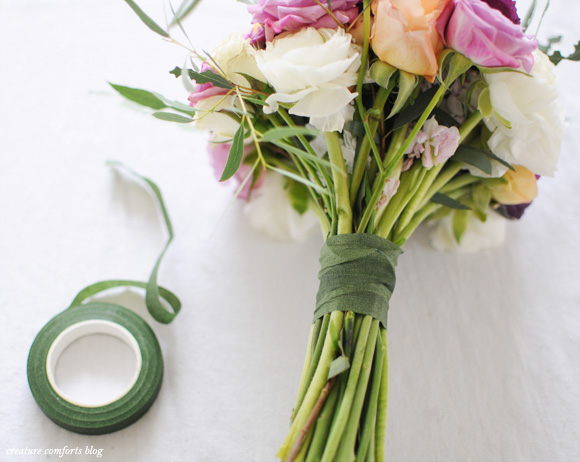
Once I was satisfied with the overall design and fullness I wrapped the stems in floral tape.
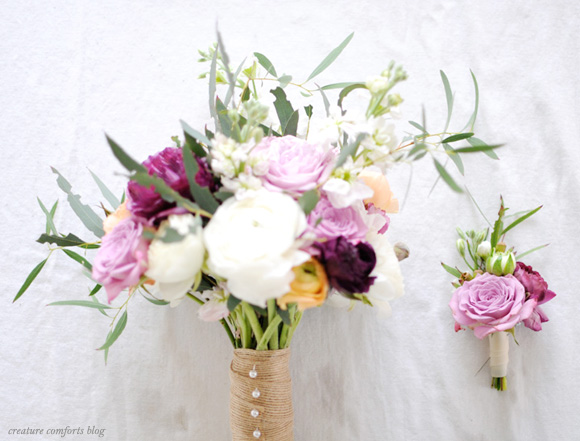
Lastly, I wrapped the stems in a natural-looking ribbon and added decorative pins for embellishment. The pins are pretty, but I will probably want to find something less sharp (maybe applied with a glue gun) for the actual wedding.
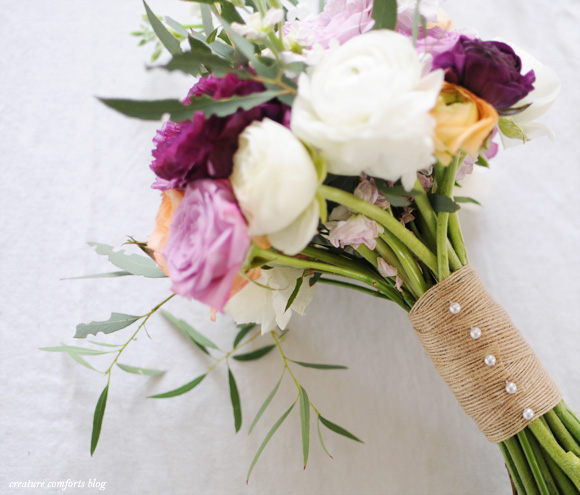
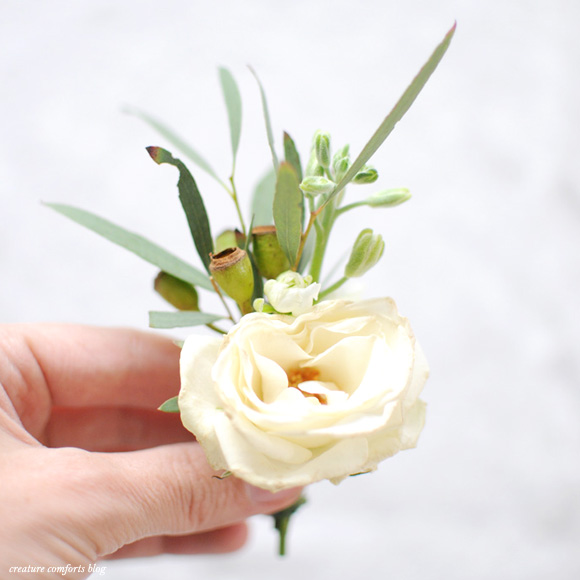
I think the bouquet and boutonniere / corsages (below) turned out pretty well for my first time! The one truly tricky thing that I'm worried about is that my sister is on a very tight floral budget (you might cry if I told you how small), so one of my biggest challenges will be completing arrangements for the huge wedding party plus all the family members (and honorary bridesmaids) that she has on her list without sacrificing style. Trust me...I have even considered buying roses from the wonderful vendor at our local farmer's market and blooms from Trader Joe's to pack in my suitcase when I head to Michigan for the ceremony! We shall see.
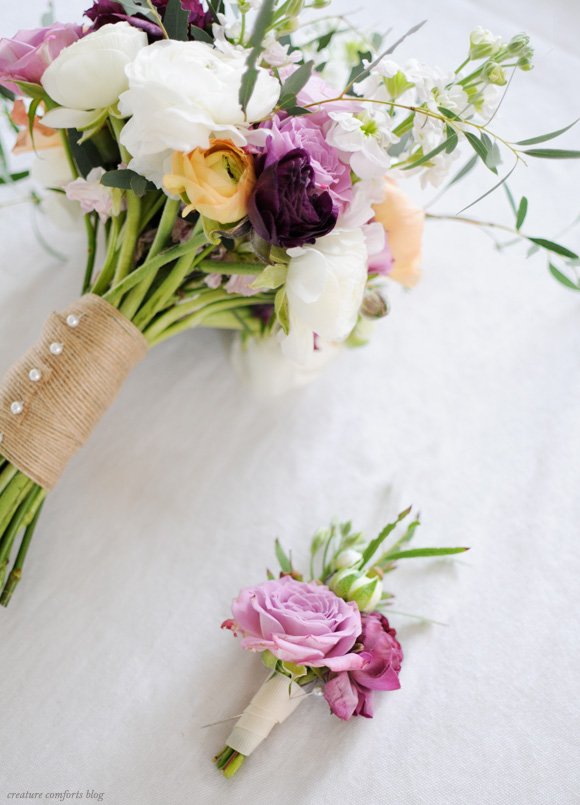
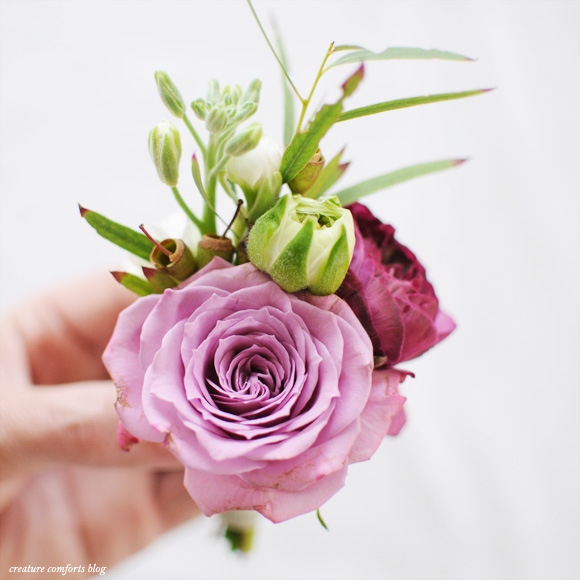
If you have knowledge in the world of floral design that you would be willing to share, I would love your help! I received a ton of wonderful feedback over on Instagram when I shared the photos of these arrangements that I snapped with my phone. So fantastic! I never cease to be humbled and amazed by the wonderful community we share together! xo Ez

Monday
Dec172012

DIY Leather-wrapped Vases and Votive Holders

Hello lovelies! Today I'm back for another fun DIY that I created in partnership with my friends at Waverly. This time I thought it would be nice to create some table decor that will look just as lovely at a festive party this season, as it will in-use all year 'round.

Let's make some easy DIY leather-wrapped vases and votive holders!

DIY Leather-Wrapped Votive Holders

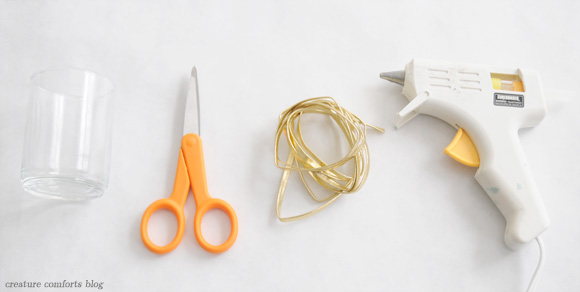
Gather your supplies. You will need:

  • Small glass votive holder(s) | The variety used here were purchased at Michael's
  • Sharp craft scissors
  • Realeather Craft Lace in Metallic Gold and / or Silver | Available at Michael's and Hobby Lobby (find additional suppliers here). Be sure that your leather cord has two flat sides (like a fettuccini noodle...not round like a spaghetti noodle).
  • Hot glue gun (low heat) and glue stick(s)
  • Battery-operated candles

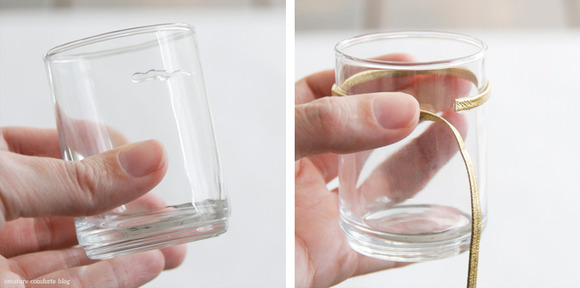
Plug in your glue gun and allow it to get hot. Begin by squeezing a small line of glue somewhere within the top 1/3 of your votive holder. Immediately place one end of your leather down into the glue and press to adhere. If the glue dries too quickly, you can easily peel it off the glass and try again.

Once the end is glued in place, wrap your leather cord around the top of your votive holder until it meets back at the starting point.

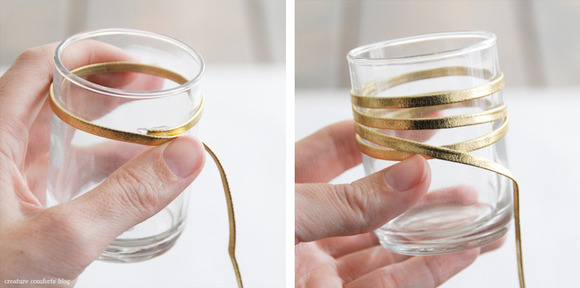
Squeeze a drop of glue on top of the end of your cord (where you first started) and lay the loose end of your cord through it. Be sure that you have pulled the cord taught so that it is not drooping. Once this dot of glue has hardened (it should take just a few seconds) continue wrapping your cord around your votive holder.

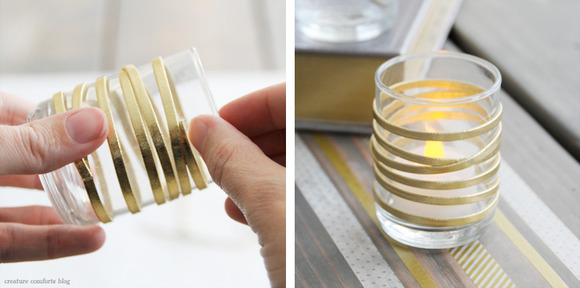
You can keep your lines parallel or overlap them like I did here. If you want to create the overlapped look, just be sure to add a dab of glue under the cord anytime you will have two pieces laying on top of one another. Keep your cord nice and tight while you work.

When you get to a good stopping point, add a dot of glue on top of a portion of leather that is already wrapped around the votive holder, and lay the end of your cord through it to adhere. Use a pair of scissors to trim off any excess cord. If there are any bits of dried glue on your votive holder, you can use your fingernail or the tip of your scissors to carefully peel it off. Place a battery-operated candle in your new holder, and you're done!

Now on to creating a pretty DIY Leather-Wrapped Vases!

Gather your supplies. You will need:

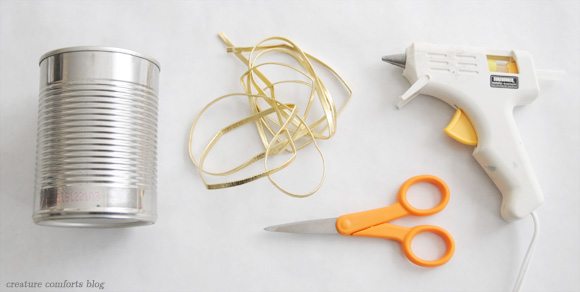
  • Tin can(s), emptied, cleaned, and dried | Make sure to use the variety with the pull-off top so that you are not left with any sharp edges. You can also use a glass cup in place of the can if you prefer.
  • Sharp craft scissors
  • Realeather Craft Lace in Metallic Gold and / or Silver | Available at Michael's and Hobby Lobby (find additional suppliers here). Be sure that your leather cord has two flat sides (like a fettuccini noodle...not round like a spaghetti noodle).
  • Hot glue gun (low heat) and glue stick(s)
  • Fresh flowers (and water)

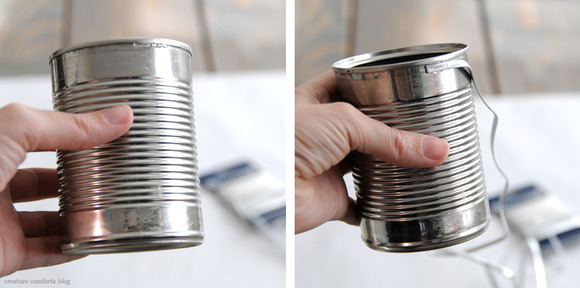
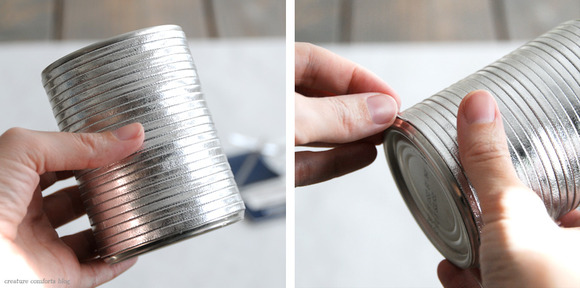
Plug in your glue gun and allow it to get hot. Begin by squeezing a small line of glue beneath the top lip of your can. Immediately place one loose end of your leather cord into the glue and press down to adhere. If the glue dries to quickly you can easily peel it off and try again.

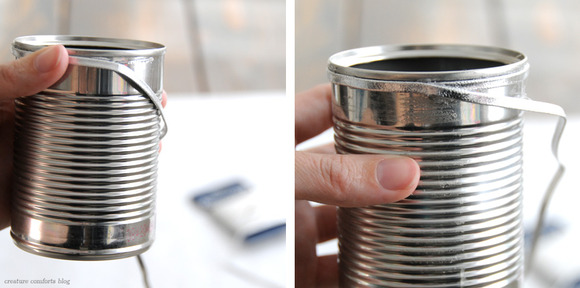
Now apply another short line of glue just slightly below the top lip of your can, and directly following the portion of cord that is already attached. Don't place the glue too close to the edge or you will have a messy vase top. Place your leather cord into the hot glue, making sure to pull your cord tight as you are working so that there is no slack in the cord. Continue to work in small sections, adding glue, and placing leather cord, until you have made your way back to your starting point.

Now add a small dot of glue on top of the cord end (where you started) and overlap the loose end of your leather cord over it, angling it down slightly (as seen in the photo).

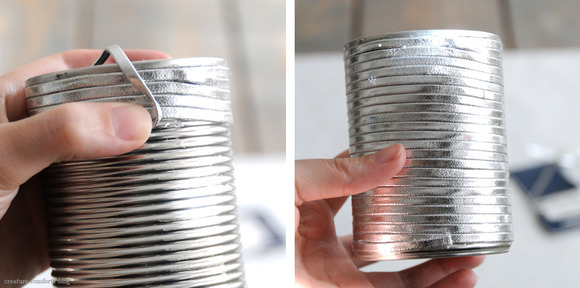
Continue to wrap your leather cord around your can, keeping the cord taught as you work, and the top edge of your cord snug against the bottom line of the cord above it. You will not need to glue the cord down along every row. If you'd like to apply a small dab of glue every few rows to make it extra secure, you can. The very top row is the only one that need to be glued down completely.

Continue wrapping cord around your can until it is completely covered. Glue the loose end atop the last wrapped row and snip off excess cord. You'll see that the leather on the back of the can angles down just a bit (nobody will notice when there are flowers inside it)...

...but the front is nice and straight.

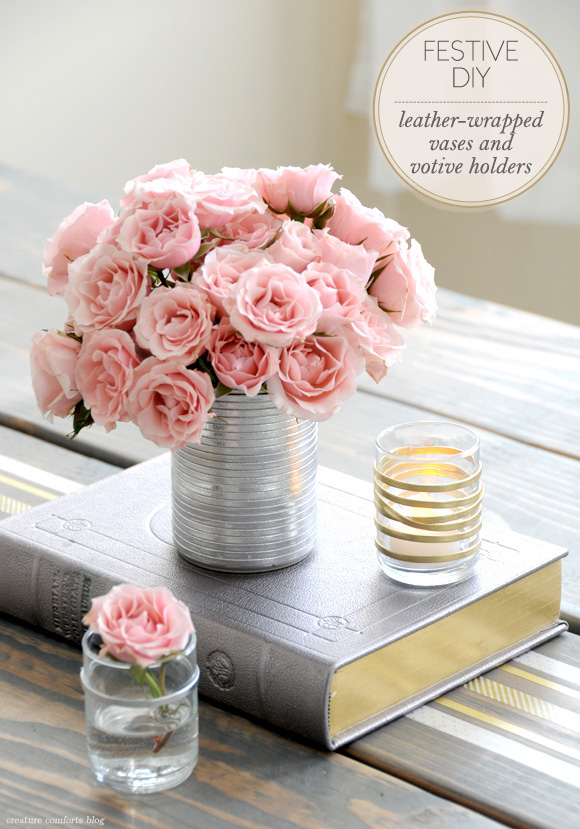
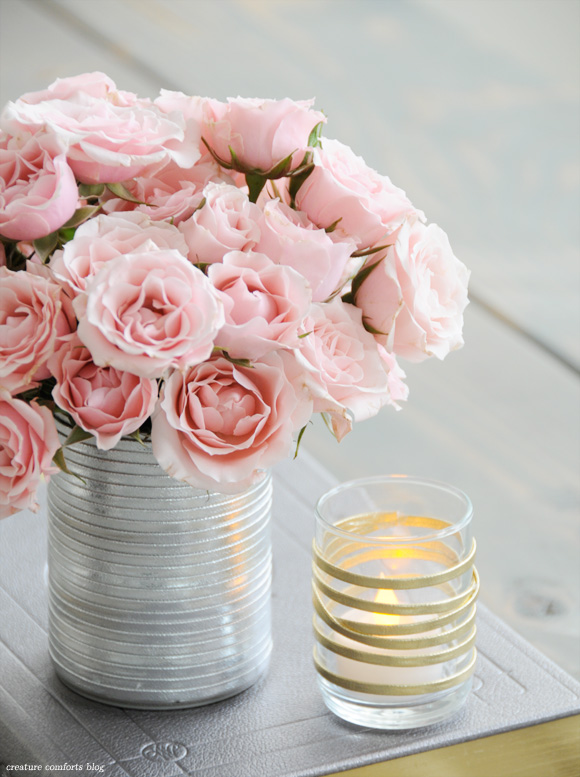
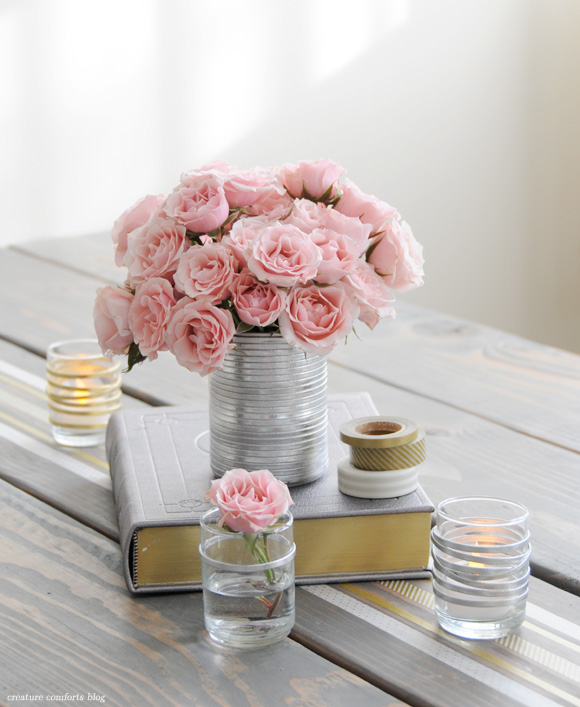
Use your fingernail or the tip of your scissors to carefully remove any excess glue along the edges. Fill with water (carefully so it doesn't leak on the leather) and a bouquet of beautiful blooms!

Doesn't it look lovely?!

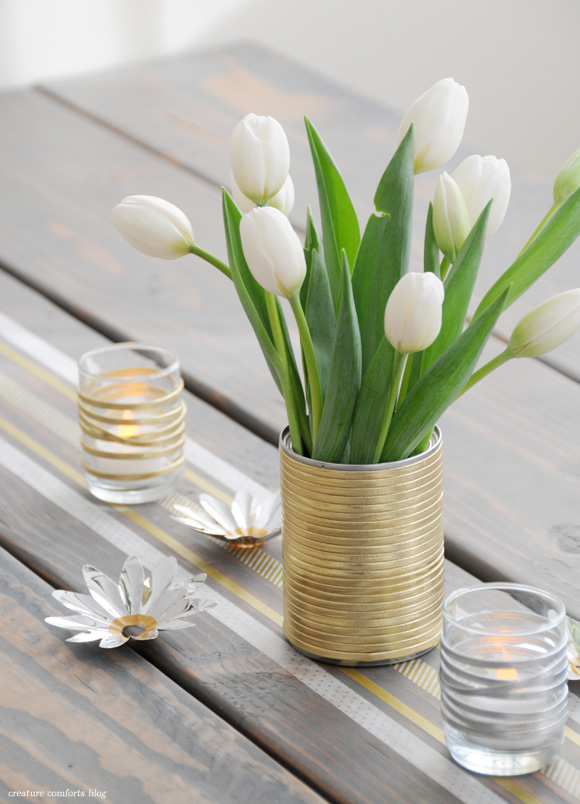
And here it is in gold!

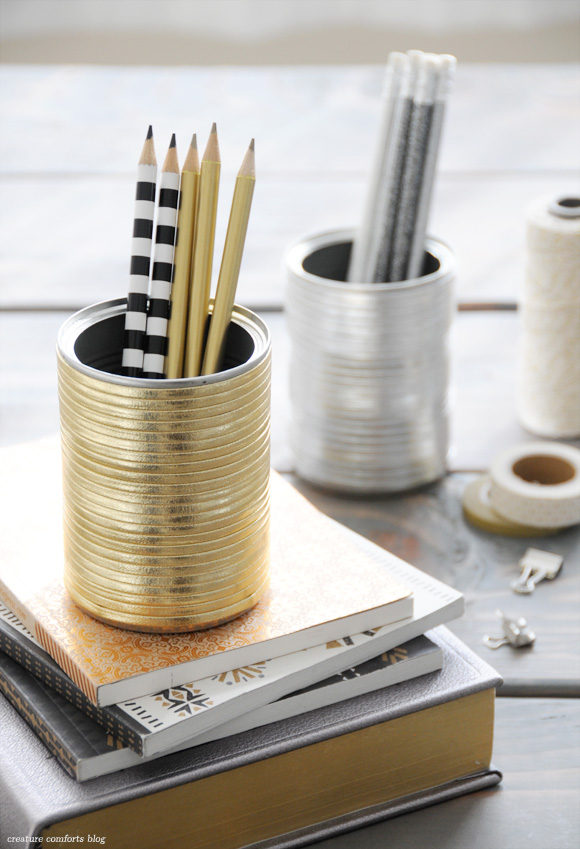
Bonus...these vases can also double as snazzy pencil holders! I have the gold one on my desk right now!

And one last gratuitous rose photo...because I just can't help myself. xo Ez

Prop sources: Pencils - Target | Journals - Delphine Press (from a trade show), Sparrow & Co. | Silver Dictionary - received as a gift | Japanese Masking Tape - etsy | Metallic Flowers - vintage Christmas decor | 

---------

This post was kindly sponsored by Waverly. Follow them on TwitterPinterest, and like them on Facebook. The DIY content, images, and opinions shared in this post are my own.

Tuesday
Nov272012

Site for Sore Eyes: Fraulein Klein

I spotted a photograph from this gorgeous party (the color palette has me swooning) over on Pinterest a couple weeks ago, and immediatly had to pop over to see if there might be more to discover. Luckly there is...a lot more! So today I thought I'd point you all in the direction of the lovely Fraulein Klein Blog, where you're going to find some wonderful party decor inspiration (of course) and much more. I hope you love it as much as I do. xo Ez

Images from Fraulein Klein Blog

Wednesday
Aug082012

Inspired By: Mag Rouge: The Harvest Issue

Even if you're not planning a wedding there is so much inspiration to be found within the pages of online magazine, Mag Rouge. The color palettes and floral arrangements in particular are absolutely stunning. Take a peek for yourself right here (yes, it's free). You can also find more beautiful color palettes and inspiration boards on their blog Magnolia Rouge. xo Ez

Tuesday
Jul172012

Easy DIY Fabric Baby Shower / Party Garland

As I mentioned yesterday, I created a simple little garland to decorate for my sister's baby shower on Sunday, and am excited to share the how-to with you here today. The process is so easy and perfectly customizable to any theme / color palette...maybe you'll create one for your next party or shower! Bonus, the garland is reusable for future parties, or can be used by the new mom to decorate her baby's nursery!

I came up with the concept after being inspired by this fabric ribbon garland by My Life as a Sugar Lander. I knew that I needed something that could be strung around the room...that wouldn't drape down nearly as much but would have a similar visual effect. My sister is really into sewing and since the gender of her baby is unknown I went for a color theme using her favorite shades of peach and blue. Here's what you'll need to create your own garland:

  • Sturdy cotton twine
  • cotton fabric strips (ribbon would also work - and would create a similar look)
  • Fabric scissors
  • Pushpins or tape (for hanging the garland)

Begin by ripping your fabric into even strips. Mine were about 1.5" wide. To create even strips quickly and easily, use a pair of scissors to snip along the top edge of your fabric, starting 1.5" in from the outside edge of your fabric. Grasp fabric with both hands on either side of the portion you just snipped and pull firmly apart...fabric will tear neatly. Repeat this process with as many strips as you'd like to use. Next you will cut your long strips into shorter pieces. I made mine 10" long, and they were the perfect length for tying.

Begin tying your fabric strips onto your twine one at a time. Lay a fabric strip down and place your twine on top of it. Tie a knot in your fabric around the twine. You can attach them featuring the colors and patterns in any order you'd like. Have fun with it.

Pull the knot nice and tight. Now it looks like a sweet bow!

Trim off the ends to make them perfectly even or shorter if you'd like (optional).

Ta-da! Repeat this step for as many bows as you'd like your garland to have. Since the bows are simply knotted on the twine they can be slid back and forth to create whatever kind of spacing you need. Hang your garland using pushpins or sturdy tape. Tip: To store your garland wrap it around a scrap piece of cardboard (like the inside tube of a roll of wrapping paper or the cut off flap on a cardboard box).

I also made another version in a different color combination using fabric scraps that my mom has had around since my childhood.

I hope you have a blast making your own version of this simple garland! xo Ez

Related Posts Plugin for WordPress, Blogger...