Partners

Newsletter Sign-up


Lovely Sponsors


Currently Obsessed

Subscribe

Lovely Press

Disclaimer

From time to time Creature Comforts may include affiliate links to products featured in their posts and/or affiliate banner ads. However posts and featured products seen on Creature Comforts are never controlled or selected by advertisers or affiliates. Featured items are products that we personally like, and would share regardless of affiliate partnerships. If you choose to purchase an item that has been featured from an affiliate link or ad banner, we may receive a small commission on that sale.

Privacy Policy
Hosted by

Entries in Tutorials (98)

Wednesday
Aug012012

DIY Clay Nursery Mobile or Wall Hanging

I have two friends with new babies and a sister who is expecting, so instead of scour the interwebs and stores for gifts that may or may not be exactly what I would want to give (and would probably cost more than I want to spend), I decided that I'd make their gifts myself. I've actually had this project idea up on my DIY idea wall for half a year, so I was thrilled to actually find the time to try it out. It ended up being so fun and easy to make that it seems only fair that I share a tutorial with you all so you have a sweet DIY gift in your arsenal next time you have a special baby to spoil.

Psst...You can make at least three different mobiles with just the one package of clay. Personalized handmade gifts for less than $3 a piece = Awesome! 


  • Printed template (download above)
  • Scissors
  • Rolling pin
  • Craft knife
  • Gel or felt-tipped pen (a finer tipped pen will work better than one with a large tip)
  • Waxed paper for freezer paper (for protecting your work surface)
  • Premier Stone Clay - available at craft stores such as Michael's or online
  • Air-tight container or sealable plastic bag (for clay storage)
  • Small glass of water (optional)
  • Scrap paper

For finishing you will also need: 

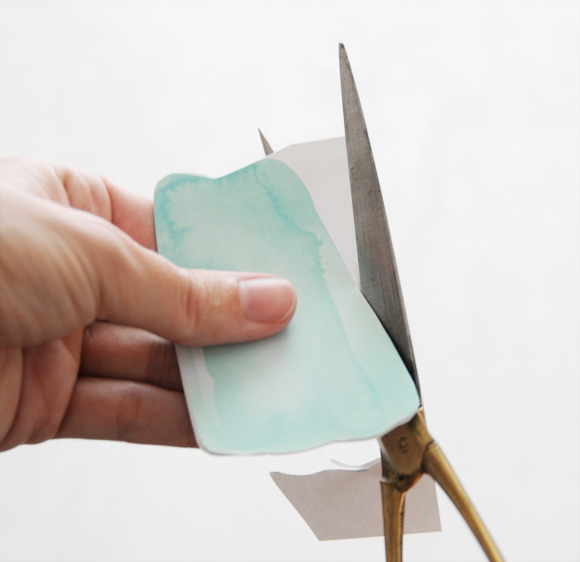
Cut out your paper templates along the outside of the grey border.

Cover a smooth hard working area with a piece of wax or freezer paper (freezer paper, waxed side up works the best). Use your rolling pin to flatten your clay into an area that will fit at least one of your template shapes. The finished piece should be rolled to about 1/4 inch thick.

Place a template onto the prepped clay and use the tip of your craft knife to carefully trace around the outside of the design. You don't need to worry about cutting all the way through the clay the first time around. Once you've traced the design, use your craft knife to cut off the excess clay. Be sure to store all extra clay inside an airtight container while working so that it doesn't dry out.

Helpful bear-cutting tip: I found that it is easiest to cut the bear out by making as many straight cuts as possible. You can then round off the proper edges once you've removed the template.

Your cut out pieces might look a little bit jagged. No need to worry! Smooth out the edges by dipping your fingertip into water and gently rubbing along all the outside edges (you can smooth the surface as well if you'd like).

Once you've cut and smoothed out all your pieces, arrange them on top of your waxed paper in the order that you would like to hang them in. You can use the same layout that I used, or create your own arrangement.

Use a wooden skewer to pierce a hole into each piece where you will need to attach your twine for hanging. This hole will give you a place to glue your twine into later on, so be sure that you don't skip this step.

The hole-piercing configuration I used was: Bear: 2 holes - One at the top center, and one at the bottom center | Cloud: 4 holes - One at the top center, three spaced along the bottom edge | Raindrops: 1 hole - At the top of each droplet.

Now the hardest part...waiting for the pieces to dry. Start by allowing the clay to dry on a flat surface (I suggest using your waxed paper) and then after an hour or so, prop the pieces up against something to allow air to circulate around them. For best results, allow everything to dry for at least 12-24 hours or until completely dry to the touch.

Woohoo! They're dry! Now you get to add character to your mobile! Use a pen to create a design inside your clay pieces. For this project I wanted to keep it super simple, but you can be as creative as you'd like.

You can even fill in your shapes with colored pencils (or acrylic paint) if you'd like!

I decided to just use pen on mine. Make sure to create a design on both sides if you want the finished project to be used as a hanging mobile (that way there is always something sweet showing).

You can also include a child's name or a sweet greeting (i.e. "Welcome") on the cloud.

Tip: If your pen is drying out while you are working, you can fix the problem by scribbling a bit on a piece of scrap paper.

Arrange your pieces again how you'd like them to be while hanging. Now it's time to prep the twine. First create a loop for hanging the mobile. Make sure your knot is not too bulky.

You can determine the length of twine needed for each section by measuring it up against the arranged mobile. Now create the twine pieces for each hanging section by knotting both ends of each twine portion. 

Place the completed twine portions down into the right spaces as you work.

Plug your glue gun in or get out your Elmer's Paper Craft Gel Glue (this particular glue adheres to the clay very well and dries fairly quickly). Place a small dab of glue on one of the holes in your piece. Use your wooden skewer to push one knotted end of your twine into the hole with the glue. Repeat this process until you've attached your entire mobile together. It is best to leave the mobile laying down on your working surface while you are working so that the glue sets properly.

Bonus idea: It also occurred to me that you could make some pretty adorable Holiday ornaments by just making the bear portion of this DIY!

Once the glue has dried completely your mobile is ready to be hung up or given as a gift!

A special note: Please be sure that mobiles are hung out of reach of babies and small children. This project is meant to be an art piece, not a toy...and therefore is not strong enough to withstand a little ones' attention.

Tip: I recommend making several mobiles all at once, then you can tuck the extra ones away until you're in need of another baby gift. Just fill in the details with a pen when the time is right!

Tuesday
Jul172012

Easy DIY Fabric Baby Shower / Party Garland

As I mentioned yesterday, I created a simple little garland to decorate for my sister's baby shower on Sunday, and am excited to share the how-to with you here today. The process is so easy and perfectly customizable to any theme / color palette...maybe you'll create one for your next party or shower! Bonus, the garland is reusable for future parties, or can be used by the new mom to decorate her baby's nursery!

I came up with the concept after being inspired by this fabric ribbon garland by My Life as a Sugar Lander. I knew that I needed something that could be strung around the room...that wouldn't drape down nearly as much but would have a similar visual effect. My sister is really into sewing and since the gender of her baby is unknown I went for a color theme using her favorite shades of peach and blue. Here's what you'll need to create your own garland:

  • Sturdy cotton twine
  • cotton fabric strips (ribbon would also work - and would create a similar look)
  • Fabric scissors
  • Pushpins or tape (for hanging the garland)

Begin by ripping your fabric into even strips. Mine were about 1.5" wide. To create even strips quickly and easily, use a pair of scissors to snip along the top edge of your fabric, starting 1.5" in from the outside edge of your fabric. Grasp fabric with both hands on either side of the portion you just snipped and pull firmly apart...fabric will tear neatly. Repeat this process with as many strips as you'd like to use. Next you will cut your long strips into shorter pieces. I made mine 10" long, and they were the perfect length for tying.

Begin tying your fabric strips onto your twine one at a time. Lay a fabric strip down and place your twine on top of it. Tie a knot in your fabric around the twine. You can attach them featuring the colors and patterns in any order you'd like. Have fun with it.

Pull the knot nice and tight. Now it looks like a sweet bow!

Trim off the ends to make them perfectly even or shorter if you'd like (optional).

Ta-da! Repeat this step for as many bows as you'd like your garland to have. Since the bows are simply knotted on the twine they can be slid back and forth to create whatever kind of spacing you need. Hang your garland using pushpins or sturdy tape. Tip: To store your garland wrap it around a scrap piece of cardboard (like the inside tube of a roll of wrapping paper or the cut off flap on a cardboard box).

I also made another version in a different color combination using fabric scraps that my mom has had around since my childhood.

I hope you have a blast making your own version of this simple garland! xo Ez

Tuesday
Jul102012

Popsicle Party Printables + DIY

Hi friends! Last year I painted some watercolor popsicles with grand DIY plans in mind for them. Unfortunately the Summer just breezed by and in the end I only managed to arrange them into a couple free Desktop Wallpapers (which you are still welcome to download and enjoy of course). Fortunately popsicles never go out of style and now I've finally gotten around to using them as I intended to all those months ago! Are you ready for a popsicle party (now yesterday's popsicle recipe roundup will come in handy)! Woohoo!

--------------------------------------------------------------------------------------------------------------------

This DIY post was sponsored and made possible by Method..."Clean Happy."

Are you a sweet clementine or are you feisty like sea salt + lime? Take a dishy personality test on Method’s Facebook page to find out your signature fragrance, and enter a sweepstakes to win a year’s supply of Method dish soap at the same time. Residents in the US and Canada (excluding Quebec, désolé!) are eligible to enter once through the Sweepstakes app on Method’s Facebook page. Contest is open until August 6th.

--------------------------------------------------------------------------------------------------------------------

Popsicle Mini Tote Favor Bags:

Supplies needed:

  • Iron-on transfer paper | Available at office and craft supply stores
  • Iron
  • Mini cotton tote bags | I purchased these at Michael's Craft Store (they're about $1 a piece)
  • Sharp scissors
  • Favors (optional) | the items in my bags here are from Michael's and Party City

Get started by printing out your popsicle iron-ons (click on the download button below). If you'll be using a dark colored material behind the design, be sure to purchase transfer paper that is specially designed for dark fabrics.

Cut out your popsicle shapes as close to the colored design as you are able.

Position your iron-on face down on your fabric unless your transfer paper manufacturer directions state otherwise. Iron according to directions — for mine I used the highest cotton setting (no steam) and ironed with pressure on a hard surface (protected with a cotton cloth) for a couple minutes. Make sure your design fully adheres to the fabric on all edges.

Once the design has cooled to the touch, carefully peel away the paper backing.

Fill your bags with treats and other favors!

Now it's time to wrap up the gifts and decorate...

Printable Popsicle Gift Tags:

Popsicle Tag Supplies:

  • Popsicle tag printable file (download found above)
  • Cardstock
  • Wooden popsicle sticks | Available at craft supply stores
  • Glue stick | I prefer Uhu® Stic
  • Scrap paper
  • Scissors
  • Small hole punch | Found at craft supply stores
  • Twine or ribbon

A simple trick to make cutting your popsicle shapes easier is to begin by cutting along one straight edge as well as the top of each paper popsicle. You'll see that the popsicle designs are mirror opposites, so that when two of the same color from the printable are placed back to back, they line up properly with a pretty popsicle design on each side.

Once you have prepped two popsicles of the same color, place them back-to-back, lining up the cut edges.

Hold them firmly together so they don't slip and finish cutting out the final sides of the popsicle design - cutting through both pieces of paper until the full popsicle has been cut out.

Place your two matching popsicle pieces colored-side down on a piece of scrap paper and use a glue stick to apply a liberal amount of glue. Pay careful attention to the edges.

Apply a small amount of glue to the top half of a popsicle stick and place it into the center of one of your popsicles leaving about half of the stick laying outside the bottom of the design.

Place the two glued pieces on top of one another and seal together with the stick inside. Make sure to carefully seal around all outside edges as well as the center.

Trim any portions that don't line up properly.

Use a small hole punch to create a hole at the top edge or center of your popsicle tag.

Attach your tag to your gift by threading it onto twine or ribbon. Address to the lucky gift recipient using a pen (optional).

Printable Popsicle Party Garland:

Follow steps above for the Popsicle Gift Tags (using the same supplies as well). Create as many popsicles as you'd like to hang on your garland. Once all your popsicles are ready you can simply string them onto twine one at a time, tying them in place with a simple knot as you go. Once your garland is the length you'd like, hang it up and get ready to party!

Other ways you can use your printables or iron-ons:

  • Use the popsicle tags as invites for your party. Hand-write a short invite message on your printed sheet of tags (or get handy with the text tool in photoshop if you feel so inclined), then glue the popsicle stick in place. Place in an envelope and mail!
  • Use your iron-on transfers to dress up t-shirts or other cotton material (such as a pillowcase or tea towel). Just be sure to use transfer paper designed for the color you'll be ironing onto (they make transfers for light and dark materials).
  • Popsicle tags can serve as placecards. Just write your guests names on each popsicle and arrange them around your table.
  • Tags can also serve as a fun cake topper. Try arranging several on the top of a cake (you can write a message on them first if you'd like) or place one in the center of a cupcake. Cute!

--------------------------------------------------------------------------------------------------------------------

Full disclosure: This DIY post was sponsored and made possible by Method. The project and any opinions expressed are my own.

Thursday
Jul052012

5 Minute DIY: Gilded or Vibrantly Painted Mini Clothespins

It seems that often times the simplest things are the last things you think of. Such is the case with these DIY Painted Mini Clothespins. I've had an inspiration wire (literally just a wire hung with two nails) above my desk for a couple years now, and a mini teacup filled with mini wooden clothespins to hang pretty clippings up with right below it...but it wasn't until just the other day when I was straightening up and had three bottles of nail polish in my hand to put away, that it occurred to me that I might just be able to jazz up my standard pins with a quick coat of polish. Sure enough, it was a total cinch to do and now I have pretty gilded pins hanging on my wire.

They also make great tag holders for topping gifts, or you could incorporate them into a table placesetting—try tying napkins with festive ribbons and then affixing place cards to the ribbons with your clips). Teeny-tiny 1" wooden clothespins can be found in craft stores (I got mine at Michael's) and online (I recommend Besotted Brand LLC). Don't limit yourself to using only gold polish, there are endless colors or nail polish out there, so choose your favorite hues and have fun!

Supplies Needed:

  • Mini wooden clothespins - I used the 1" size
  • Nail polish in gold or any other color you'd like — high gloss varieties work best
  • Scrap cardstock paper

Tip: Click on the following tutorial step photos to see an enlarged view in a new window.

Step 1: Create a working/drying area for your clips with a piece of scrap cardstock. Fold one end of your cardstock to create a 3" flap.

Step 2: Keep paper folded and create a 1" fold on top of the initial 3" fold. Turn paper over and fold the 1" fold back the other way to deepen the crease.

Step 3: Open Paper and pinch the portion where you created the 1" fold so that it forms a raised peak.

Step 4: Repeat with the other end of your paper if you will be making more than just a handful of clips.

Step 5: Attach one clip to the fold of your paper.

Step 6: Paint clip using nail polish, making sure to coat all sides.

Step 7: Repeat with as many clips as you'd like to make. Leave clip(s) attached to paper until they are completely dry (I recommend letting them sit for at least an hour).


To use as a tag holder on a gift, wrap gift and tie with decorative twine. Attach clip onto the knotted portion of your gift and secure your gift tag inside it. Knot twine around the center of your clip and tie a bow to finish.

Prop notes: Twine from Knot & Bow | Mini Clothespins from Michael's | Kraft Favor Box from Michael's | hello friend card with decal from Shanna Murray | Art Print from Caitlin Shearer | Nail Polish pictured from Orly (Luxe), Revlon (Silver Dollar), and Piggy Polish (Sunrise Skies)

Want more 5 Minute DIY ideas? Find them here. See even more DIY tutorials in the Projects & Inspiration Gallery.

Tuesday
Jun052012

DIY Faux Snow Cone Party Garland & Gift Embellishment

As soon as the snow cone shack in our neighborhood opens up, we know that Summer is officially here! The bright candy colors and the sparkle of glittery ice makes the eyes light up of both young and young-at-heart! What better way to capture the essence of summertime fun and bring it indoors, than with this sweet DIY Faux Snow Cone Garland and Gift Embellishment. Bonus: these ones won't melt everywhere!

Follow below for the simple steps. This would also be a fun project to do with kids...they will have a blast mixing up the paint and pouring on the glitter (just be sure to give little ones a hand with the glue gun). Enjoy!

--------------------------------------------------------------------------------------------------------------------

This DIY post was sponsored and made possible by Method..."Clean Happy."

This month Method is hosting a fun contest and asking fans (like you) to guess how many bottles of Method hand soap it took to build the spectacular rainbow light installation in this month’s video. 

Visit Method's guessing contest page on Facebook to enter. The person with the closest guess will win a $100 gift card to soap.com to stock up on method goodies AND, their very own rainbow of hand wash (a set of 7 colorful method hand soaps). Nine runner ups will win a $50 gift card. You can guess daily for more chances to win. Contest ends June 28.

--------------------------------------------------------------------------------------------------------------------

DIY Garland - Supplies needed:

  • Styrofoam Balls (craft store) — 1.5" or 2" (I used 1.5") You will need at least 8 for a small garland.
  • Acrylic Paint in any colors you'd like (craft store)
  • Paint brushes (craft store) — you will need one for each color of paint
  • Clear Glitter (Michael's craft store) — I used the Martha Stewart Crafts™ Tinsel Glitter in Crystal, and it looks just like shaved ice). I highly recommend it for this particular DIY.
  • Scissors
  • White Cardstock Paper (office supply store)
  • Paper Cone Template (Includes templates for both 1.5" and 2" cones. Download will begin as soon as you click on the link)
  • Low heat hot glue gun (craft store) — low heat is very important for this project, or you will likely burn yourself)
  • Twine
  • Bamboo skewers (grocery store)— optional, but very helpful and highly recommended
  • Scrap paper
  • Tall mug or cup

Steps 1 and 2

1. Pierce each Styrofoam ball with a bamboo skewer and set aside. This will give you something to hold onto while working, and will also allow for faster/cleaner drying time.

2. Apply a small amount of paint to the top of one prepared Styrofoam ball. You can add more as needed, so for less waste and mess, start with just a little.

Steps 3 and 4

3. Use a paintbrush to coat the top 2/3 of your ball. You don't need to cover the bottom 1/3 because it will be hidden inside the paper cone.

4. Glitter! Generously sprinkle your tinsel glitter all over the painted surface of your ball. Tip: work over a piece of a scrap paper so that you can capture the excess and pour it back into the bottle when you are finished. Tap off loose glitter.

This is where the skewers really come in handy. As you work place each finished ball into a tall cup to help them dry quickly and without any mess. Repeat steps 1-4 with all blank Styrofoam balls using whatever paint colors / variation that you'd like. While they dry, you can work on the second half of your project.

Steps 5 + 6

5. Print and cut out the paper cone template (provided above). Be sure to use the proper template for the Styrofoam ball size that you are working with. Place your template on top of a piece of cardstock and cut around the template. Cut out as many paper cone shapes as Styrofoam balls that you used.

6. Gently curl the outside ends in towards each other until the slightly shorter edge overlaps the opposite edge. Doing this before adding the glue makes it much easier to work with.

Steps 7 + 8

7. Apply a small line of hot glue to the inside edge (the slightly shorter edge) and curl it around once more until it overlaps the opposite edge, forming a cone. Make sure that the glue seals all the way down the full length of the cone.

Steps 9 + 10

9. If there is any excess paper sticking out at the seam, you can snip it off with your scissors.

10. Be sure your Styrofoam balls are dry and have been removed from the skewers before moving onto this step. Apply a small amount of glue to the top inside portion of your paper cone and quickly place a ball inside (make sure the non-painted side is facing down). Gently press down on the ball to make sure that the glue adheres to it.

And now you have an adorable faux snow cone! Assemble all remaining balls and paper cones and set aside.

Don't they look so pretty!

Steps 11 and 12

11. To complete your garland, apply a small droplet of hot glue to the very top of a prepared snow cone.

12. Place your twine into the middle of the hot glue dot and let the glue set for a moment. Tip: Be sure to leave enough room at the end of your twine for hanging purposes. Repeat with remaining snow cones, spacing them as far apart from one another, and in whatever color pattern you'd like.

Hang your garland with pride!

You can also use individual snow cones to decorate gifts. Don't they look adorable!

Follow the steps above to create your snow cone, and then add a name onto the paper cone before folding it and attaching it to the foam ball.

To make it easy to attach to a gift you can either:

1. Use a pair of wire cutters to snip off the end of a paper clip. Insert the U-shaped wire into the top of your snow cone and it's ready to use (this would also be a great way to turn these into holiday ornaments).

2. Knot a small piece of twine leaving a small loop at the end. Snip off the two loose pieces of twine beneath the knot. Apply a small amount of glue to the top of your snow cone and place the knotted end of your twine into it. To secure it in place, use the point of a bamboo skewer to gently press the knot down into the top of the snow cone.

You can use your snow cones as place cards too. Just add your guest's names onto the cones and leave off the hook/loop at the top. Easy peasy!

Prop / product notes:

Acrylic paint colors used for this project are Apple Barrel Acrylic Paint by Plaid® in Diva Pink, Tropic Orange, Caribbean, and Folk Art Acrylic Paint by Plaid® in Sunny Yellow.

Artwork by Fifi Lapin and Courage My Love Poster from The Poster List | Striped Paper Straws and similar mini milk bottles from Shop Sweet Lulu.

--------------------------------------------------------------------------------------------------------------------

Full disclosure: This DIY post was sponsored and made possible by Method. The project and any opinions expressed are my own.

Related Posts Plugin for WordPress, Blogger...