DIY Faux Snow Cone Party Garland & Gift Embellishment

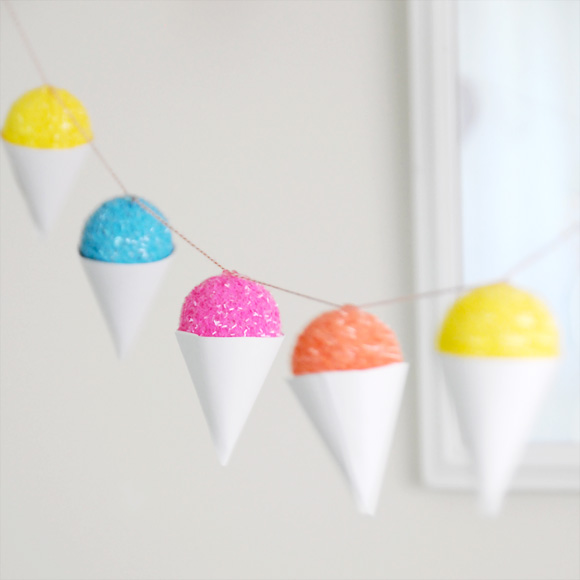
As soon as the snow cone shack in our neighborhood opens up, we know that Summer is officially here! The bright candy colors and the sparkle of glittery ice makes the eyes light up of both young and young-at-heart! What better way to capture the essence of summertime fun and bring it indoors, than with this sweet DIY Faux Snow Cone Garland and Gift Embellishment. Bonus: these ones won't melt everywhere!
Follow below for the simple steps. This would also be a fun project to do with kids...they will have a blast mixing up the paint and pouring on the glitter (just be sure to give little ones a hand with the glue gun). Enjoy!
--------------------------------------------------------------------------------------------------------------------
This DIY post was sponsored and made possible by Method..."Clean Happy."
This month Method is hosting a fun contest and asking fans (like you) to guess how many bottles of Method hand soap it took to build the spectacular rainbow light installation in this month’s video.
Visit Method's guessing contest page on Facebook to enter. The person with the closest guess will win a $100 gift card to soap.com to stock up on method goodies AND, their very own rainbow of hand wash (a set of 7 colorful method hand soaps). Nine runner ups will win a $50 gift card. You can guess daily for more chances to win. Contest ends June 28.
--------------------------------------------------------------------------------------------------------------------
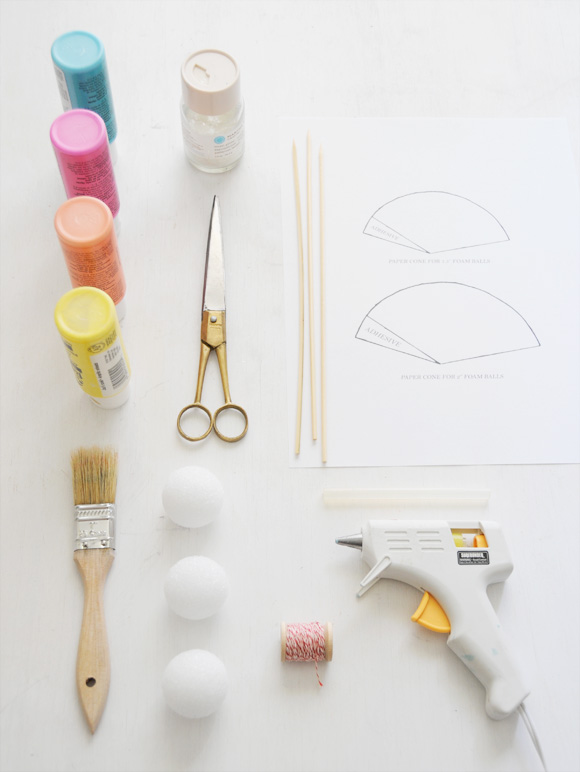 DIY Garland - Supplies needed:
- Styrofoam Balls (craft store) — 1.5" or 2" (I used 1.5") You will need at least 8 for a small garland.
- Acrylic Paint in any colors you'd like (craft store)
- Paint brushes (craft store) — you will need one for each color of paint
- Clear Glitter (Michael's craft store) — I used the Martha Stewart Crafts™ Tinsel Glitter in Crystal, and it looks just like shaved ice). I highly recommend it for this particular DIY.
- Scissors
- White Cardstock Paper (office supply store)
- Paper Cone Template (Includes templates for both 1.5" and 2" cones. Download will begin as soon as you click on the link)
- Low heat hot glue gun (craft store) — low heat is very important for this project, or you will likely burn yourself)
- Twine
- Bamboo skewers (grocery store)— optional, but very helpful and highly recommended
- Scrap paper
- Tall mug or cup
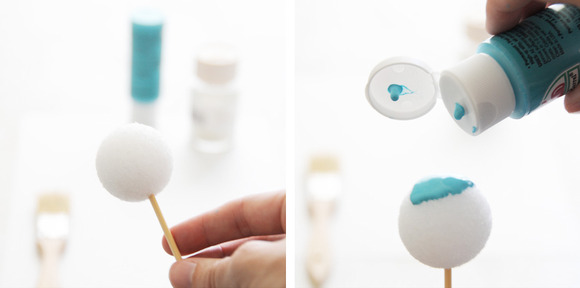
1. Pierce each Styrofoam ball with a bamboo skewer and set aside. This will give you something to hold onto while working, and will also allow for faster/cleaner drying time.
2. Apply a small amount of paint to the top of one prepared Styrofoam ball. You can add more as needed, so for less waste and mess, start with just a little.
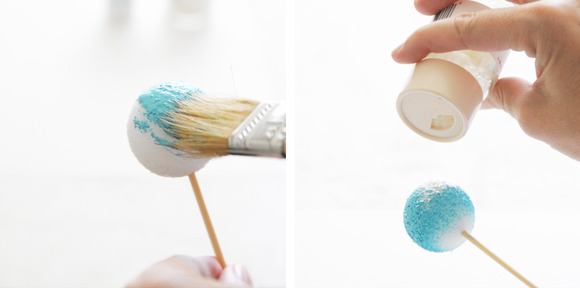
3. Use a paintbrush to coat the top 2/3 of your ball. You don't need to cover the bottom 1/3 because it will be hidden inside the paper cone.
4. Glitter! Generously sprinkle your tinsel glitter all over the painted surface of your ball. Tip: work over a piece of a scrap paper so that you can capture the excess and pour it back into the bottle when you are finished. Tap off loose glitter.
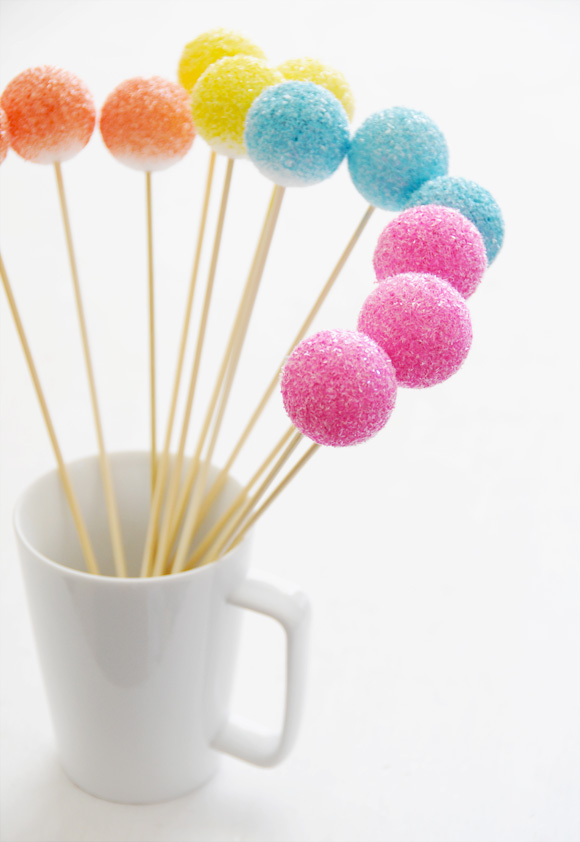
This is where the skewers really come in handy. As you work place each finished ball into a tall cup to help them dry quickly and without any mess. Repeat steps 1-4 with all blank Styrofoam balls using whatever paint colors / variation that you'd like. While they dry, you can work on the second half of your project.
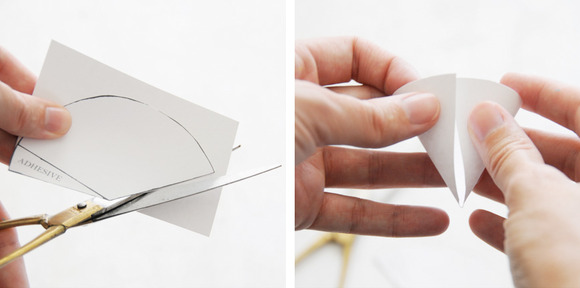
5. Print and cut out the paper cone template (provided above). Be sure to use the proper template for the Styrofoam ball size that you are working with. Place your template on top of a piece of cardstock and cut around the template. Cut out as many paper cone shapes as Styrofoam balls that you used.
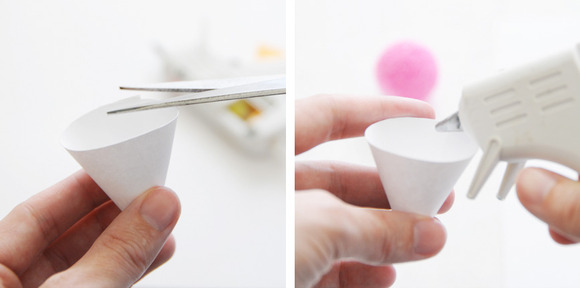
6. Gently curl the outside ends in towards each other until the slightly shorter edge overlaps the opposite edge. Doing this before adding the glue makes it much easier to work with.
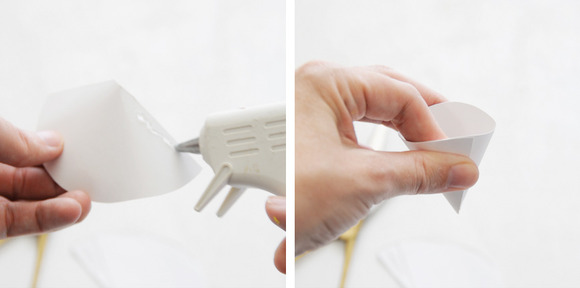
7. Apply a small line of hot glue to the inside edge (the slightly shorter edge) and curl it around once more until it overlaps the opposite edge, forming a cone. Make sure that the glue seals all the way down the full length of the cone.
9. If there is any excess paper sticking out at the seam, you can snip it off with your scissors.
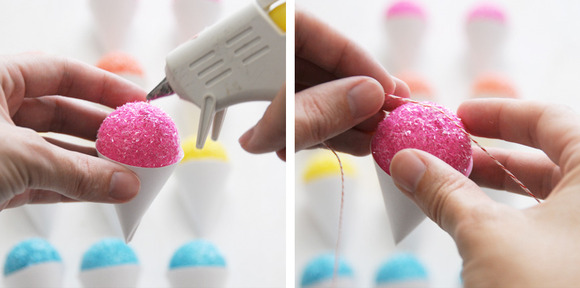
10. Be sure your Styrofoam balls are dry and have been removed from the skewers before moving onto this step. Apply a small amount of glue to the top inside portion of your paper cone and quickly place a ball inside (make sure the non-painted side is facing down). Gently press down on the ball to make sure that the glue adheres to it.
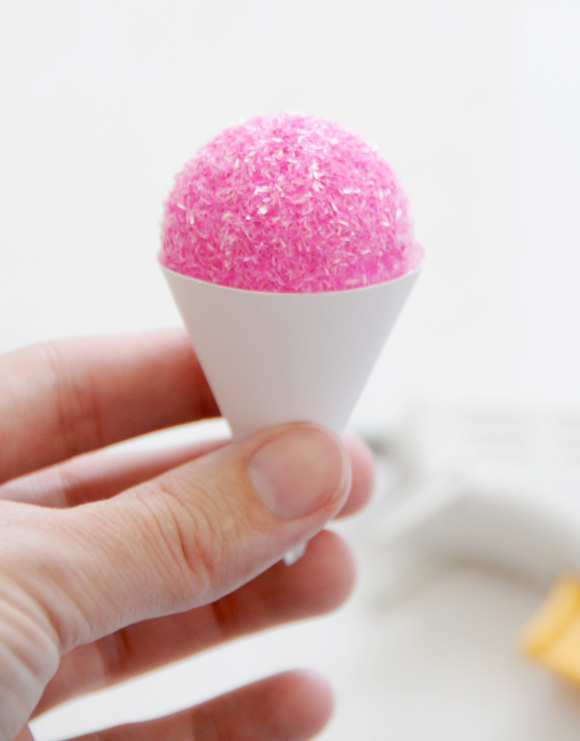
And now you have an adorable faux snow cone! Assemble all remaining balls and paper cones and set aside.
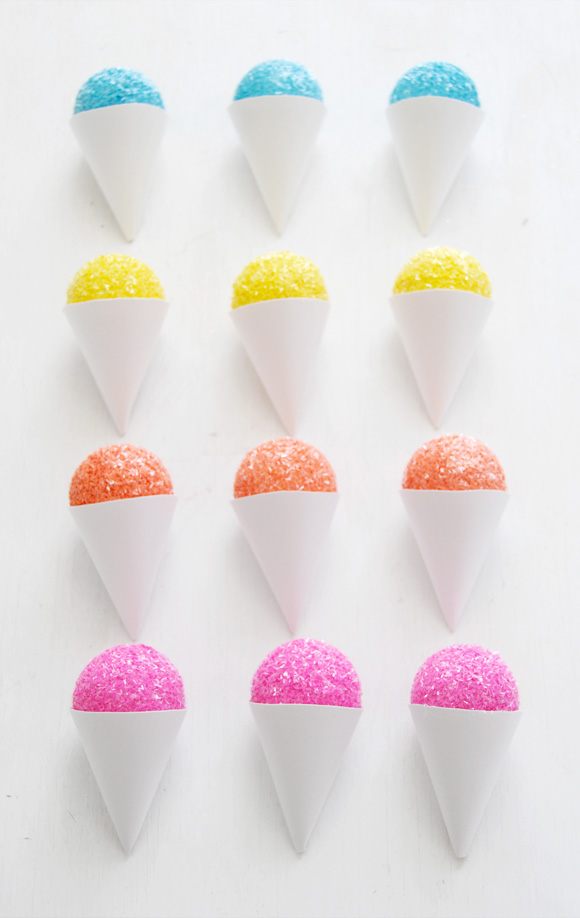
Don't they look so pretty!
11. To complete your garland, apply a small droplet of hot glue to the very top of a prepared snow cone.
12. Place your twine into the middle of the hot glue dot and let the glue set for a moment. Tip: Be sure to leave enough room at the end of your twine for hanging purposes. Repeat with remaining snow cones, spacing them as far apart from one another, and in whatever color pattern you'd like.
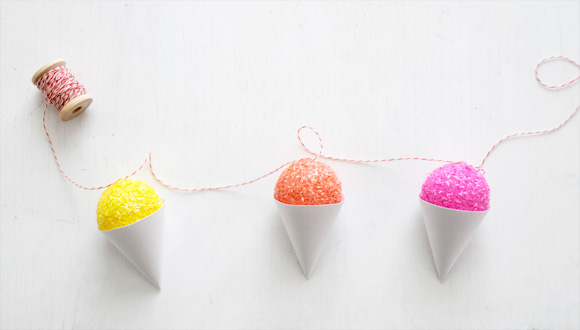
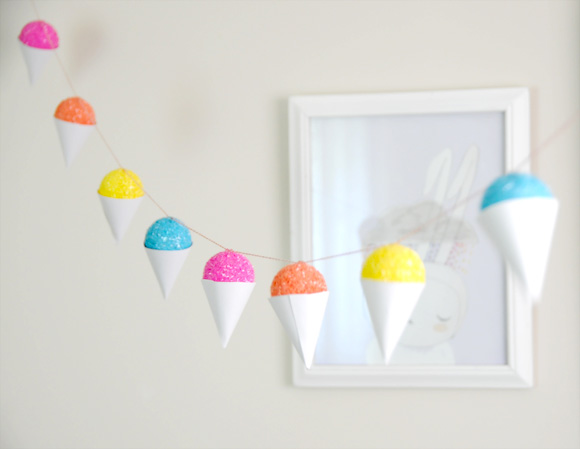 Hang your garland with pride!
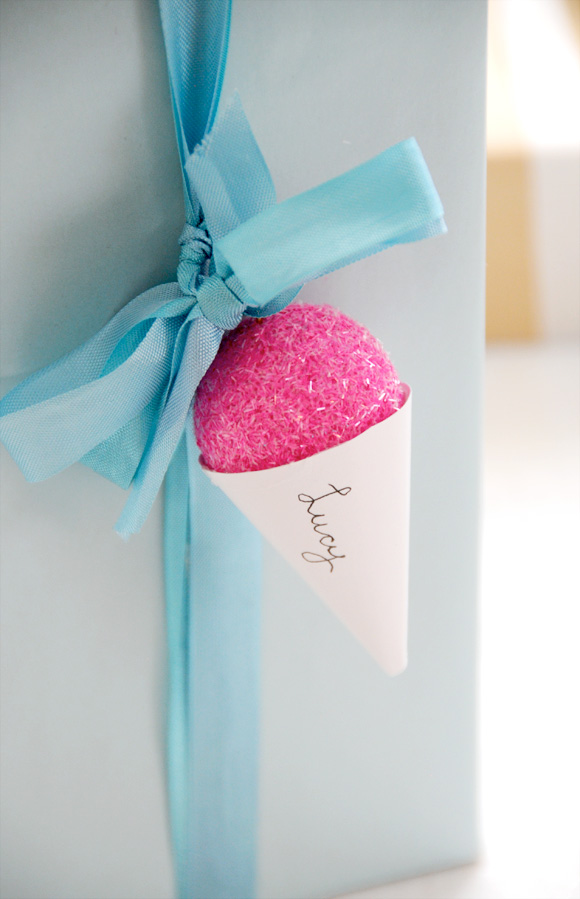 You can also use individual snow cones to decorate gifts. Don't they look adorable!
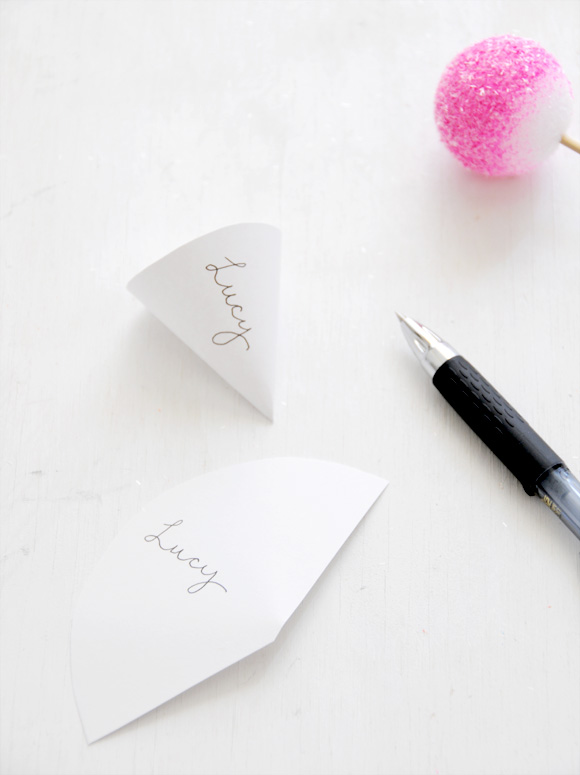 Follow the steps above to create your snow cone, and then add a name onto the paper cone before folding it and attaching it to the foam ball.
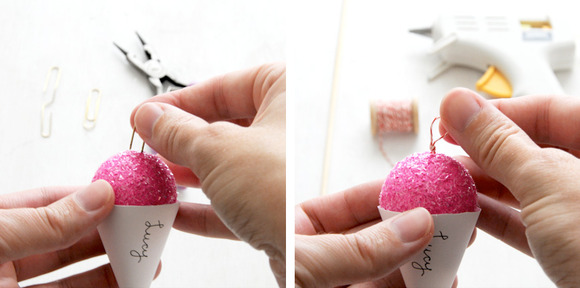 To make it easy to attach to a gift you can either:
1. Use a pair of wire cutters to snip off the end of a paper clip. Insert the U-shaped wire into the top of your snow cone and it's ready to use (this would also be a great way to turn these into holiday ornaments).
2. Knot a small piece of twine leaving a small loop at the end. Snip off the two loose pieces of twine beneath the knot. Apply a small amount of glue to the top of your snow cone and place the knotted end of your twine into it. To secure it in place, use the point of a bamboo skewer to gently press the knot down into the top of the snow cone.
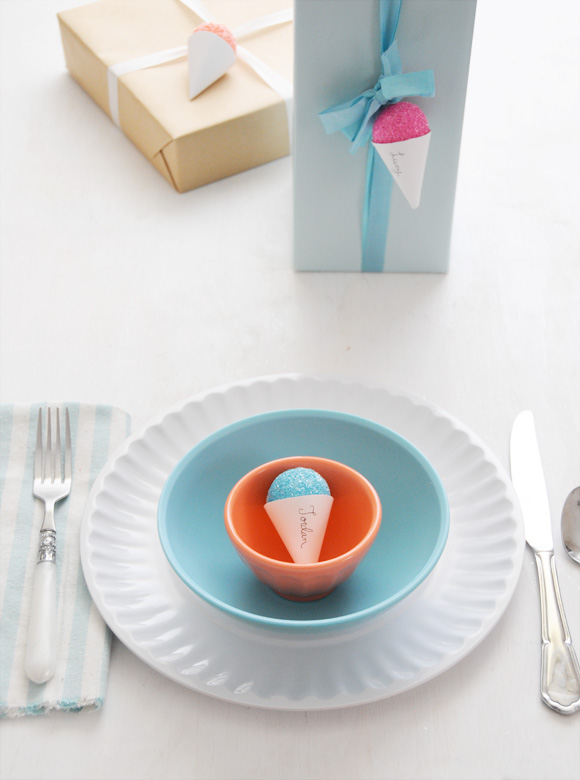
You can use your snow cones as place cards too. Just add your guest's names onto the cones and leave off the hook/loop at the top. Easy peasy!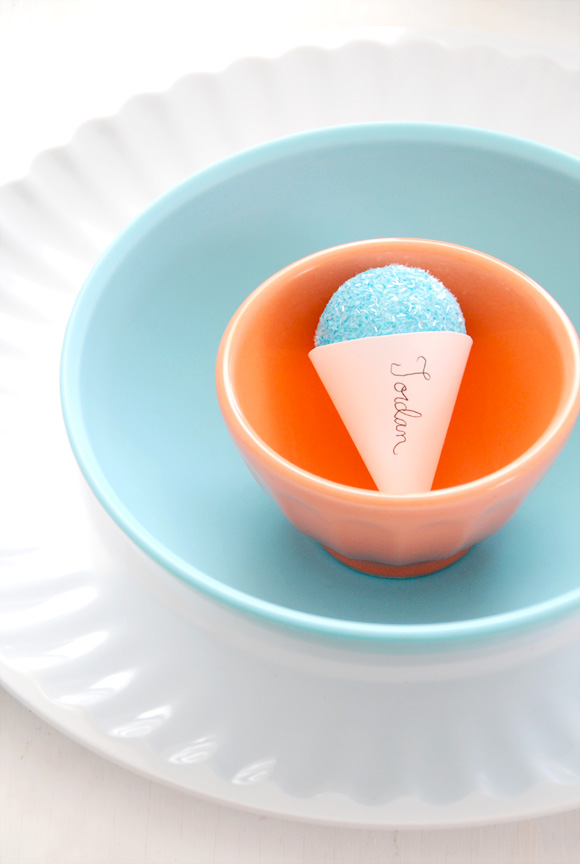
Prop / product notes:
Acrylic paint colors used for this project are Apple Barrel Acrylic Paint by Plaid® in Diva Pink, Tropic Orange, Caribbean, and Folk Art Acrylic Paint by Plaid® in Sunny Yellow.
Artwork by Fifi Lapin and Courage My Love Poster from The Poster List | Striped Paper Straws and similar mini milk bottles from Shop Sweet Lulu.
--------------------------------------------------------------------------------------------------------------------
Full disclosure: This DIY post was sponsored and made possible by Method. The project and any opinions expressed are my own.
 46 Lovely Comments |
  Email Article | found in
  D.I.Y. + Projects,
  Tutorials
  Print Article | |
  | by
| by  Ez
Ez  Tuesday, June 5, 2012


Reader Comments (46)
These are so incredibly adorable! Seriously, EZ, the DIY projects on here are phenomenal. I so admire your imagination.
this is such an adorable project and perfect for a summertime party! thanks for sharing, ez!
This is absolutely brilliant - I cannot wait to try and make these with my daughter. She will love them - although I think she will want to pretend she has a snow cone shop instead of turning them into garland.
Oh my goodness, these are adorable!! I love the bright colors and the sparkle. I can't wait to give this a try.
I love this idea!!! My sister loves snow cones...every time we pass one, she has to stop! For her next party, I will definitely be decorating with snow cones!!! Brilliant!
Eeeek!! These are way too cute! Must MUST make them! :)
Awesome! Absolutely love the snow cones. How fun for summer?!
I was going to say EEEK and then I realized another person (also named Ashley) had the same idea! But seriously, EEK! Being from MD where snowcones (or snowballs) are a summer staple, I absolutely adore these!
Oh my God I'm going to die! These are so beautiful and adorable and I just love them! So bright and happy :)
I have an upcoming window display I'm designing that's going to be an ice cream truck theme - these are perfect! Thanks for sharing!
where oh where did you find those adorable white glass plates in the picture? i love that they look like paper plates!
That is SO stinkin cute! I don't know how you come up with these hun! They are always awesome.
xo
Melis
Holy Shoot!! This is the most incredible summer DiY I've seen yet. Pinning this for lots and lots of future use :)
Adorable DIY, Ez!! Just perfect for the summer :)
They look yummy enough to eat!! Thanks for posting such amazing DIYs Ez.
This is the cutest idea EVER!
Wow. SO CUTE! I'm pinning this right away, but I had to stop by and say this is the most adorable and tasty looking DIY decorating project I've seen in a very long time. Thanks for sharing it. :)
This is really the cutest thing ever. I'm in love : )
Love this! So dang adorable...thinking back to school party...
These are beautiful!! I can't wait to make these with the kids! Well done
Love it! These are such adorable little cones.
Wow - Could that be any cuter. It reminds me of that amazing lady that makes organic snowcones and sells them out of her adorable trailer. I love how you photographed it but my absolute favourite is the blue snowcone in the coral bowl as a place setting - brilliant!
That is so sweet and adorable!
This project is absolutely adorable! Thanks for sharing! :)
Too cute! I think these are a must-make for my upcoming birthday party!! (who cares if I'm turning 28, haha). EZ, you come up with the coolest crafts. I bought supplies over the weekend to try your Brushstroke Glazed mini bowls and I am so excited to see how they turn out!