Partners

Newsletter Sign-up


Lovely Sponsors


Currently Obsessed

Subscribe

Lovely Press

Disclaimer

From time to time Creature Comforts may include affiliate links to products featured in their posts and/or affiliate banner ads. However posts and featured products seen on Creature Comforts are never controlled or selected by advertisers or affiliates. Featured items are products that we personally like, and would share regardless of affiliate partnerships. If you choose to purchase an item that has been featured from an affiliate link or ad banner, we may receive a small commission on that sale.

Privacy Policy
Hosted by

Tuesday
Feb122013

High + Low: The D'Orsay Flat

I know many of us are still seeing the white stuff outside our windows, but I couldn't help but satisfy my craving for all things springtime. This includes checking out what's what in the world of flats. I kept seeing Jenni Kayne's d'Orsay flats everywhere. As d'Orsays were originally designed for men, (and wide feet) the have a menswear feel, but they're also pretty sexy on. Colour me intrigued, but I'm not about to test these out for the $450 pricetag. So I've found a bunch of great alternatives that fit the bill! (And a few others with a strap for those of you who may find the fit to be better.)

Jenni Kayne Suede D'Orsay flat $450 - Jenni Kayne | D'Orsay pointed toe flats $19.80 - Forever21 | Audrey flat $79.98 - ShoeMint | Jeffrey Campbell In Love flat $98 - Nasty Gal

Additional options: Dolce Vita Lance flats $99 - Free People | Report Jessica Flat $70 - Swell | With ankle strap: Olivia flat $38 - Need Supply | Know Your Tuft flat $175 - Mod Cloth | Dolley D'orsay flats $20 - Lulu's | Various Jeffret Campell pairs at Free People

Monday
Feb112013

California...Here We Come!

Happy Monday friends! Did you read the title above?! Well today I am delighted to share some big news with you that I've been trying to keep under wraps for a while now....My daughter and I are moving back to California!!! We are triple cartwheel, quadruple back-handspring, caffeine-fueled jazz hands excited!

Until recently, it was only in our wildest dreams that we imagined ourselves back in the place we feel most at home. But now in just a few short weeks we will be stuffing all our worldly possessions into our car and a moving truck, and making our way to the West Coast! We can't wait to get settled back into life on the Central Coast. It's going to be wonderful!

As you can imagine, our house is currently in a state of craziness that is only made livable because of the excitement that motivates us to ignore the boxes closing in around us. I will be doing my best to continue to post here daily, but I hope you'll forgive me if I miss a day (or a few) in there. I promise I'll make your patience worth it! If you're missing a daily update, or are curious what a person looks like wading through a sea of half-packed boxes, please come on over and say "hi" via my Instagram. I tend to keep up with it pretty regularly. Oh...and I'm going to need all the helpful packing, cleaning (I need to get this place spotless), and sanity-saving tips you are able to share! We'll get through this together! xox Ez

Friday
Feb082013

Pinterest Pros: Set No.11

Happy Friday friends! It's been a while since I put together one of my Pinterest Pros posts, so today I have three lovely new pinners for you to fall in love with. I hope you'll find them just as inspiring as I do!

Jane McManus: pin | pin | pin / Recommended board to follow: Pattern.Package.Graphic

Ginny Au: pin | pin | pin / Recommended board to follow: Bloom

Emma Stefan: pin | pin | pin / Recommended board to follow: Lettering

If you'd like, you can check out past Pinterest Pros collections here, and find me over on Pinterest right here.

Also...I want to invite you to check out my board that I'll be adding to all month as a guest pinner for Martha Stewart Weddings. The theme is perfectly pink...and I'm loving how it's looking so far! Hope to see you over there!


Wednesday
Feb062013

No-bake Nutella Chocolate Wafer Ice Cream Cake (gluten free)

Hi friends! As some of you might have notice via my Instagram, yesterday was my daughter's 14th birthday (I can't believe I have a 14 year old...that is just craziness). In any case, I also posted a photo of the cake I made her. It was an experiment that went awesomely right, so I thought that I would share my recipe with you here today. I hope you'll enjoy it!

For one 6" round ice cream cake you will need: 

  • 6" springform pan - I purchased mine at Hobby Lobby, but I believe they sell them at Michael's and some grocery stores as well.
  • 2-3 pints of Haagen-Dazs vanilla ice cream (I used two, but three pints would be better)
  • 2 boxes of milk chocolate coated wafer cookies | I used gluten-free Glutino Milk Chocolate Coated Wafer Cookies but you can probably substitute a traditional variety if you prefer.
  • Nutella - approximately 1/2 cup
  • Sharp knife and cutting board
  • Spoons

Step 1: Place ice cream on the counter to soften for a few minutes (you don't want it to be too soft or you'll have a soupy mess on your hands). 

Step 2: Make sure your pan is clipped into the closed position with the bottom tray in place and then set it on top of a plate to catch any dripping ice cream while you work. Arrange a single layer of wafer cookies along the bottom of your pan. Since the pan is round they won't fit perfectly, but you can break off pieces from an additional cookie to fill in the gaps. Don't worry about getting it perfect.

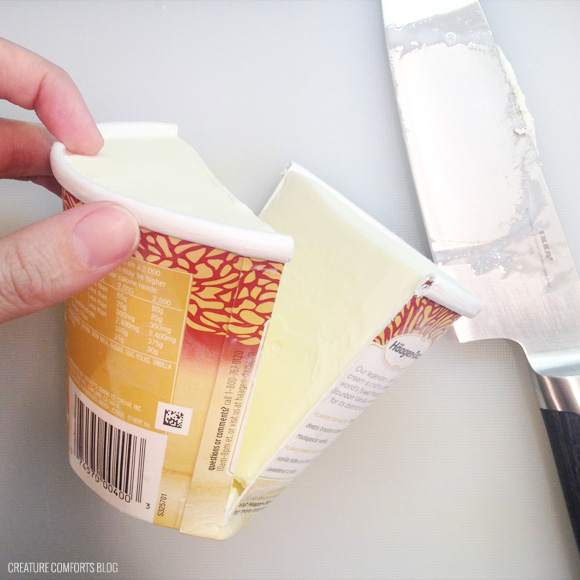
Step 3: You can scoop your ice cream with a spoon or for a faster and easier method: use a sharp knife to cut straight down through the center of your ice cream container. Next, cut 1/2 inch slices of ice cream from one side (they will be half-moon shaped). Arrange them into the pan on top of the cookie layer. Use a spoon to squish it into the cracks and smooth it in place. Base the amount of ice cream you use off the number of pints you will be using. 

Step 4: Place a large dollop (around 1/4) of Nutella onto the center of the ice cream layer and use a spoon to spread it around so that it reaches approximately 1/2 inch from the outside edge. Remember...it doesn't need to be perfect. Resist the urge to use too much Nutella, or the layer will be hard to bite through later on.

Step 5: Now repeat the layering steps above: cookies, ice cream, and Nutella, cookies, ice cream, Nutella....and then finish with a final layer of ice cream. Make sure that each new cookie layer is placed in the opposite direction of the layer beneath it. So if the first layer is layered horizontally, the next one should be vertical (this makes the cake sturdier). A bit of ice cream may be leaking out the bottom of the pan at this point, but that's okay. Go ahead and place the whole thing (pan, plate, and cake) into the freezer and allow it to set. I let my set up overnight, but I'm sure you could leave it in for an hour or two and it would turn out great.

Remove from the freezer for several minutes before serving. Remove outer ring of springform pan. If the metal seam is frozen shut you can hold a warm dampened kitchen cloth on the seam to help it release. Transfer cake to a new plate or cake pedestal if desired (or pre-cut slices before serving...see note below). Enjoy!

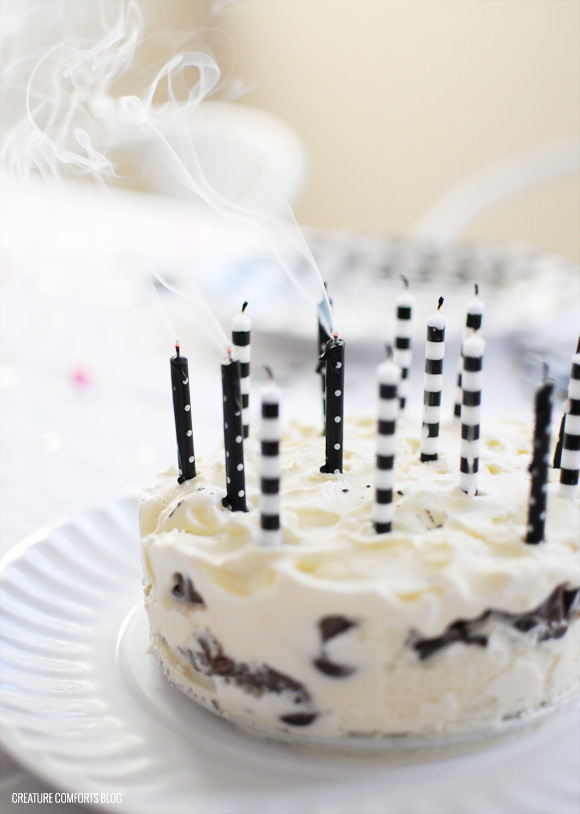
Note: While incredibly delicious, this cake is a little bit tough to cut through in it's frozen state. As soon as it hits your mouth it begins to soften, so you're not going to break a tooth or anything like that. But before that it's a bit hard. Because of this it might be best to serve pre-cut slices (not use a delicate cake plate) and use metal forks to eat it (not flimsy plastic ones).

Tuesday
Feb052013

Pinterest Picks: 20 Valentine DIY Projects + Printables

Hello friends! It's Tuesday...so how about a heaping helping of sugary-sweet Valentine's Day inspiration?! Are you in? Even if you don't have plans to celebrate the day o' love, don't miss out on the tasty recipes that I included at the bottom of this roundup. The Nutella-stuffed French Toast is so good it should be illegal. I'm serious! xo Ez

1. DIY Fringed 3-D Heart (via) | 2. Fabric Arrow Banner DIY | 3. Valentine's Day in a Box (via) | 4. Send a Valentine's Day Care Package (via) | 5. DIY Love Struck Arrows (via) | 6. DIY Hand Warmers (via) | 7. DIY Paper Heart Garland (via) | 8. DIY Gold Mylar Heart Pinata (via) | 9. How to Make a Floating Heart Background | 10. DIY Pom Pom Tablecloth (via)

11. Glitter Heart Cake Topper (via) | 12. Free Printable Mini Valentines | 13. Giant Geometric Wall Heart (via) | 14. Tree Heart Installation (via) | 15. DIY Wall of 3-D Paper Hearts (via) | 16. DIY Love Letter Gift Wrap (via) | 17. Brownie Hearts & Brownie Bites (via) | 18. Chantilly Cream Pavlova Hearts (via) | 19. Heart Milk Cubes | 20. Nutella-stuffed French Toast with Fresh Strawberries (via) - I can personally vouch for this recipe. It is scrumptious!

Page 1 ... 6 7 8 9 10 ... 690 Next 5 Entries »
Related Posts Plugin for WordPress, Blogger...