Partners

Newsletter Sign-up


Lovely Sponsors


Currently Obsessed

Subscribe

Lovely Press

Disclaimer

From time to time Creature Comforts may include affiliate links to products featured in their posts and/or affiliate banner ads. However posts and featured products seen on Creature Comforts are never controlled or selected by advertisers or affiliates. Featured items are products that we personally like, and would share regardless of affiliate partnerships. If you choose to purchase an item that has been featured from an affiliate link or ad banner, we may receive a small commission on that sale.

Privacy Policy
Hosted by

Entries in Food / Recipes (163)

Friday
Mar152013

Easy Strawberry Cheesecake with Ginger Snap Pecan Crust

I considered titling this post: Finding Small Comforts in the Midst of Discomfort...but the words "cheesecake" and "ginger snap" seemed to have a bit more of a ring to them. In any event, this isn't a recipe post in the traditional sense (not to worry...there are links and notes leading you to the recipes included below), but instead more of an update on our moving situation (as I promised I'd give you) and a little glimpse at one of the small distractions (cooking) I've used to keep my spirits up during this very long drawn-out moving headache.

So if you've been watching our moving/settling-in process over on Instagram then you may have noticed an absence of furniture in any of my photos. This is because although we were verbally promised that our moving truck would arrive in California on the same day as we were scheduled to, we have since (16 days later) not heard a word from them (they won't answer or return my phone calls). Yes, it's incredibly scary! About 100 times a day I start imagining strangers digging through our belongings, selling off our stuff and trashing the things I love the most...artwork from my daughter and my daughter's baby photos (I have no digital copies of them...they are irreplaceable. Nearly every single thing I own is on that truck). The one small glimmer of hope I have is that upon investigating the fine print of our contract, I discovered a section that claims that delivery will happen within 14-21 days (I'm willing to put the verbal promise behind us at this point, and am holding my breath that there is still hope that we'll see our belongings before next week ends). So we've got 5 days before I start considering what legal action I want to take...I can't even let my brain go there yet.

In any event...while it is incredibly stressful (understatement of the year) not knowing where our belongings are, or if we will ever see them again, we are still very happy that we've made it here to California (in the midst of a very gorgeous pre-Spring season at that). There is no shortage of sunlight or fresh produce here (I am so thankful). Because of the bounty, I've been itching to start making all sorts of yummy recipes. Thankfully I was smart enough to pack a few cooking necessities in the car with us, such as a couple of pots and pans, utensils, etc.. On Tuesday, after our second trip to a roadside stand for strawberries, I decided that a cheesecake was probably in order (plus we were driving down to visit my grandparents the next day, so we had a good excuse). Of course the recipe needed to be as simple as possible to accommodate my limited cooking gadgetry. Queue the No-Bake Strawberry Cheesecake filling from Epicurious (I used Neufchâtel Cheese in place of standard cream cheese to lower the fat content), which I then poured it into my favorite Ginger Snap Pecan Crust (it's gluten-free, but you'd never know it). It was divine! Sweet, creamy, a little bit tart, and scrumptious!

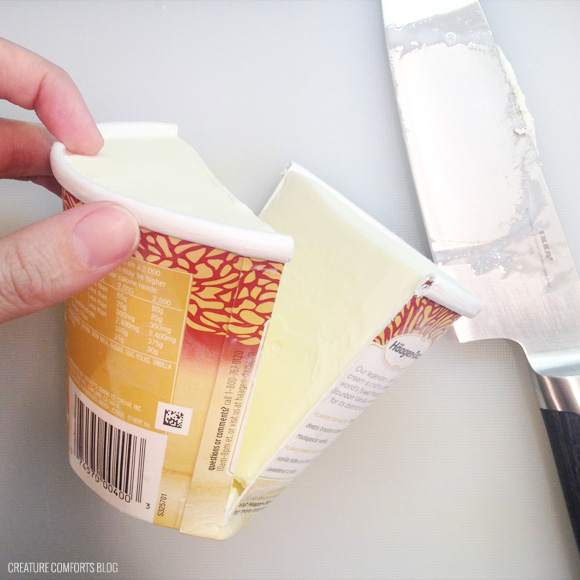
You can even make the crust if you don't have a food processor! I discovered that a hammer and a couple plastic bags will work just as well for pulverizing the cookies into crumbs as a machine! Awesome, and worth the extra effort! If you're in need of a simple and delicious dessert recipe (maybe for Easter or Mother's Day), I can't recommend this tasty combo enough. And if you don't have strawberries on hand, I'm certain this recipe would taste just as yummy with any other variety of berry. Mmmm...


While quickly snapping these photos yesterday, I thought it would be amusing to give you a little look at my "photo set-up" (click the image for an enlarged view). Won't it look better when my furniture arrives?! I hope, hope, hope, it gets here soon! Cross your fingers for us please! xo Ez

Oh...and here's another one of our small comforts that we are so thankful for: snuggles with our sweet boy Orey.

Wednesday
Feb062013

No-bake Nutella Chocolate Wafer Ice Cream Cake (gluten free)

Hi friends! As some of you might have notice via my Instagram, yesterday was my daughter's 14th birthday (I can't believe I have a 14 year old...that is just craziness). In any case, I also posted a photo of the cake I made her. It was an experiment that went awesomely right, so I thought that I would share my recipe with you here today. I hope you'll enjoy it!

For one 6" round ice cream cake you will need: 

  • 6" springform pan - I purchased mine at Hobby Lobby, but I believe they sell them at Michael's and some grocery stores as well.
  • 2-3 pints of Haagen-Dazs vanilla ice cream (I used two, but three pints would be better)
  • 2 boxes of milk chocolate coated wafer cookies | I used gluten-free Glutino Milk Chocolate Coated Wafer Cookies but you can probably substitute a traditional variety if you prefer.
  • Nutella - approximately 1/2 cup
  • Sharp knife and cutting board
  • Spoons

Step 1: Place ice cream on the counter to soften for a few minutes (you don't want it to be too soft or you'll have a soupy mess on your hands). 

Step 2: Make sure your pan is clipped into the closed position with the bottom tray in place and then set it on top of a plate to catch any dripping ice cream while you work. Arrange a single layer of wafer cookies along the bottom of your pan. Since the pan is round they won't fit perfectly, but you can break off pieces from an additional cookie to fill in the gaps. Don't worry about getting it perfect.

Step 3: You can scoop your ice cream with a spoon or for a faster and easier method: use a sharp knife to cut straight down through the center of your ice cream container. Next, cut 1/2 inch slices of ice cream from one side (they will be half-moon shaped). Arrange them into the pan on top of the cookie layer. Use a spoon to squish it into the cracks and smooth it in place. Base the amount of ice cream you use off the number of pints you will be using. 

Step 4: Place a large dollop (around 1/4) of Nutella onto the center of the ice cream layer and use a spoon to spread it around so that it reaches approximately 1/2 inch from the outside edge. Remember...it doesn't need to be perfect. Resist the urge to use too much Nutella, or the layer will be hard to bite through later on.

Step 5: Now repeat the layering steps above: cookies, ice cream, and Nutella, cookies, ice cream, Nutella....and then finish with a final layer of ice cream. Make sure that each new cookie layer is placed in the opposite direction of the layer beneath it. So if the first layer is layered horizontally, the next one should be vertical (this makes the cake sturdier). A bit of ice cream may be leaking out the bottom of the pan at this point, but that's okay. Go ahead and place the whole thing (pan, plate, and cake) into the freezer and allow it to set. I let my set up overnight, but I'm sure you could leave it in for an hour or two and it would turn out great.

Remove from the freezer for several minutes before serving. Remove outer ring of springform pan. If the metal seam is frozen shut you can hold a warm dampened kitchen cloth on the seam to help it release. Transfer cake to a new plate or cake pedestal if desired (or pre-cut slices before serving...see note below). Enjoy!

Note: While incredibly delicious, this cake is a little bit tough to cut through in it's frozen state. As soon as it hits your mouth it begins to soften, so you're not going to break a tooth or anything like that. But before that it's a bit hard. Because of this it might be best to serve pre-cut slices (not use a delicate cake plate) and use metal forks to eat it (not flimsy plastic ones).

Monday
Oct082012

Pinterest Picks: 20 Scrumptious Pumpkin Recipes

1. Pumpkin Cupcakes with Maple Cream Cheese Frosting (via) | 2. Pumpkin Spice Latte Ice Cream (via) | 3. Pumpkin 7-Layer Magic Bars (via) | 4. Oatmeal Cookie Sandwiches with Pumpkin Creme (via

This is definitely one of those times when photos truly say more than words ever could. So without further wordy rambling, I give you 20 Scrumptious Pumpkin Recipes as spotted and drooled over on Pinterest. Dig in! xo Ez

5. Pumpkin Fudge (via) | 6. Pumpkin Icebox Pie (via) | 7. Pumpkin Cinnamon Rolls with Maple Cream Cheese Frosting (via) | 8. Simple Pumpkin Cheesecake Trifles (via

9. Make Your Own Pumpkin Pie Spice (via) | 10. Pumpkin Gingersnap Cookies (via)

11. Pumpkin Roll Recipe (via) | 12. Pumpkin Gingersnap Magic Bars (via) | 13. Mini Pumpkin Funnel Cakes (via) | 14. Pumpkin Doughnuts with Buttermilk Spiced Glaze (via)

15. Homemade Pumpkin Spice Latte (via) | 16. Pumpkin Spice Latte Syrup (via) | 17. Pumpkin Pie Granola (via) | 18. Whole Grain Pumpkin Spice Pancakes with Apple Maple Compote (via) | 

19. Pumpkin and Pecan Pie (via) | 20. Simple Pumpkin Pie Bars (via)

Psst...if you've got space for one more pumpkin dessert on your list, then you might like my Pumpkin Whoopie Pies Two Ways. Yum! And/or check out my EAT board on Pinterest for a whole load of tasty goodness.

Tuesday
Sep112012

Good Taste: Corn & Potato Soup with Queso Fresco

I've always been a huge fan of soup. My daughter on the other hand could do without. That is until I discovered this amazing South American recipe over on Pinterest a few weeks ago. Since then she has requested it for just about every meal, including school lunches (I've made it at least 7 times in the past couple of weeks). I see so many more tasty batches in the near future that I'm very seriously considering learning how to make my own Queso Fresco (it's pretty pricey at Whole Foods).

I adapted the original recipe quite a bit to suit our tastes, and have included my version here for you. If you prefer a version with peas, more potatoes, and less Queso Fresco...then be sure to check out the original from TheKitchn. Either way...your taste buds are in for a treat.

Enjoy! xo Ez

Thursday
Aug302012

Good Taste: Homemade Oreo Cookies with Minty Creme Filling

I wanted to quickly pop by to share a link/review for these scrumptious Homemade Oreo Cookie recipe that I found over on Pinterest last week. As usual I adapted the recipe to make it gluten free, and then went a step further and altered the filling to make it deliciously minty too. Yum! It was such an easy recipe and the results were awesome. If you have the ingredients on hand, I highly recommend whipping up a quick batch!

For the original recipe by The Marion House Book, visit Sweet Potato Chronicles. My minor adaptations are below, in case you'd like a gluten-free and minty creme filling as well. Enjoy! xo Ez

Oreo Cookie adaptations:

  • Substitute traditional flour with a gluten-free all-purpose flour (I used my favorite Carol's All-Purpose Gluten-Free Flour)
  • Be sure that all other ingredients are labeled as gluten-free (i.e. baking powder, baking soda, etc.)
  • As with most gluten-free things...these taste best on the first day. I recommend leaving the cookies un-iced until you are ready to serve them, and storing them in an air-tight container. Any leftover cookies (there won't be any) would probably make a great cookie crumb crust for a cheesecake or tort.

Minty Creme Filling adaptation: 

  • Use 1/2 cup unsalted butter (softened) in place of the butter/shortening combo in the original recipe.
  • Use natural alcohol-free Peppermint Extract in place of the vanilla (but don't use the vanilla measurement). Add a few drops of mint at a time until the icing has the minty taste that you like.
  • If you don't ice your cookies all at once, you can store your frosting in the refrigerator for several days. When ready to use, just allow icing to soften at room temperature and beat it quickly with a spatula or mixer until it is fluffy again.

 Interested in more? Check out my Food & Recipes Gallery!

Related Posts Plugin for WordPress, Blogger...