


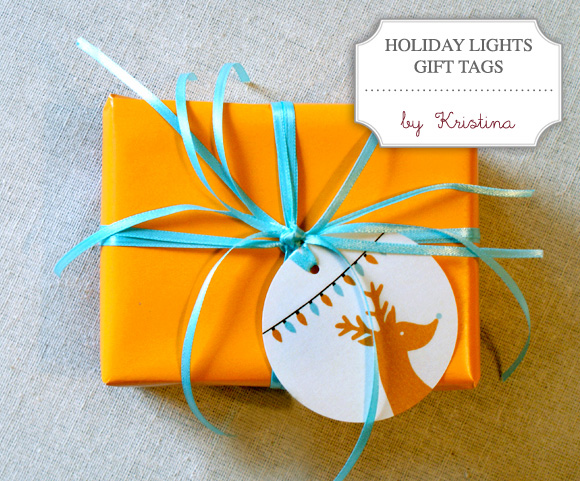
Free Printable: Gift Tags by Kristina
Hello lovelies! It's day two of our 18 Days Series and I'm super excited to introduce Kristina as today's special contributor. Kristina is so talented and I just love these tags that she's created for us to bits. I printed mine onto premium watercolor paper and they really look incredible. I know you'll love them too, so read on for the free download and simple instructions.

Hi, I’m Kristina Walton with Studio 67. I just love Creature Comforts and am plain smitten over the idea of 18 days worth of fab freebies and tuts for this holiday season.
Today I’m going to share with you how to make a seriously simple gift tag I designed for your holiday packages, because sticker tags are just so 2008. This DiY may require you to purchase a few new supplies, but believe me, once you’ve got them, you will never put them down.
Supplies before you begin:
- White card stock
- Ribbon
- Hand-held Punch, such as McGill’s 2” Inch Reach Punchline in 1/8″ Round
- 2.5 inch circular paper punch, such as the Clever Lever Extra Giga Craft Punch in 2.5 inches
- And the tag downloads: Free Holiday Lights Tag - Front & Free Holiday Lights Tag - Back
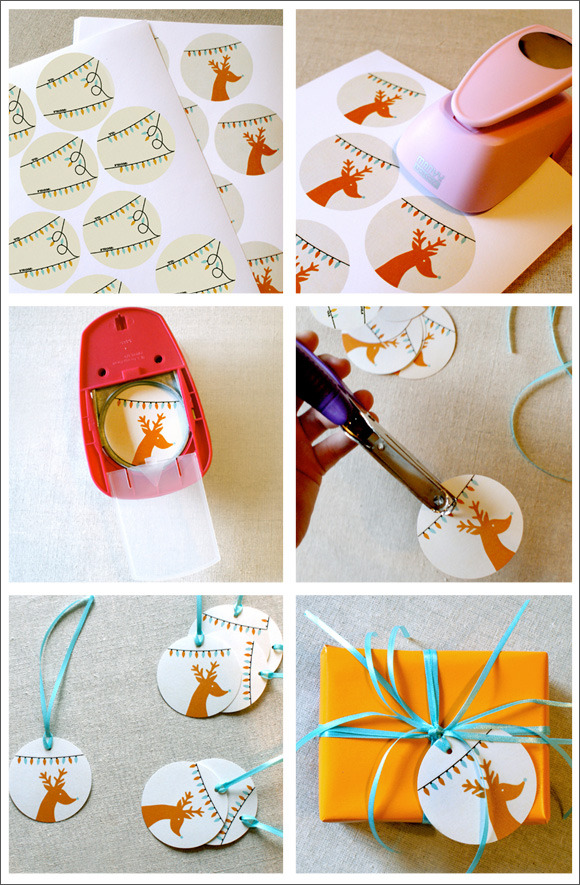
1. Print the PDF named "Lights Tag_Front", then flip paper over to print on the other side with the PDF labeled "Lights Tag_Back". Be sure to print at 100 percent. Each side is 8.5×11.
2. You might notice the edges of the label aren’t perfect. No bother! Each label is designed with a .25 bleed all around, meaning the circles are 2.75 inches all around, to give you a little wiggle room when cutting them out with your paper punch. I prefer to use the Clever Lever Extra Giga Craft Punch in 2.5 inches. Turn your punch over on the back to center labels, and press the paper in the punch until you have the desired amount for all of your fabulous presents.
3. Take your hand-held punch, like McGill’s 2” Inch Reach Punchline in 1/8″ Round, and create a hole for your ribbon at the top of the label.
4. Loop the ribbon through the hole you just created, going face forward. PS: I bought my ribbon at Michael's for 50 cents, and use about 8 inches of ribbon per tag.
5. Wrap your present, then sit back and enjoy all your tag goodness.
Thank you so much Kristina! I can't wait to top my gifts with these beauties! If you'd like to see more of Kristina you can find her on her: PORTFOLIO | BLOG
 28 Lovely Comments | Email Article | found in D.I.Y. + Projects, Downloads + Printables, Gift Giving / Wrapping Ideas, Holiday Inspiration/Projects Print Article | Share This |
  | by Ez
Reader Comments (28)
Oh! I love these :) Fabulous colors! The back of the tags are wonderful too! Thank you for sharing :)
Thanks! This is helping me get ready for the holiday season (it just seems to be approaching too quickly this year). I love the colors... nice to change it up a bit :)
:O Paper puncher? What an excellent tool! These are so super cute! I am definitely wanting to try this :)
These are too cute! I love tags like this w/ a bit of vintage flair, and I'm actually going to retranslate this idea as little tags for party favors! Thanks for sharing Kristina.
I LOVE the colors too! So cheerful!
Oh, these are SO adorable! How perfect! I guess I have found my gift tags for this year! :)
Thank you ladies!
xo
Melis
Can't wait to use these (might tweak the colors a bit, my wrapping paper this year is bright pink and green!)
These are too adorable! love the rudolph gift tag. Thank you!
love these- thanks ez!
Thanks again for including my gift tags Ez! It's been so much fun to see everyone's comments. :) I can't wait to see the rest of the projects for the 18 Days Series!
Kristina
These are wonderful. thanks for sharing!
Maybe I am doing something wrong, but I can't get these to match up.....I love them and I really want it to work! It seems like the back should be flipped around or something?
Love these. Thanks!!
so cute! but yes, i don't think match up to print front and back because the top is always offset to the left. all good, cute enough to punch out twice and glue together
I love them. Thanks for sharing. As soon as I can I'll mention them on my blog. Happy holidays!
Cute tags! Thanks for sharing.
Thank you!! I love these tags!!
Please help i can't get these to line up.
Hi Jill. I'm sorry to hear that you are having trouble with this file lining up. Since it is not my design I'm not sure what to recommend specifically other than to suggest that you are printing without margins. My also printer automatically constrains the image size to fit the page so I always have to uncheck that box or it shrinks things down. I hope one of these things will be the solution you need. xo Ez
I added this project to our site and linked to you. We are looking for more Christmas Crafts as well, so if you have any similar projects please feel free to let me know. Thanks!
Kirsten
Editor, www.allfreechristmascrafts.com
For Jill:
Sorry that you are having problems with the gift tags. I am on a Mac, so whenever I print, I have the option to 'Fit to Print' on my page settings, which I uncheck to create my own settings. Since everyone's system is different, some printers include a default border, while others are able to bleed of the page. Make sure you have checked all of your printer settings, that it's at 100%, centered, etc.
If anyone is still having trouble, feel free to email me at studio67designs@gmail.com
Best,
Kristina // Studio 67
Thank you so much Kristina! xo Ez
Thank you so much! :D
Hi! These are adorable but for some reason I'm unable to actually download these tags. Could you email them to me for printing?? Many thanks and Happy Holidays!
Thank you <3
Happy Holidays!