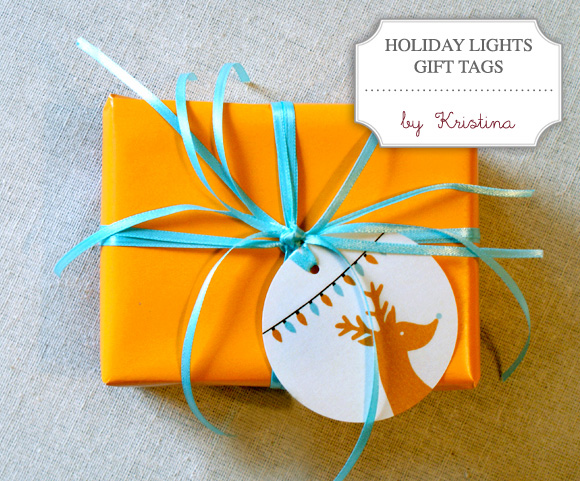
Hello lovelies! It's day two of our 18 Days Series and I'm super excited to introduce Kristina as today's special contributor. Kristina is so talented and I just love these tags that she's created for us to bits. I printed mine onto premium watercolor paper and they really look incredible. I know you'll love them too, so read on for the free download and simple instructions.

Hi, I’m Kristina Walton with Studio 67. I just love Creature Comforts and am plain smitten over the idea of 18 days worth of fab freebies and tuts for this holiday season.
Today I’m going to share with you how to make a seriously simple gift tag I designed for your holiday packages, because sticker tags are just so 2008. This DiY may require you to purchase a few new supplies, but believe me, once you’ve got them, you will never put them down.
Supplies before you begin:
- White card stock
- Ribbon
- Hand-held Punch, such as McGill’s 2” Inch Reach Punchline in 1/8″ Round
- 2.5 inch circular paper punch, such as the Clever Lever Extra Giga Craft Punch in 2.5 inches
- And the tag downloads: Free Holiday Lights Tag - Front & Free Holiday Lights Tag - Back
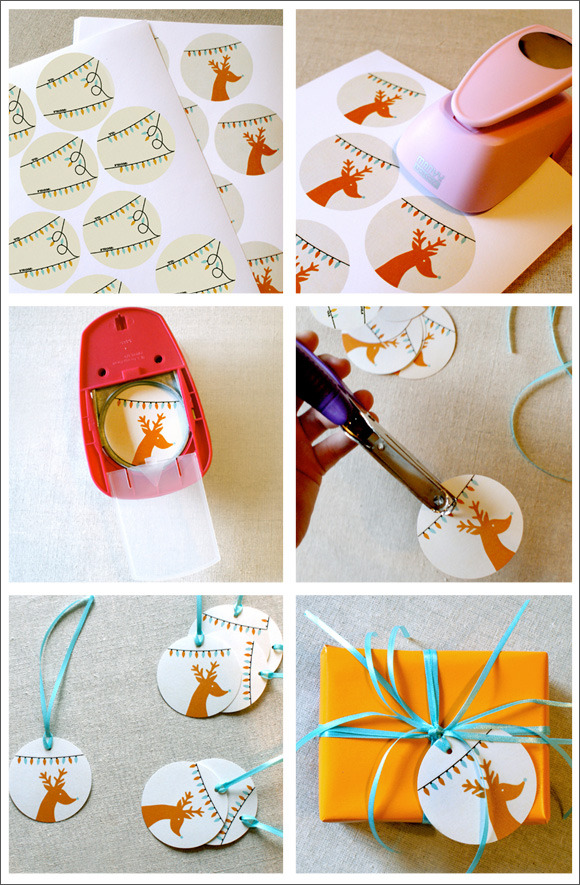
1. Print the PDF named "Lights Tag_Front", then flip paper over to print on the other side with the PDF labeled "Lights Tag_Back". Be sure to print at 100 percent. Each side is 8.5×11.
2. You might notice the edges of the label aren’t perfect. No bother! Each label is designed with a .25 bleed all around, meaning the circles are 2.75 inches all around, to give you a little wiggle room when cutting them out with your paper punch. I prefer to use the Clever Lever Extra Giga Craft Punch in 2.5 inches. Turn your punch over on the back to center labels, and press the paper in the punch until you have the desired amount for all of your fabulous presents.
3. Take your hand-held punch, like McGill’s 2” Inch Reach Punchline in 1/8″ Round, and create a hole for your ribbon at the top of the label.
4. Loop the ribbon through the hole you just created, going face forward. PS: I bought my ribbon at Michael's for 50 cents, and use about 8 inches of ribbon per tag.
5. Wrap your present, then sit back and enjoy all your tag goodness.
Thank you so much Kristina! I can't wait to top my gifts with these beauties! If you'd like to see more of Kristina you can find her on her: PORTFOLIO | BLOG