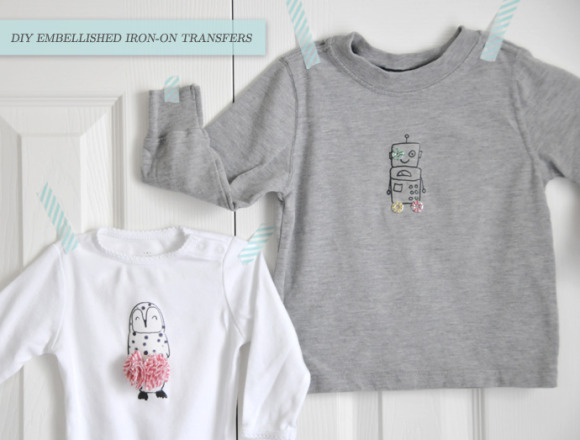
Hello lovelies! I recently dreamed up these created two Embellished Iron-On Transfer tees as Christmas gifts for two little sweeties in my life. It seems that anyone with a love of cute might appreciate receiving them though, so I've made them both available for you to print and enjoy in your own crafting/gifting projects. I chose to use t-shirts for my project, but you could create yours on any natural textile - tote bags, aprons, cushion covers, stockings, and more.
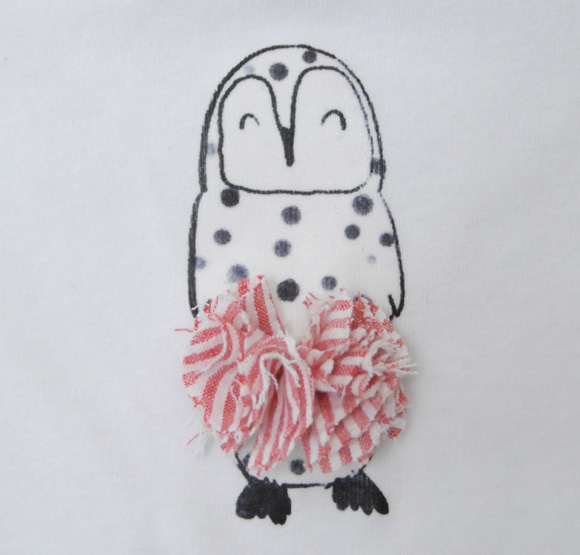
First we have the Tutu Cute Snowy Owl Iron-on Transfer: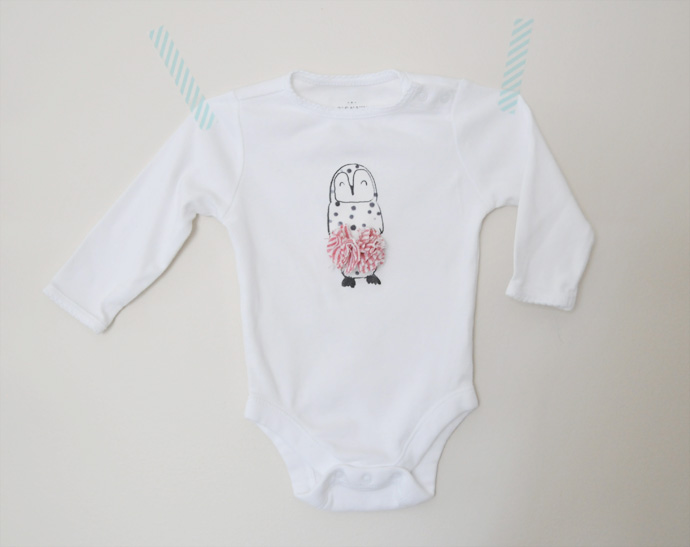
SUPPLIES:
Iron-on transfer paper for your kind of printer (inkjet or laser)
Light colored t-shirt or textile goods (cottons and natural fabrics are best)
Iron
Scissors
Light-weight fabric piece (such as chiffon) at least 8” x 8” per project
Sewing needle
Thread (in a color that matches your fabric)
HOW TO:
Download Free Owl Iron-on Design
Print owl design (choose between printing a single design or three). Print only the page you want.
Follow usage directions found with your iron-paper for printing, cutting, and ironing.
Print the circular template on this page onto standard paper. Alternately you can create freehand circles or trace around an object in your home that is about 2” across.
Use your circular template to cut out 7-8 circles from your light-weight fabric of choice.
Follow directions for assembling a fabric flower found on Hey! Jen Renee blog.
Add a few additional stitches to the center of your flower, piercing your needle through all layers a little ways into your flower. This will cause your flower to flatten slightly into a tutu-like shape.
Attach your flower tutu to your prepared owl textile by sewing through both your owl design and your flower tutu several times. Once it feels secure knot your thread to finish.
And then we have the Little Washer Robot Iron-on Transfer: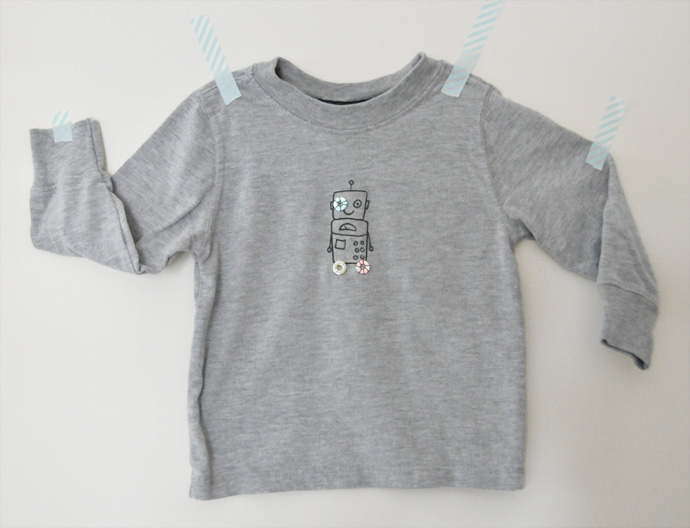
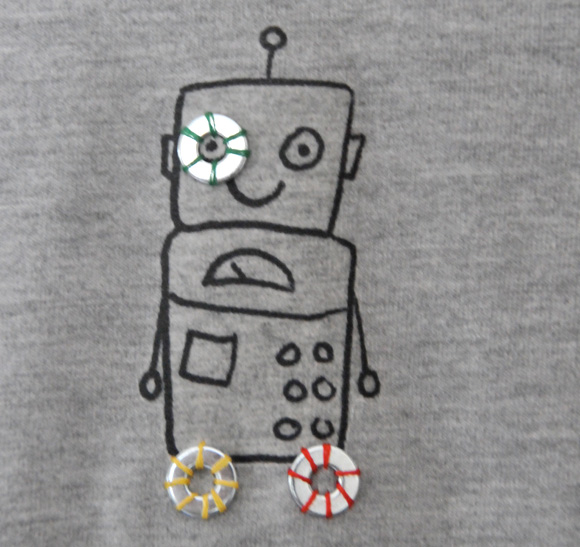
SUPPLIES:
Iron-on transfer paper for your kind of printer (inkjet or laser)
Light colored t-shirt or textile goods (cottons and natural fabrics are best)
Small metal washers from your local department store. 3+ per project.
Iron
Scissors
Sewing needle
Thread (in any colors you'd like. I used red, yellow, and green)
HOW TO:
Download Free Robot Iron-on Design
Print robot design (choose between printing a single design or three). Print only the page you want.
Follow usage directions found with your iron-paper for printing, cutting, and ironing.
Attach individual metal washers to your prepared robot textile with at least 5 stitches around each
washer. Be creative with placement. Once your washers feel secure securely knot your thread to finish.
I hope you will enjoy making your own versions of these projects. I'd love to see your finished results if you do. xo Ez
Update on Thursday, November 11, 2010 by
 Ez
Ez
A special note: Please use caution when crafting for small children. Some parts in this project are small and could pose a choking hazard if not secured well enough.


 Photography by me
 | by
| by 


