


DIY Embellished Iron-On Transfers with Free Printable
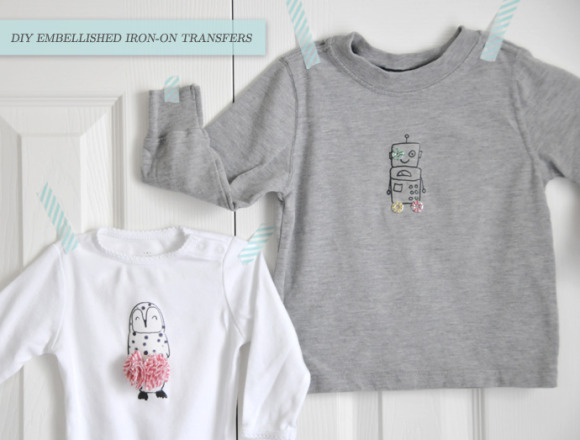
Hello lovelies! I recently dreamed up these created two Embellished Iron-On Transfer tees as Christmas gifts for two little sweeties in my life. It seems that anyone with a love of cute might appreciate receiving them though, so I've made them both available for you to print and enjoy in your own crafting/gifting projects. I chose to use t-shirts for my project, but you could create yours on any natural textile - tote bags, aprons, cushion covers, stockings, and more.
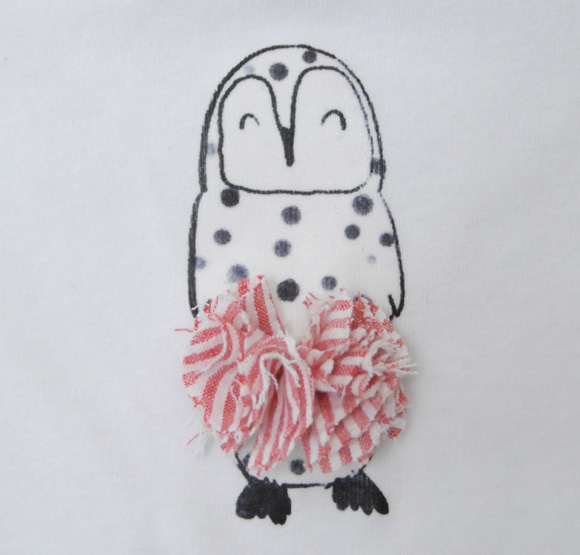
First we have the Tutu Cute Snowy Owl Iron-on Transfer: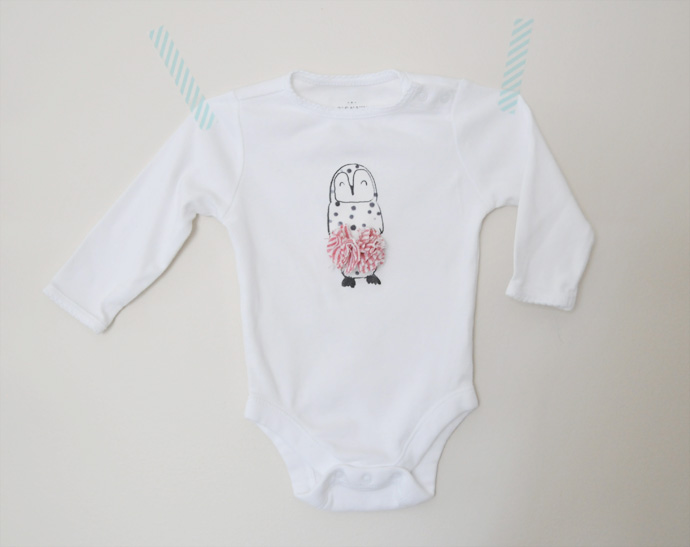
SUPPLIES:
Iron-on transfer paper for your kind of printer (inkjet or laser)
Light colored t-shirt or textile goods (cottons and natural fabrics are best)
Iron
Scissors
Light-weight fabric piece (such as chiffon) at least 8” x 8” per project
Sewing needle
Thread (in a color that matches your fabric)
HOW TO:
Download Free Owl Iron-on Design
Print owl design (choose between printing a single design or three). Print only the page you want.
Follow usage directions found with your iron-paper for printing, cutting, and ironing.
Print the circular template on this page onto standard paper. Alternately you can create freehand circles or trace around an object in your home that is about 2” across.
Use your circular template to cut out 7-8 circles from your light-weight fabric of choice.
Follow directions for assembling a fabric flower found on Hey! Jen Renee blog.
Add a few additional stitches to the center of your flower, piercing your needle through all layers a little ways into your flower. This will cause your flower to flatten slightly into a tutu-like shape.
Attach your flower tutu to your prepared owl textile by sewing through both your owl design and your flower tutu several times. Once it feels secure knot your thread to finish.
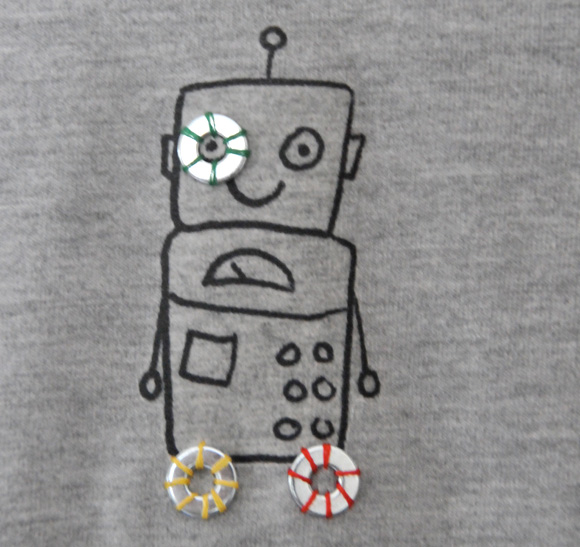
And then we have the Little Washer Robot Iron-on Transfer: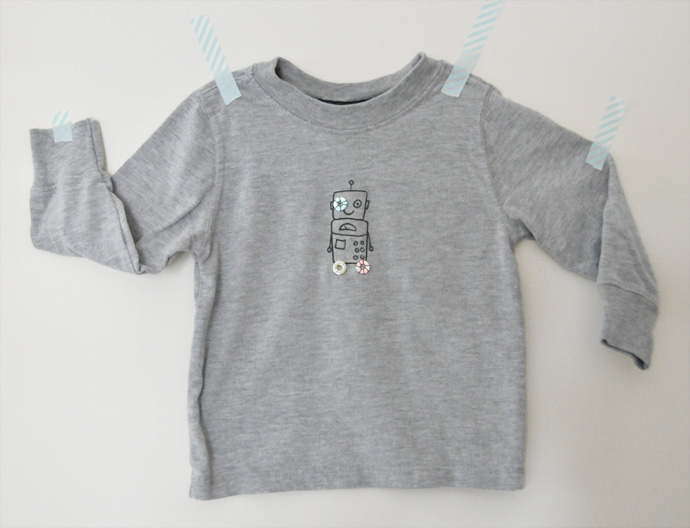
SUPPLIES:
Iron-on transfer paper for your kind of printer (inkjet or laser)
Light colored t-shirt or textile goods (cottons and natural fabrics are best)
Small metal washers from your local department store. 3+ per project.
Iron
Scissors
Sewing needle
Thread (in any colors you'd like. I used red, yellow, and green)
HOW TO:
Download Free Robot Iron-on Design
Print robot design (choose between printing a single design or three). Print only the page you want.
Follow usage directions found with your iron-paper for printing, cutting, and ironing.
Attach individual metal washers to your prepared robot textile with at least 5 stitches around each
washer. Be creative with placement. Once your washers feel secure securely knot your thread to finish.
I hope you will enjoy making your own versions of these projects. I'd love to see your finished results if you do. xo Ez
 Ez
Ez
A special note: Please use caution when crafting for small children. Some parts in this project are small and could pose a choking hazard if not secured well enough.
24 Lovely Comments | Email Article | found in Babies + Kids + Families, D.I.Y. + Projects, Downloads + Printables, Gift Giving / Wrapping Ideas Print Article | Share This |  | by Ez
Reader Comments (24)
Too adorable!!! I love the little sew-on details. LOVE THIS!
Thank you!
iron ons!!! that's so smart!! as im gonna be on a "budget" this Xmas :))
xo.
http://dropsofjupiterBLOG.com
Did you do these illustrations, Ez? I am in love with them. I love the contented look on the owl's face. he looks so self-satisfied!
Congrats on yet another AMAZING project!!
Thank you all!!!
Susy my dear, you are too sweet. Yes they are little doodles I drew up. I wanted the effect to look hand-drawn since the original project was intended for kids. Thanks for making my day! xo Ez
its so cute
This is so sweet - what an adorable pair! I especially LOVE the onesie - too cute!
They are so cute! What kind of iron on paper did you use that doesn't leave that gross sticky backing on the fabric?
Those are so adorable!
Probably the cutest things EVER. Love!
Thanks for your comments guys! I hope you will enjoy making these for the sweeties in your life (or maybe even for yourself).
@ Emily - Great question! I used Avery brand transfers for this project. xo Ez
Adore the robot. I definitely see a make coming on. Thanks Ez!
wow! I cannot believe you are giving us the download for free! Thank you so, so much! That is incredibly generous! i wanted to mention to you that I posted photos of your art photo on my blog today. It has now made it from Morocco to Denmark and I think of you every time I look at it! Thank you so much for bringing so much beauty and inspiration to my days!
What a brilliant idea and beyond adorable sketches EZ... Thanks so much for sharing!
I've had this page open for a few days and every time my daughter sees it she gets really excited - guess I'll be making these for Christmas! Thanks!
darling!
Lovely idea and great out come ;o)
Thank you for such a lovely tutorial. Been admiring for a while and when the opportunity came up to make an outfit for a friend's little girl, I simply couldn't pass up such a sweet project. I used the tutu cute snowy owl image. But I didn't use an iron on transfer and instead traced the image and hand drawn it on the -shirt.
I blogged about it here: http://cookyousomenoodles.wordpress.com/2011/01/08/red-and-white-baby-girl-outfit/
Thank you :)
I admire it a lot! Very cute.
this is crazy cute! can't wait to make these for my niece & nephew!
these are so cute! i had a go at making the robot one, link to my attempt is below, and i love how he turned out - thanks :)
http://abimakes.blogspot.com/2012/02/robot-tshirt-printable.html
your work is great.
Congratulations on a beautiful birth with a beautiful baby!
Congrats! I love reading your blog. You have a dear family.
I love the name Ruby! So sweet.
Thanks for sharing your story with us. My second birth was quite similar with contractions starting early, which meant for a faster delivery. Glad all is well.