DIY Cupid's Arrow Cupcake + Treat Bag Toppers
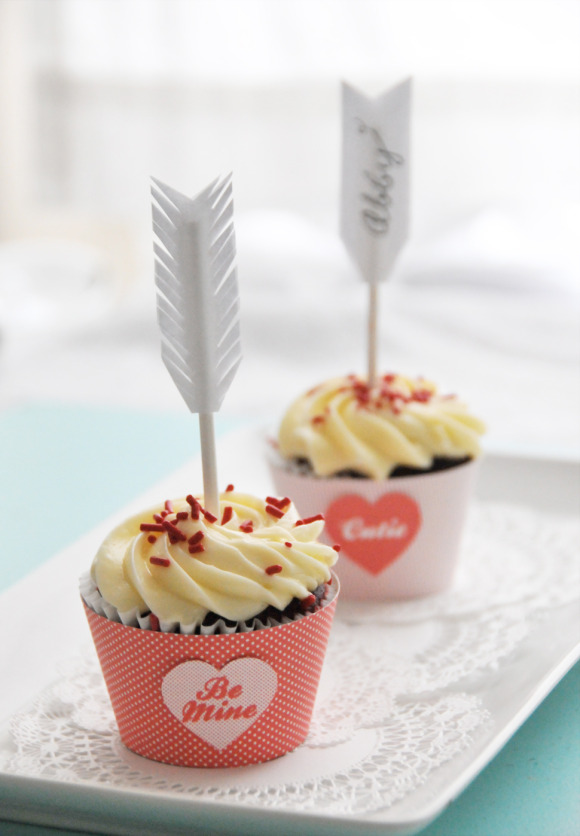
Hello sweets! Back in November (during the madness of the holidays) Fossil got in touch and asked if I would like to create a Valentine DIY project to share on their site. I love Fossil, so my answer was a quick "yes." I ended up dreaming up a sweet little set that is perfect for a Valentine's Day party for both kids or adults, or just for one special someone: Cupid's Arrow Cupcake Toppers and Cupcake Bands (see how the cupcakes look like they've been shot by Cupid's arrow!). The directions and free download can be found over on Fossil. UPDATE: The download and directions can now be found below! I hope you will enjoy making them as much as I did (creating those little feather toppers is super easy and oh-so addictive).

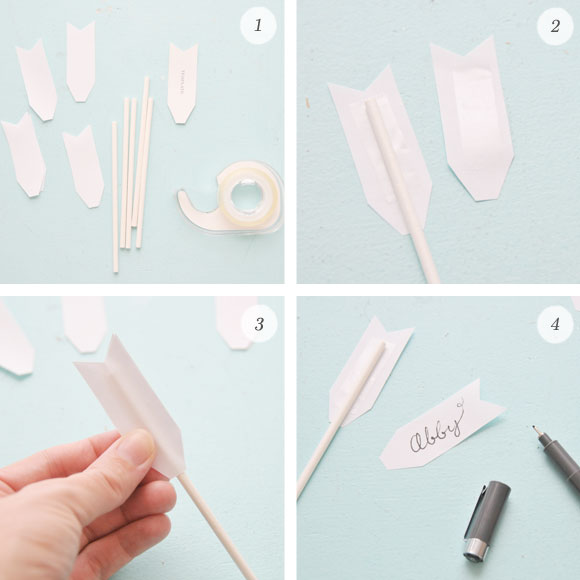
Follow the steps provided on the PDF download above. For a little extra help with the feather topper portion, you can follow along with these photos:
If you'd like you can also follow the simple directions below to create charming little Cupid's Arrow Treat Bag Toppers (using the same free download that I made for Fossil). The topped cupcakes + treat bags would really make your Valentine's Day party sweet!
Option II: Treat Bag Toppers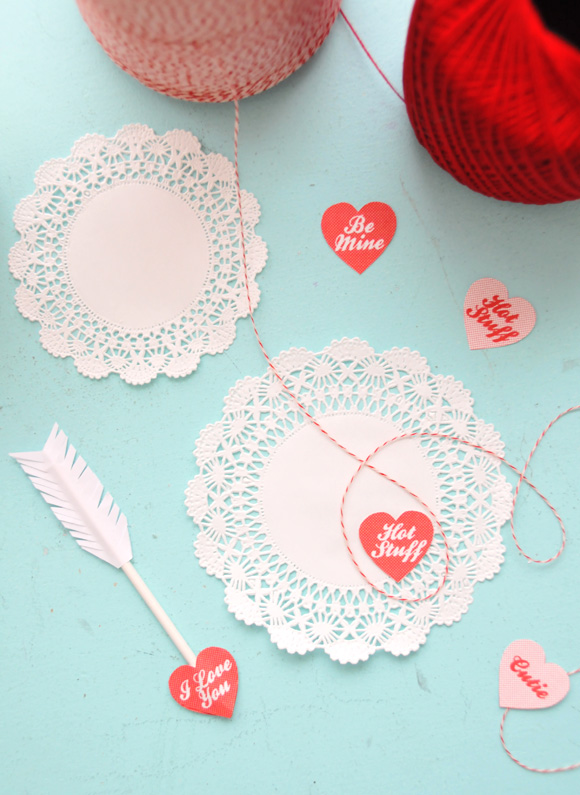
Follow the directions found on Fossil to create your Cupid's Arrow Toppers. After creating the feathered portion of each topper, attach chosen hearts (found on the free printable) to the bottom of using double-sided tape (you will use two, one on either side of the stick). Choose from either blank or pre-written text versions (the blank ones work perfectly for writing guest's names).
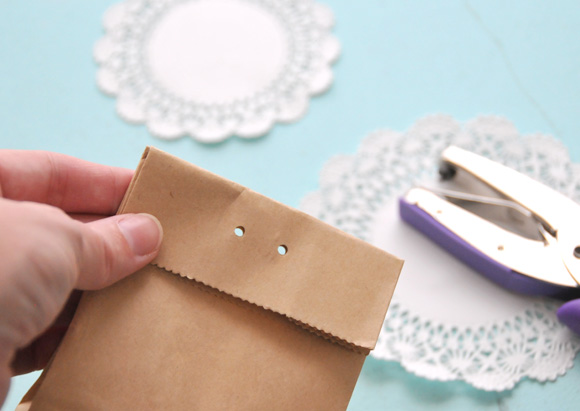
Fold the top of your treat bag down and punch holes as shown above using a hole punch. I used a 1/8" punch for a smaller hole.
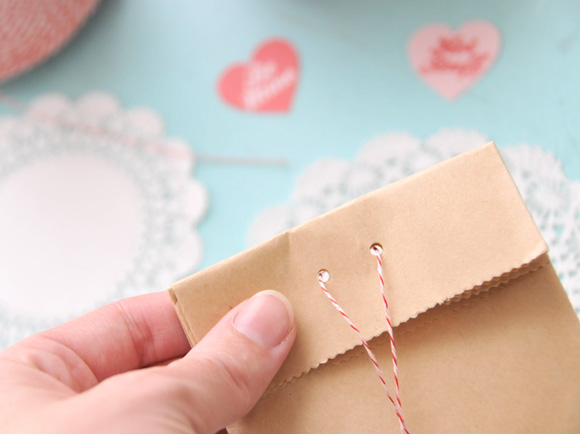
Thread twine or yarn through the holes (if you want a bow in the back, thread through as shown - if you prefer it in the front, thread from the opposite side). Next, insert twine ends (one at a time) through the opposite holes than you initially threaded them through.
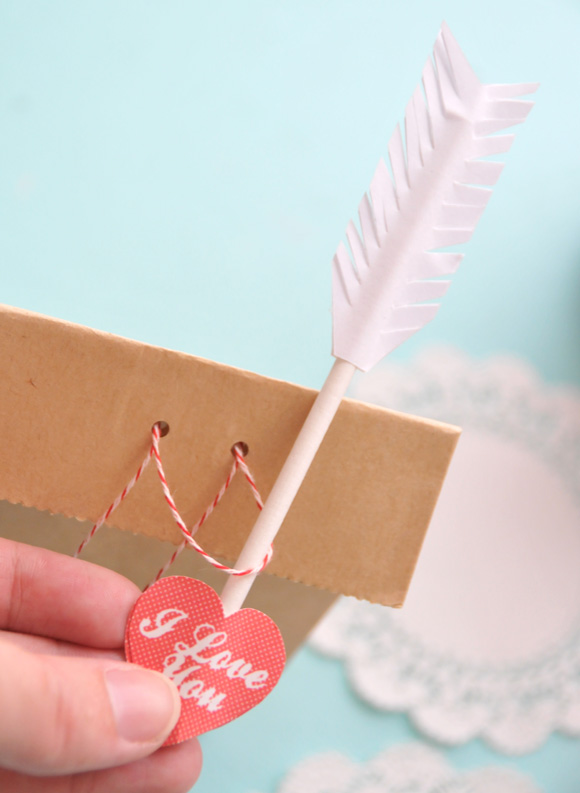
Place one Cupid's Arrow inside the loose loop. Pull twine taught and tie a bow to secure.
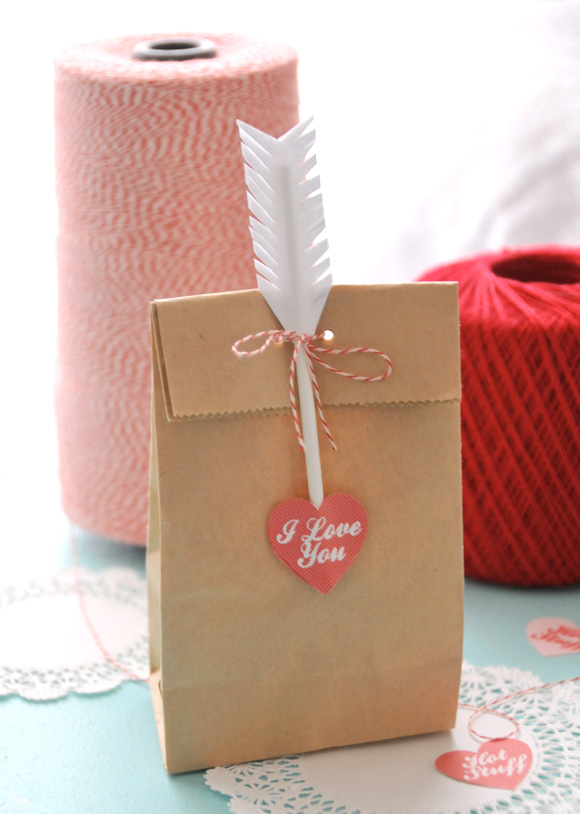
Remember to get the free download for this project and the Cupcake Toppers + Cupcake Wraps at Fossil right here. Enjoy! xo Ez
 52 Lovely Comments |
  Email Article | found in
  Downloads + Printables,
  Holiday Inspiration/Projects,
  Tutorials,
  Weddings + Events
  Print Article | |
  | by
| by  Ez
Ez  Thursday, February 3, 2011


Reader Comments (52)
Another great project! Thank you! And a huge congratulations on the collaboration with Fossil! I'm a big fan as well. Keep up the great work and thanks again!
absolutely love these! so cute and whimsical :-)
Love it!
hello bloom
Ohh, these are great, so cute!! Not to mention the photography. You are so talented, lady!:)
Hi EZ! These are adorable! I love when you do paper crafts. Your ideas are so simple and cute. I'm bummed I didn't make it to ALT Summit. I would have loved to meet you.
Genius.
Another great idea ! Thanks Thanks !!
This is SO adorable!!
So darn cute, I just have to tweet it!
Brianne
PetalPetal designs
Love these ideas!! Amazing lady!
Such a gorgeous idea!
Oooooh, what an adorable idea, no ideaS: I love them both! Thanks for sharing! I want to make this for sure, I'll use longer wood sticks...
Pretty pretty pretty!
This is the cutest idea ever!
My mind is constantly blown by all the creative people out there. I love this idea! Thank you for sharing.
Cheers!!
I saw your project featured over at "One Pretty Thing" and had to come by. Love your cupcakes and arrow picks! So beautifully done. Heading over to Fossil to get the download! Thank you! Jenn/Rook No. 17
Wow, we absolutely LOVED these DIY valentine's projects. We featured the bag toppers on our own blog! They look great!
hi!! LOVE LOVE your creativity :) Just stumbled upon your blog today. It's too late for this Valentine's but I was going to bookmark/save this craft for next year so I followed your link to the Fossil site. Once there, the Fossil site displays a message stating I need Flash to view. After dowloading Flash 2x (bc after 1st time I still got same message) and rebooting my laptop, sadly, I am still unable to open the Fossil page. I even tried to open the link via Fossil blog. I get same message re: needing Flash. Is there any way I can get a soft copy (.pdf?) of your DIY Cupid's Arrow topper/wrappers project? Please advise :) Thanks again for your FAB projects!!!
I went to Fossil and couldn't get the arrows. What am I doing wrong?
Oh this is waaaay to lovely, but I can't find the download link on the fossil site, what am I doing wrong?
Beautiful, what a wonderful idea! Thank you for sharing, your explanation are very well done. I will be using those for care packages I am making for my son and friends in college...
You are truly one mastermind! Love this idea! Thanks for the inspiration, xx!! Trackback: http://blog.joyhey.com/2012/01/29/inspiration-lovely-valentines-day-party/
Fantastic tutorial and realization! Thanks a lot for it! I share it on my blog and link it back to you. Check here: http://krasart.com/2012/02/10/diy-cupids-arrow-by-creaturecomfortsblog/
Very beautyfull
Absolutely adorable! I've featured this on my blog, thanks for the great idea!
http://www.deeindesign.com/blog/2012/02/diy-valentine-goodies/
Beautiful! Great tutorial... Thank you.