


Eraser Stamp Carving - Part II
Six months ago I put together an Eraser Stamp Tutorial that used the end of standard pencils to create cute little stamps to adorn gift wrap, tags, and more. It was a lot of fun, so I thought I'd keep the eraser theme going and put together a simple stamp carving project for you today: Eraser Stamped Gift Ribbons!
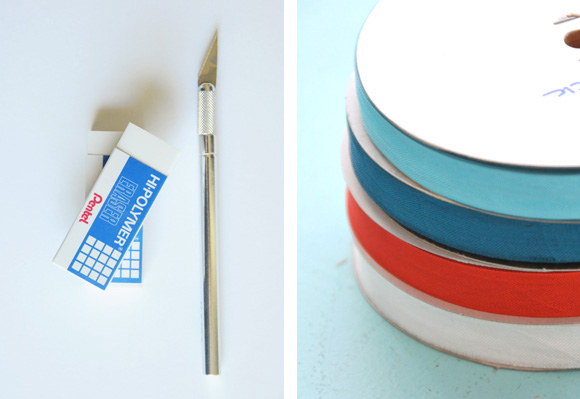
The great thing about this project is that you don't have to hunt down any fancy stamp carving tools or supplies. I just used Pentel Hi-Polymer Erasers, found in a 3-pack at my local Target for only a few dollars. The erasers are also available for purchase online right here. The brand does matter for this project. I purchased another set from a different manufacturer first, and the stamps were really hard to carve. You'll also need a craft knife (or stamp carving tools if you have them), scrap paper and a protective work surface covering (such as cardboard or an old magazine), pencil, pigment stamp ink (I like Encore and Color Box brands), and ribbons such as these seam binding ribbons (or strips of natural fabric to repurpose as ribbons).
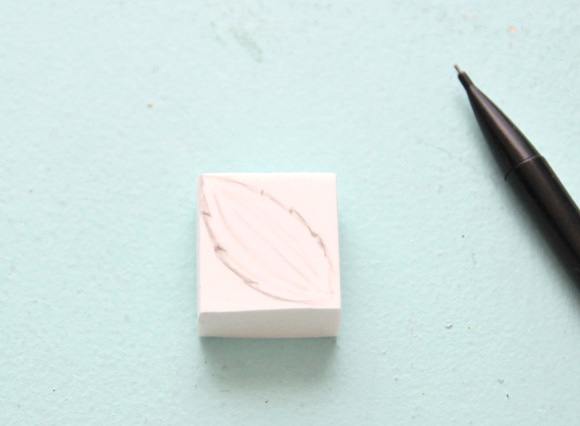
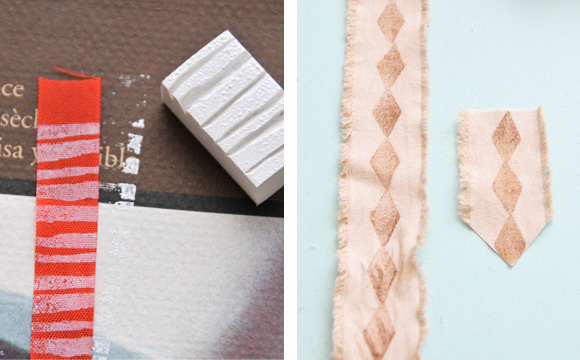
Step 1: Cut your eraser down to the block size you'd like to work with. Using your pencil, lightly (so you don't scratch the surface of the eraser) sketch a simple design. Remember that the portions that remain after cutting will determine your final stamped look.
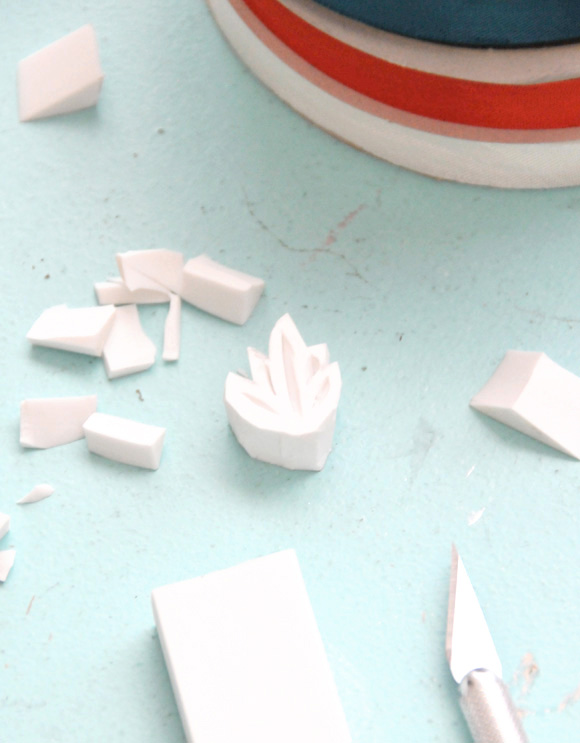
Step 2: Using your craft knife (on top of your protected work surface) slowly begin to remove potions of your eraser by cutting around your sketched design. It is easy for the knife to slip so please use a lot of caution when cutting your eraser. You don't need to create an intricate design to end up with a lovely stamp. Some of my favorite stamps are just rectangular blocks with small irregular lines and dots cut out of them (those take only seconds to make). Optionally you can also use mini cookie cutters to cut shapes from your eraser into instant stamps - this version is kid-friendly (with supervision of course).

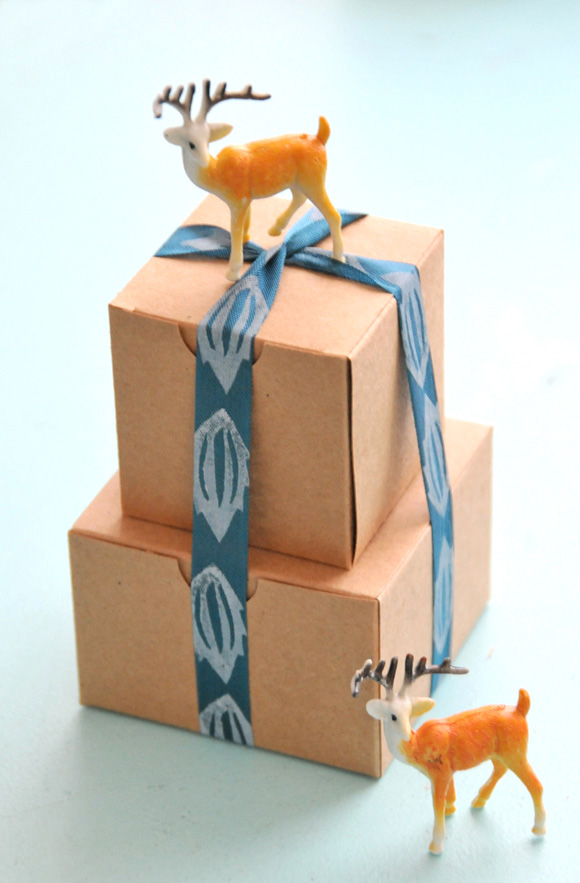
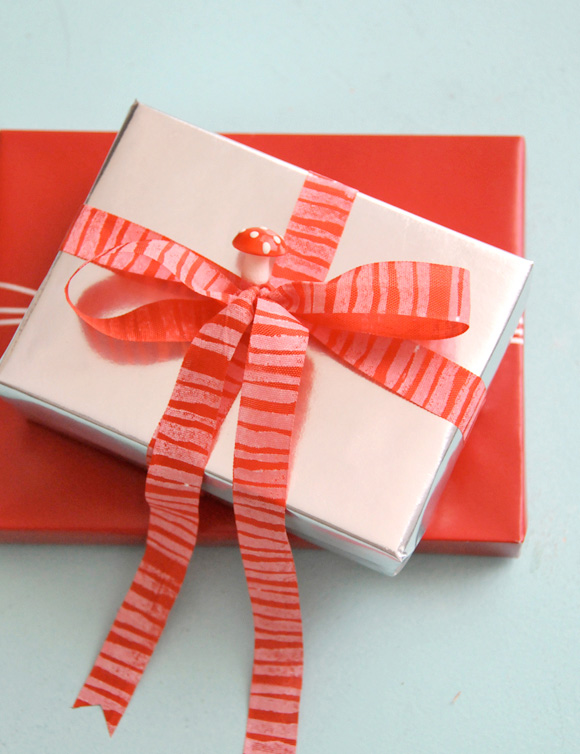
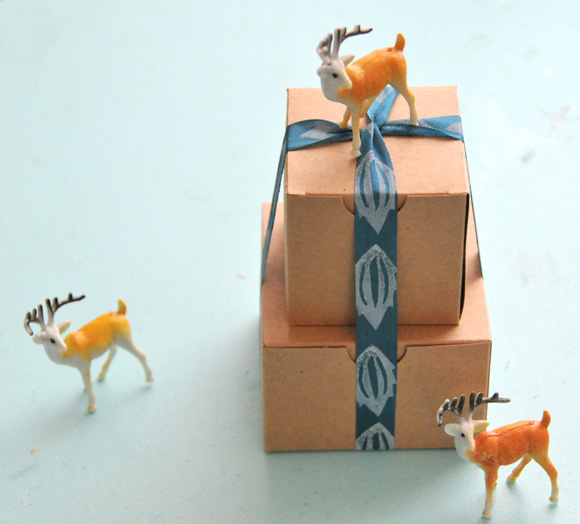
Step 3. Place your ribbons (or fabric) on top of your scrap paper and begin stamping your pattern. You can stamp the entire length of ribbon or just the ends for a pretty effect. Set them aside to dry (drying time will depend on your type of ribbon and stamp ink). Tip: It is easiest to pre-measure your ribbon for each gift first before stamping. Just wrap it loosely around your gift leaving enough length for a bow and snip it.

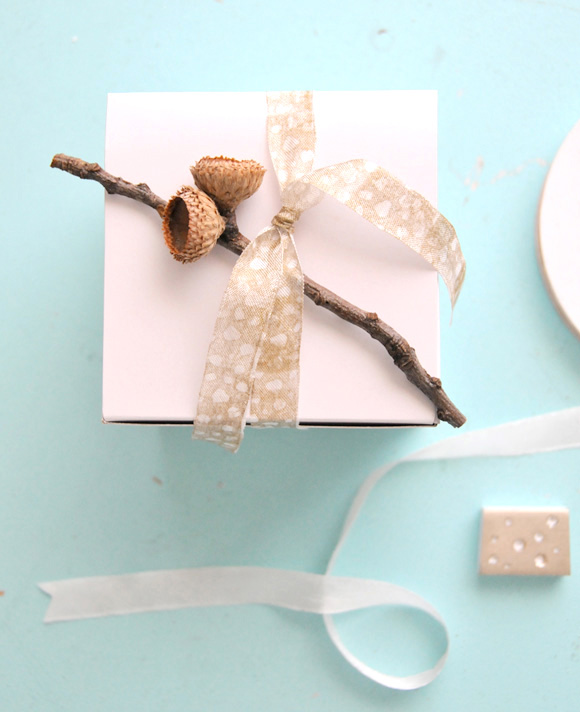
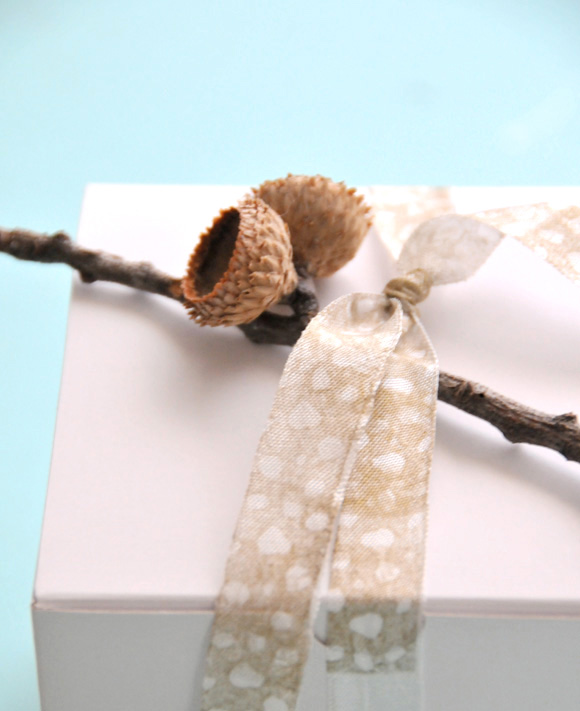
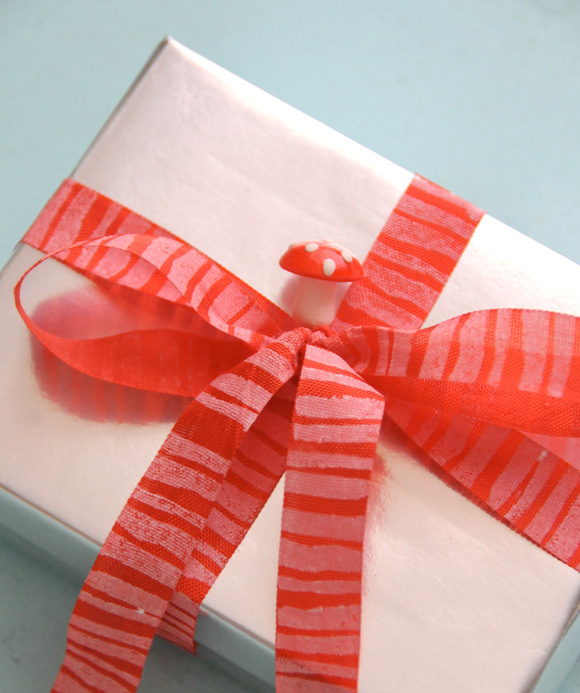
Step 4: Wrap your gifts!
Have a wonderful Thanksgiving to all of you who celebrate. I'll be spending time with family over the next few days and will see you again next Monday. And starting next week I will have even more holiday projects and freebies to share with you! Have a wonderful week/weekend, and I'll see you soon. xo Ez
 36 Lovely Comments | Email Article | found in D.I.Y. + Projects, Gift Giving / Wrapping Ideas, Holiday Inspiration/Projects, Tutorials Print Article | Share This |
  | by Ez
Reader Comments (36)
What a great idea! I'm off to Target next week to look for those erasers! Thanks.
Fun! One year I wanted to make red polka dot on white paper, so I bought a ton of plain white wrapping paper and thought it would be a great idea to use the back of a pencil eraser for petite polka dots...good idea if you like to spend a ton of time on wrapping paper, not if you like it quick and easy!
What a fantastic idea, can't wait to try making my own stamps! There's nothing better than simple wrapping with personal touches like these...thanks for sharing!
great tutorial! your stamp idea will definitely brighten up my christmas presents...
hope you had a wonderful thanksgiving weekend!
what a great idea! such fun to have patterned ribbon with plain paper instead of plain ribbon with patterned paper for a change :)
Love this idea - so simple, but so brilliant..!
FJM
x
Wow! Great idea and great instructions. I can't wait to try it. Thank you so much!
I always love stamps!!!
You made this look easy to acheive (haha :)) as always!!
thank you so much for this inspiration! Awesome*
awww you're the best ! what a great job !!
very creative ! can't wait to try it .. thanks for sharing, dear =)
I love the idea of printing on ribbon. we've been doing lots of rubber stamp carving, and this is a great wya to use them!