Partners

Newsletter Sign-up


Lovely Sponsors


Currently Obsessed

Subscribe

Lovely Press

Disclaimer

From time to time Creature Comforts may include affiliate links to products featured in their posts and/or affiliate banner ads. However posts and featured products seen on Creature Comforts are never controlled or selected by advertisers or affiliates. Featured items are products that we personally like, and would share regardless of affiliate partnerships. If you choose to purchase an item that has been featured from an affiliate link or ad banner, we may receive a small commission on that sale.

Privacy Policy
Hosted by

Entries by Ez (3438)

Monday
Jan072013

Life Lately

Hi friends! I hope you had a wonderful holiday and that your year is off to a beautiful start.

Usually when I'm away on break I am flooded with ideas to share upon my return, but for the first time ever, that isn't the case. To be honest I am having a bout of bloggers block, and the more I've tried just get over it the more it persists. I'm hoping that just the acknowledgment of it and what life has been like for me over the past few weeks will clear things up, and I'll be back on track again soon. But until that happens, I apologize if posts here are a little sparse or a bit more on the nitty-gritty and not the pretty-pretty side that I'm sure most of us would prefer. Thanks for hanging in there with me.

So I left you back in December with a hasty mention of a "family crisis," and while I won't go into every detail for the sake of privacy, I do want to share a little bit with you about what has been going on.

To keep it brief…my daughter was once again the target of bullying. Unfortunately this time it was far more serious and came very close to having deadly repercussions. This time around social media was used to spread the pain far more quickly and involve many more people than "traditional" bullying that she's dealt with in the past. Being a teenager is difficult enough, and my daughter and I were already working on building up her self-esteem and facing her struggles with depression when this whole thing exploded. It seemed like things went from day to night in a split second. A former trusted friend of my daughter's created rumors to infest the internet with, they caught like wildfire, and my daughter's mental health plummeted. 

The details of what happened are all very personal and painful, so I won't elaborate on the specifics more right now other than to say that I have never been more terrified in my entire life. I thought that dealing with my own past depression would be the worst thing I would ever have to deal with, but I was so horribly wrong. Facing and trying to figure out how to help a loved one survive it is so much worse.

I've been too busy worrying about my daughter (and not sleeping much either) to think of much else (hense the lack of cheery blog posts). The initial crisis has thankfully subsided (we've been doing a lot of things to distract away from the situation - see photo above), but the effects of what happened won't be so easily erased. Since the main perpetrators involved were the only friends my daughter felt safe with at her school (and I've since learned even more (sadistic) traits about one of those students that leaves me feeling that my daughter would not ever be safe around them), I have made the difficult decision (and she has begged me) to not send her back to her school. My daughter's mental health and safety needs will always trump any scholastic ones.

Now that the immediate crisis has been contained to a manageable level we have begun making plans for what the future will look like. A lot of it is unknown. For the time being my daughter will be schooling at home with me. I was home schooled quite a bit during my formative years, and while it wasn't always the best solution for me, and may not be for my daughter (that is yet to be determined)…at least I know that she will be safe. To fill the remainder of the year, I've started looking into online programs and in-person tutoring options as well, so if any of you have recommendations (or places I should steer clear of) I would greatly appreciate anything you have to share.

A few weeks out of this crisis I am feeling anxious but tentatively hopeful. I am trying not blame myself…it's always so easy to find blame in oneself if you start to look for it. I keep asking myself, why my kid? Why is she so often the victim of bullying? Is it me? Am I doing something wrong? The questions keep coming with few answers…so I am trying not to ask them. I am instead trying to focus on the positive and keep moving forward in a direction that is healthy for both my daughter and myself. It won't be simple or easy, but I know it's the right thing.

If you made it to the bottom of this post, thank you for reading. I promise to be back to sharing more traditional Creature Comforts content soon. Until then...xox Ez

P.S. The photo above was taken by my daughter during the distractionary (that's a word, right) road trip we took to Dallas, TX a little over a week ago. It captures us at our goofy best, makes me feel hopeful, and might be my favorite photo of all time (regardless of how dorky I look).

Thursday
Dec202012

The Best of Creature Comforts 2012

Hi friends! I had several fun posts that I was hoping to share with you this week, but we've had a unforeseen family crisis come up, so I'll be taking off for the holiday a bit sooner than planned. Even still, I didn't want to leave you emptyhanded, so I've put together a quick roundup of your and my favorite Creature Comforts posts of 2012. I hope you'll enjoy browsing through them over the coming week...maybe you'll even discover a few new favorites!

Thank you for being a part of Creature Comforts in 2012. I feel so fortunate to get to share this little corner of the web with all of you. I'll be back again for a whole new year of awesome posts and new goodies in January after the holidays. See you then!

Wishing you a holiday filled with all things merry and bright...and a New Year that sparkles with beautiful possibilities! xo Ez 

Wednesday
Dec192012

Current Crush: DIY Paper Diamonds and Gems

I've recently become enamored with some amazing DIY Paper Diamond and Gem tutorials that a few clever bloggers have shared recently. My limited math skills would never enable to me actually design the templates for these gems...luckily these crafty wizards have done the leg work, and all we have to do is print, fold, cut, and glue (all craft skills that I get a passing grade in). I've found that creating these bobbles is a great activity to do while getting caught up with my Netflix instant queue. I'm hooked!

The best thing about these, is that not only would these geometric pretties make perfect holiday ornaments and decor (imagine a group suspended from a branch or chandelier over a festive party table), but they'd be great for displaying in your home year 'round!

I'm actually working on a gift for my daughter to hang in her bedroom using several of these templates as my guide (and some glitter and silver leaf paint), and it's looking great so far. I'll be sure to share a photo over on my Instagram (and maybe here too) after she opens her gift on Christmas Day.

Here are a few of my favorite DIY Paper Diamond & Gem Tutorials:

Tuesday
Dec182012

Color Inspiration Daily: 12. 18. 12

Monday
Dec172012

DIY Leather-wrapped Vases and Votive Holders

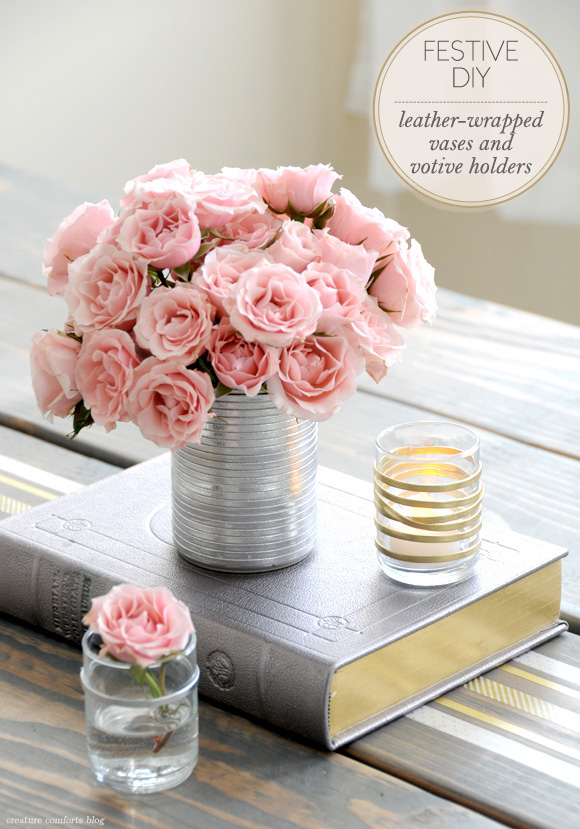
Hello lovelies! Today I'm back for another fun DIY that I created in partnership with my friends at Waverly. This time I thought it would be nice to create some table decor that will look just as lovely at a festive party this season, as it will in-use all year 'round.

Let's make some easy DIY leather-wrapped vases and votive holders!

DIY Leather-Wrapped Votive Holders

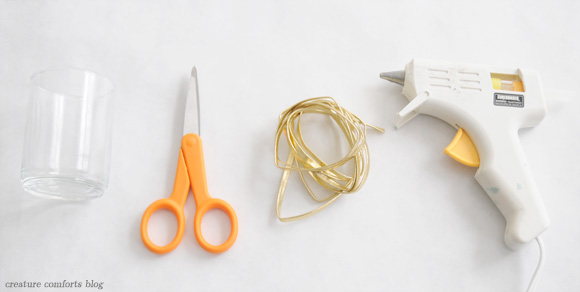
Gather your supplies. You will need:

  • Small glass votive holder(s) | The variety used here were purchased at Michael's
  • Sharp craft scissors
  • Realeather Craft Lace in Metallic Gold and / or Silver | Available at Michael's and Hobby Lobby (find additional suppliers here). Be sure that your leather cord has two flat sides (like a fettuccini noodle...not round like a spaghetti noodle).
  • Hot glue gun (low heat) and glue stick(s)
  • Battery-operated candles

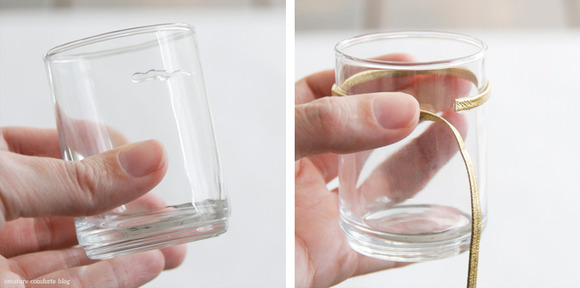
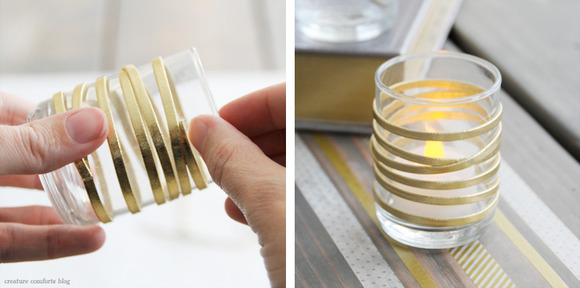
Plug in your glue gun and allow it to get hot. Begin by squeezing a small line of glue somewhere within the top 1/3 of your votive holder. Immediately place one end of your leather down into the glue and press to adhere. If the glue dries too quickly, you can easily peel it off the glass and try again.

Once the end is glued in place, wrap your leather cord around the top of your votive holder until it meets back at the starting point.

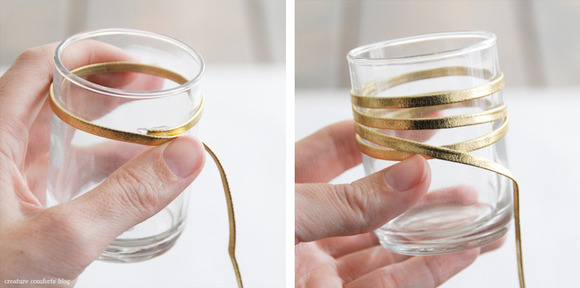
Squeeze a drop of glue on top of the end of your cord (where you first started) and lay the loose end of your cord through it. Be sure that you have pulled the cord taught so that it is not drooping. Once this dot of glue has hardened (it should take just a few seconds) continue wrapping your cord around your votive holder.

You can keep your lines parallel or overlap them like I did here. If you want to create the overlapped look, just be sure to add a dab of glue under the cord anytime you will have two pieces laying on top of one another. Keep your cord nice and tight while you work.

When you get to a good stopping point, add a dot of glue on top of a portion of leather that is already wrapped around the votive holder, and lay the end of your cord through it to adhere. Use a pair of scissors to trim off any excess cord. If there are any bits of dried glue on your votive holder, you can use your fingernail or the tip of your scissors to carefully peel it off. Place a battery-operated candle in your new holder, and you're done!

Now on to creating a pretty DIY Leather-Wrapped Vases!

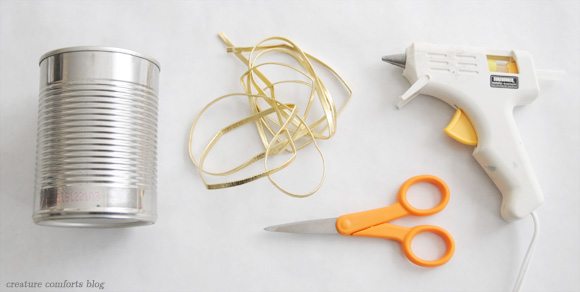
Gather your supplies. You will need:

  • Tin can(s), emptied, cleaned, and dried | Make sure to use the variety with the pull-off top so that you are not left with any sharp edges. You can also use a glass cup in place of the can if you prefer.
  • Sharp craft scissors
  • Realeather Craft Lace in Metallic Gold and / or Silver | Available at Michael's and Hobby Lobby (find additional suppliers here). Be sure that your leather cord has two flat sides (like a fettuccini noodle...not round like a spaghetti noodle).
  • Hot glue gun (low heat) and glue stick(s)
  • Fresh flowers (and water)

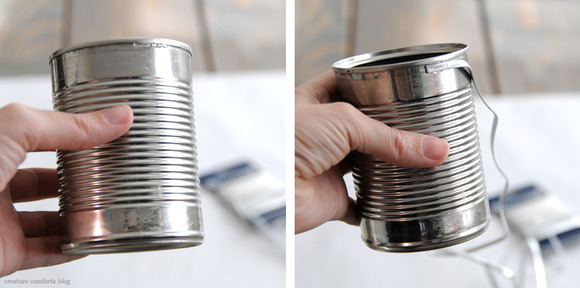
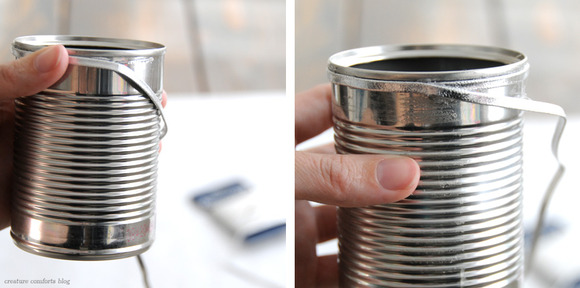
Plug in your glue gun and allow it to get hot. Begin by squeezing a small line of glue beneath the top lip of your can. Immediately place one loose end of your leather cord into the glue and press down to adhere. If the glue dries to quickly you can easily peel it off and try again.

Now apply another short line of glue just slightly below the top lip of your can, and directly following the portion of cord that is already attached. Don't place the glue too close to the edge or you will have a messy vase top. Place your leather cord into the hot glue, making sure to pull your cord tight as you are working so that there is no slack in the cord. Continue to work in small sections, adding glue, and placing leather cord, until you have made your way back to your starting point.

Now add a small dot of glue on top of the cord end (where you started) and overlap the loose end of your leather cord over it, angling it down slightly (as seen in the photo).

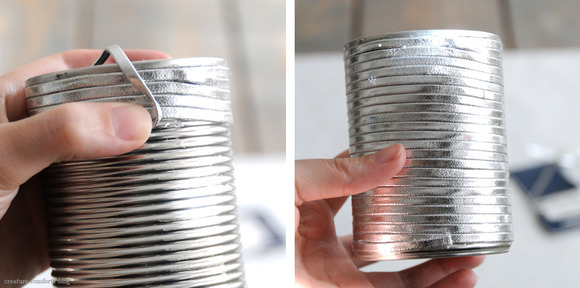
Continue to wrap your leather cord around your can, keeping the cord taught as you work, and the top edge of your cord snug against the bottom line of the cord above it. You will not need to glue the cord down along every row. If you'd like to apply a small dab of glue every few rows to make it extra secure, you can. The very top row is the only one that need to be glued down completely.

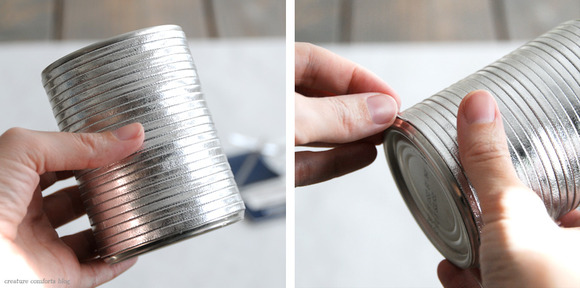
Continue wrapping cord around your can until it is completely covered. Glue the loose end atop the last wrapped row and snip off excess cord. You'll see that the leather on the back of the can angles down just a bit (nobody will notice when there are flowers inside it)...

...but the front is nice and straight.

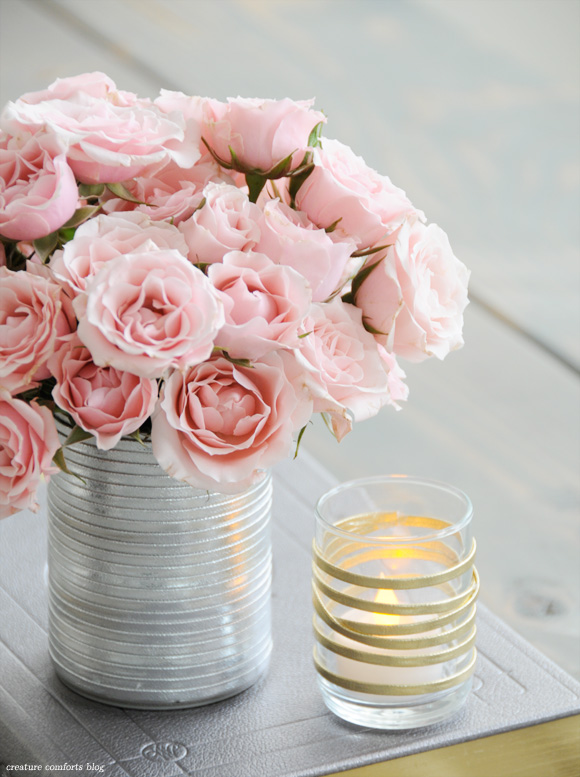
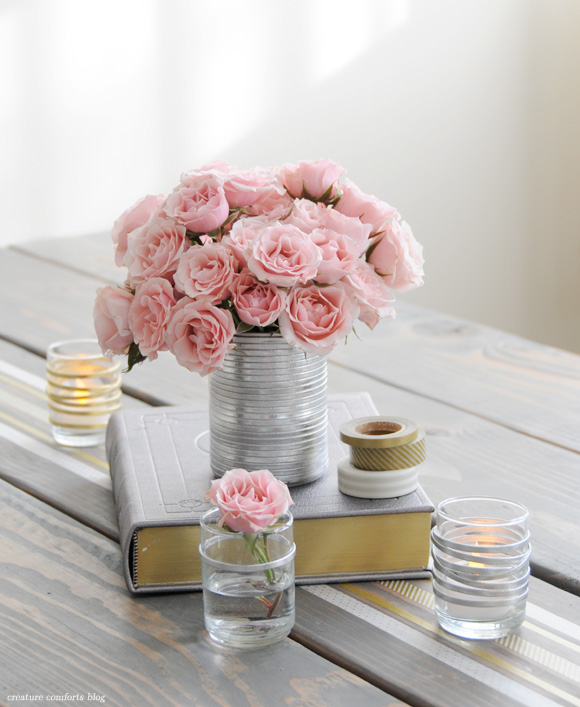
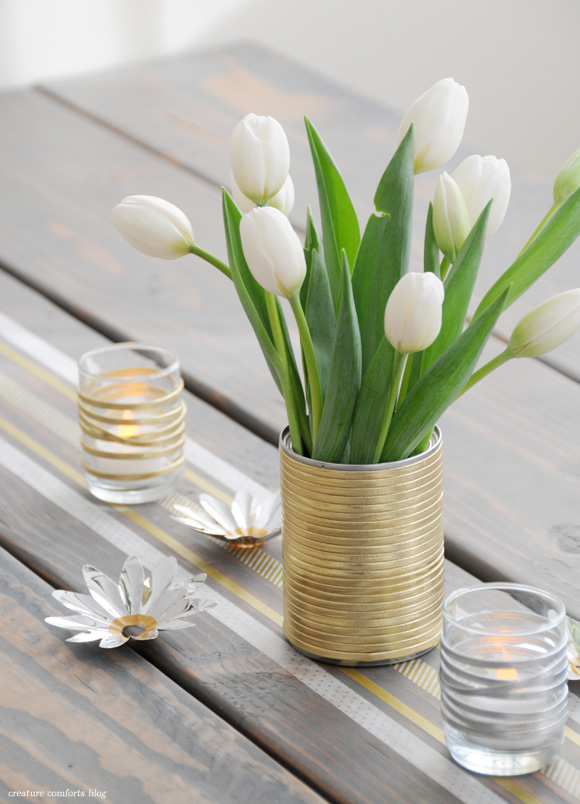
Use your fingernail or the tip of your scissors to carefully remove any excess glue along the edges. Fill with water (carefully so it doesn't leak on the leather) and a bouquet of beautiful blooms!

Doesn't it look lovely?!

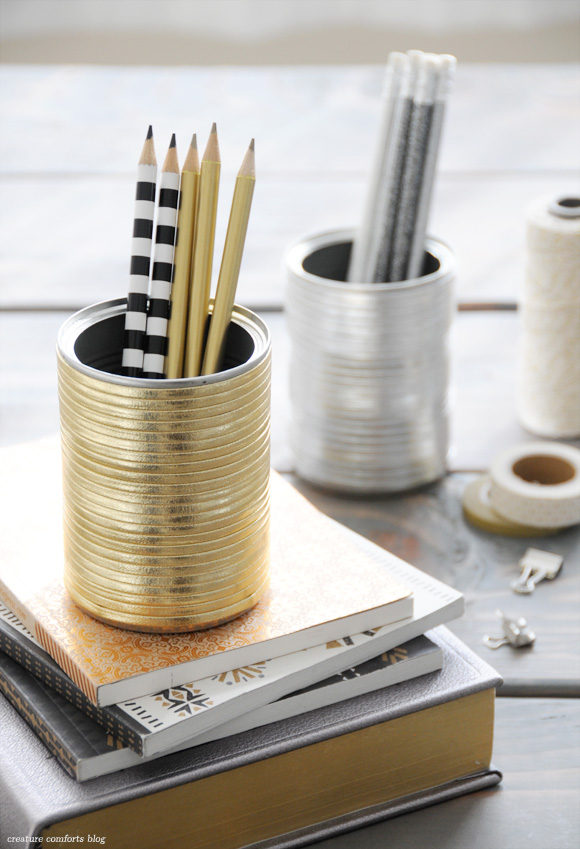
And here it is in gold!

Bonus...these vases can also double as snazzy pencil holders! I have the gold one on my desk right now!

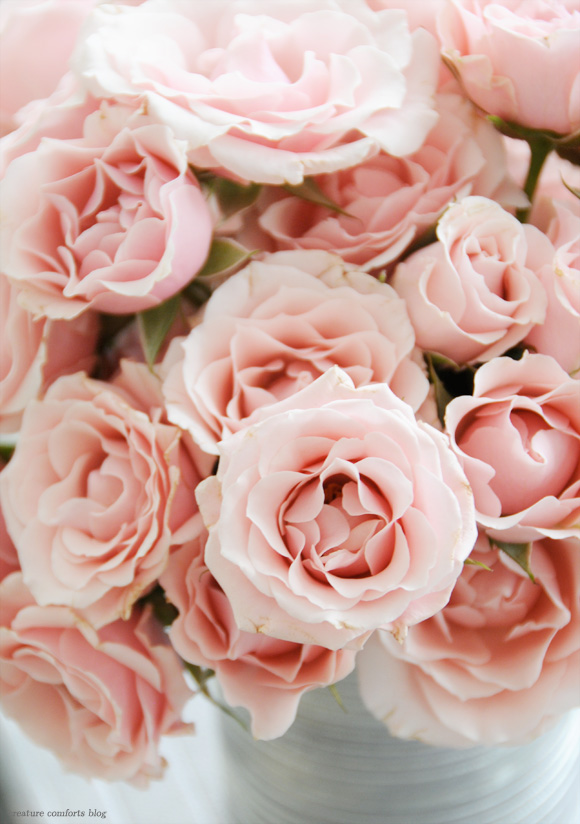
And one last gratuitous rose photo...because I just can't help myself. xo Ez

Prop sources: Pencils - Target | Journals - Delphine Press (from a trade show), Sparrow & Co. | Silver Dictionary - received as a gift | Japanese Masking Tape - etsy | Metallic Flowers - vintage Christmas decor | 

---------

This post was kindly sponsored by Waverly. Follow them on TwitterPinterest, and like them on Facebook. The DIY content, images, and opinions shared in this post are my own.

Related Posts Plugin for WordPress, Blogger...