


DIY: Fancy Clothespins
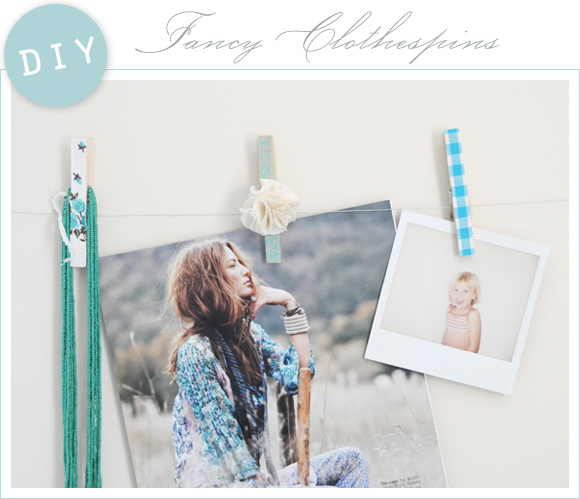
 Hello lovelies! I hope your week is going swimmingly so far. Today I've put together a little tutorial to show you how to make some sweet Decorative Wooden Clothespins that you can use to adorn inspiration wires, gifts and more. I hope you will enjoy making your own variations of these pretty little clips.
Gift giving idea: Clip a row of fancy pins onto a manila tag, strip of decorative cardstock or pretty ribbon and present as a wee gift to someone special.
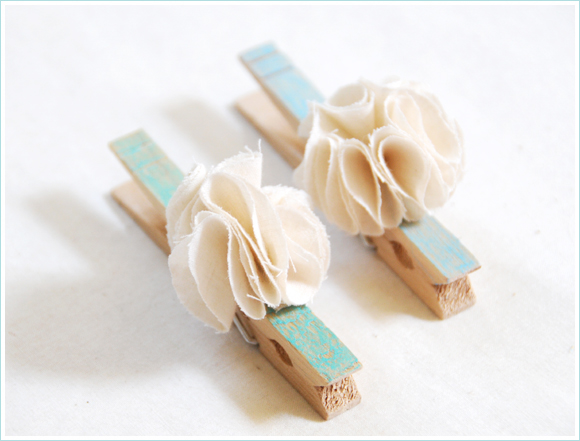
Version one - Fabric Pom Pom Flower Clothespins:
Supplies needed:
- Standard wooden clothespins - generally found in the laundry supply section at stores such as Target (about $3 for 100).
- Fabric scraps in solid colors or prints - light-weight cottons will work best.
- Needle and thread - color should match the fabric you will be using.
- Colored pencils (optional)
- Hot glue gun and glue sticks
- Scissors
 To begin with you will need to follow this awesome tutorial to create your fabric pom pom flowers (follow Tutorial II). They are rather addictive to make and super easy (even my 11 year old daughter made some. She turned hers into floral hairbands by stitching the finished flowers onto hair rubber-bands - and I'm planning to make a garland for my bedroom with the extra heap I've been making).
It should take you only about 3-5 minutes per flower. For a small circular shape you can use an object in your home as a template to trace around, such as a milk cap or spool of thread. I like how the flowers turn out when the circles are a bit more random, so I cut most of mine out without a template. Tip: For a speedier project just accordion fold strips of fabric and cut your circle shape through all the layers to create multiple circles all at once).
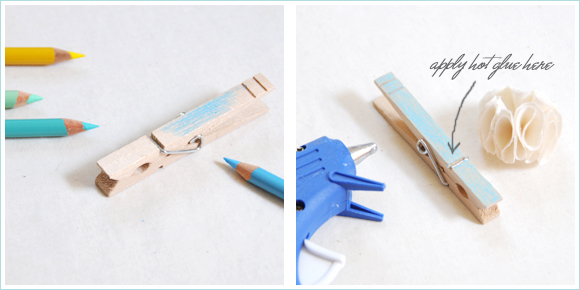
- Rub the side of your colored pencil all over the surface of your clothespin until it is coated with color and then smudge with your fingertip to soften. This will give your clothespin a charming effect that looks a lot like vintage paint.
- Apply a small dab of glue with your hot glue gun onto the clothespin as shown in the photo above. Carefully attach your pom pom flower onto your pin by pressing it onto the hot glue.
- Clip on inspiration wires, use as gift tag holders on presents, place card holders at your wedding reception or next party, etc.
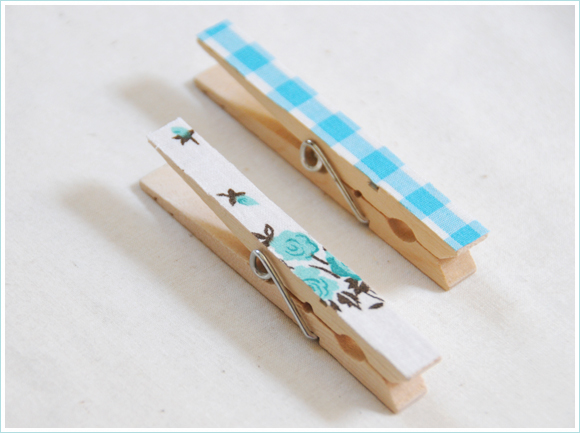
Version two - Fabric-covered clips: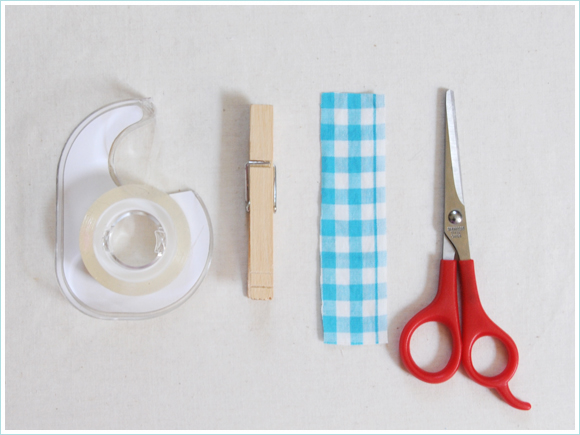 These clips are even easier to make than the first version. A set of 10 can easily be made in less than 10 minutes. Fun!
Supplies needed:
- Standard wooden clothespins - generally found in the laundry supply section at stores such as Target (about $3 for 100).
- Fabric scraps in solid colors or prints - light-weight cottons will work best.
- Double-sided tape - permanent
- Scissors
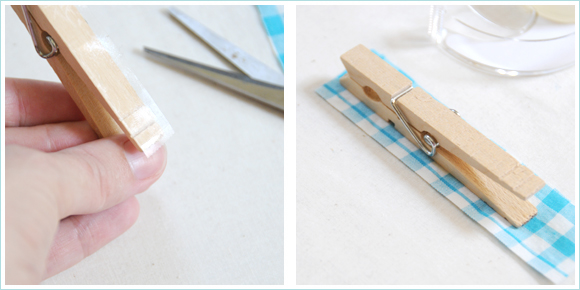
- Pull out a strip of double-sided tape that is as long or slightly longer than your clothespin. Attach it to the surface of the clothespin making sure to keep it free from bubbles or creases. The tape should be lined up evenly along one long edge so that the excess hangs off the other sides (seen in the photo above). Trim off excess using your scissors - this works best when the tape-free side is facing towards you while you cut.
- Place your prepared clothespin tape-side down onto the back side of your fabric (make sure the right side of the fabric is facing down for this step so that it will be displayed correctly when you are done). Turn over and use your finger to press and smooth the fabric onto the tape. Cut excess fabric off all sides - this works best when the fabric-covered side is away from you while you cut.
- You're done!
I hope you will enjoy making your own fancy clothespins. And please feel free to share this project with your friends and family (and blog readers)...maybe you can have a little craft party and make a bunch! Enjoy! xo Ez
 47 Lovely Comments | Email Article | found in D.I.Y. + Projects, Gift Giving / Wrapping Ideas, Tutorials Print Article | Share This |
  | by Ez
Reader Comments (47)
this ROCKS! i've been pimping my clothepins with japanese masking tapes but NEVER thought of just painting them with crayons. GREAT idea. so simple! the texture is awesome.
These are too cute!! I have to share this link!! Thanks!
these are just as lovely as easy to be made! LOVE! I'm gonna make few of them! oh and the flowers are sweet! trying them too! xxx
These are too cute & I enjoy an easy project. Love the idea of using them for 'inspiration wires' and might do just that!
SO adorable hun! I love these....such a sweet idea!
xo
Melis
Sweet idea !!!!
Marce
So cute! The pom poms would look perfect with our button clips!
http://blog.fossil.com/?p=1493
What a great idea Ez! thanku thanku!!!
You are so creative!! I love the pom pom ones - and you actually make it look easy enough for someone like me to do :)
what a great tutorial...and i love all the colors you used. makes me want to go out and and get a new set of perfectly-sharpened colored pencils :)
Hi EZ, Sou brasileira e faço seus trabalhos em minha casa! Adoro todos!
I will try to write in english... I am brasilian and make so many arts that you do! I love them..
Thanks for your art.
I just pulled my tablecloth out of a tree because it blew off the drying rack on our balcony today, so when I saw your post in my reader I had to click over, lol! But I think I'll be using your fabulous DIY post to spice up my kitchen! SO CUTE! (really, am I surprised?!) Thanks!
Love it!
very pretty photos and such a great idea!
Absolutely LUV this, thanks so much for sharing :)
What a perfectly *lovely* idea! :D
Adorable! I think I'll make a few of these for my twin girls' bedroom.
LOVE IT!! Oh man, I need scissors?? No one said anything about scissors (j/k... hee hee.. sorry I couldn't help it) What a great idea to give a row of them as a gift!
I love this idea! I recently found a huge bag full of clothespins and was wondering what to do with them; I can't wait to give this a try.
ohhh i love both of these clothespin makeovers!!! you are just full of creative ideas!!
These are lovely - if only I had all the time in the world. I will add this to my 'things I wish I could do but never get a chance to do' list. :)
seriously love these-I featured you on my blog today!
http://puertabella.blogspot.com/2010/06/clothespin-couture.html
such a simple but gorgeous idea!
When giving gifts I like to add something 'keepable' as part of the wrapping. This is such a sweet idea.
OH cute. I have a ton of clothes pins so this is awesome.
What a cute and simple idea! I will definitely be trying this out.