


Pencil Eraser Stamp Tutorial + Printable Manila Tag Freebie
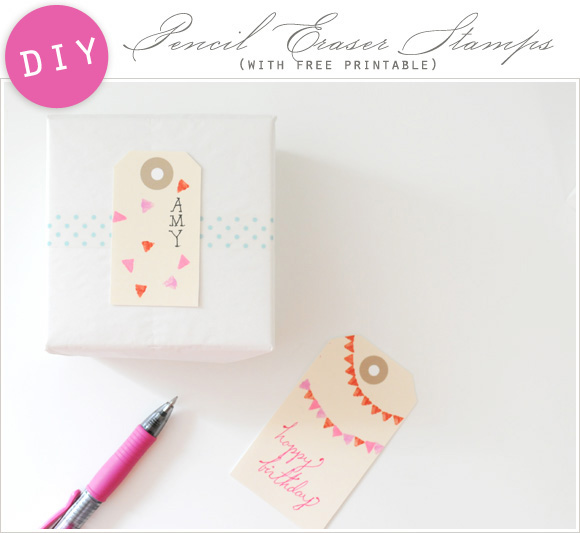 Several months ago I got bit by the stamp carving bug (so much fun), but until yesterday I hadn't had a chance to unpack my supplies following my move. While blogging yesterday I had a random recollection of reading that you can use pencil erasers as mini stamps, so I thought I'd give it a go and share the results with you. I'm happy to say that the project turned out well and was super easy. For my first version I used some manila tags I had sitting around, but since I know that not everyone might have those, I created a free Printable "Manila" Tag download for you all to use with the stamp tutorial below.
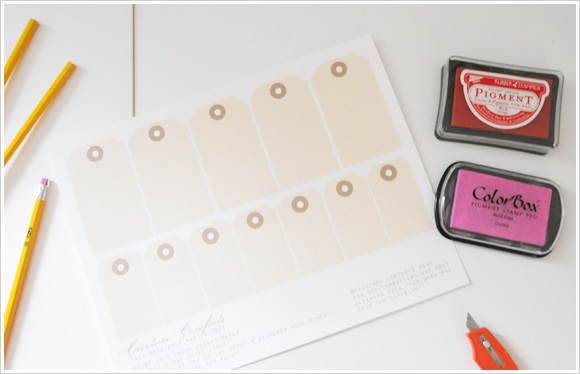 Supplies Needed:
- Standard pencils with unused erasers
- Craft knife
- Stamp ink or acrylic paint (for this tutorial I use stamp ink)
- Fine-tip permanent pen (optional)
- Other paper goods such as gift wrap, paper bags, note card, envelopes, etc. (optional)
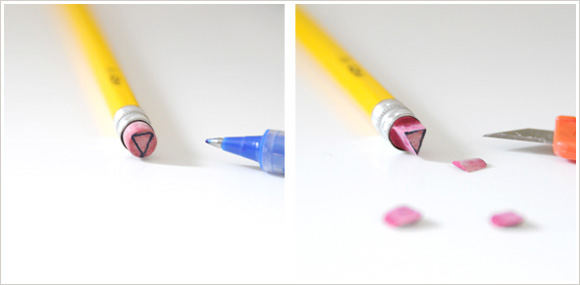
Step 1: (optional) Using a fine-tip permanent pen (I didn't at first and had to start over) create a triangle on the eraser tip. Try to use as much of the space as possible.
Step 2: Using your craft knife cut straight down along each side of your triangle outline until your blade meets the metal portion of your pencil. Please use extreme caution during this step. I really don't want anyone to cut themselves on my account. Remove the three pieces that surrounded your triangle shape to leave the triangle stamp exposed.
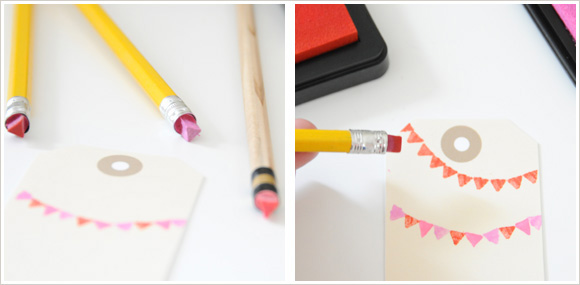 Steps 3: If you will be using multiple colors of stamp ink, you will want to cut enough eraser stamps so each color has it's own.
Step 4: Begin stamping. Press your eraser down firmly in the stamp ink and then stamp design onto your tags in a pattern that you like. Erasers can break with too much pressure, so practice different levels of pressure until you find the amount that feels right to you.
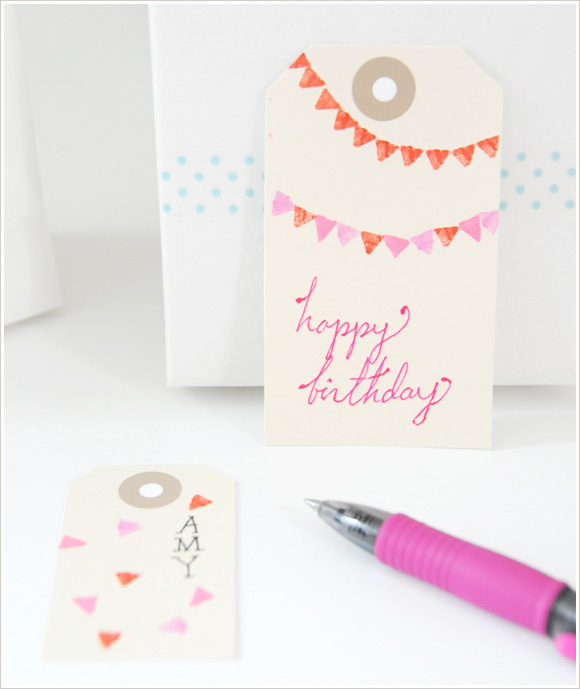
Be creative and have fun. Triangle shaped stamps can be used to create so many different designs. Experiment! A few ideas: Pennant garlands, flags, teeth, grass, leaves, trees, waves, feathers, geometric designs, etc.
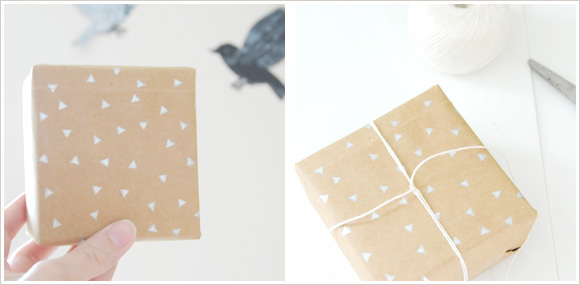 Gift wrap idea: For some easy gift wrap I used a paper grocery bag and stamped a random pattern of triangles using silver stamp ink, then to keep with the simple theme I tied some plain grocer's twine around to finish the gift.
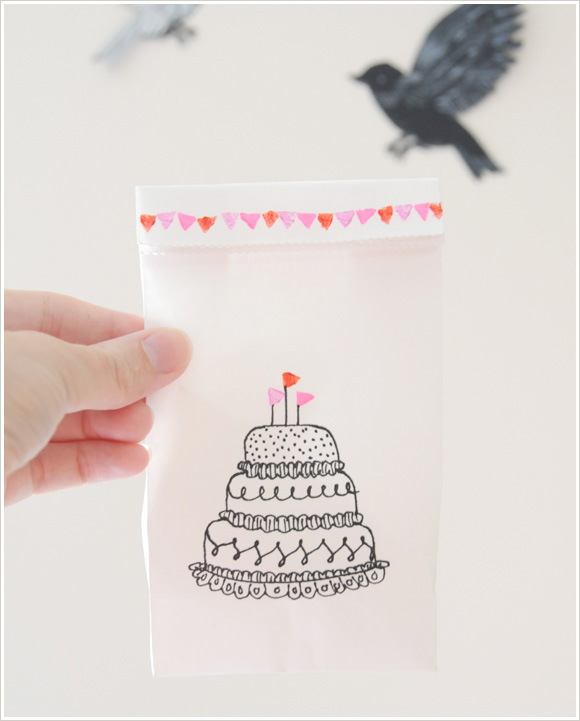
You can use stamps to add interest to little doodles. On this paper gift bag I sketched a little cake using a fine-tip permanent pen and then stamped some wee flags on top. I filled the bag and then finished the design with a pennant banner along the top fold.
I hope you will enjoy making some stamps of your own. I'd love to see your results if you do. xo Ez
Psst...I will be sending out my first newsletter shortly, and if you haven't signed up yet, I hope you will (subscription form can be found at the bottom of the right-hand column). In my first mailing today, subscribers will be receiving a bonus free download as well as a chic for cheap round-up. Don't miss out.
If you'd like to share the tag printable on your blog (hurray), please be sure to link to this post directly and do not host the actual download on your site. Thanks so much! I encourage creative personal use of all my printables. The design/concept is for non-commercial use.
Credit: The paper birds that are seen in the background of a couple of the photos were custom made by Nicole Licht of Astulabee.
 47 Lovely Comments | Email Article | found in D.I.Y. + Projects, Downloads + Printables, Gift Giving / Wrapping Ideas, Tutorials Print Article | Share This |
  | by Ez
Reader Comments (47)
This is so adorable Ez!
How adorable!
ridiculously cute and easy!
These are awesome!! ive been tempted to get into stamp carving but it looks sooo fiddly! Im quite inspired now though. xo
Aw what fun! Thanks for the tip - these turned out great : )
ridiculously simple and sweet :)
So sweet! I'm obsessed with pennant garlands ^o^
how fantastic! i can't wait to try it! thank you!
oh my goodness. so stinkin' clever! And so simple! thank you so much!
I love this. I'm going to turn my pencil into this right now :)
So cute and adorable! I love your doodle designs :)
~Kristen
absolutely love this!
i'm going to make rehearsal dinner name tags (we're having our dinner at a mexican place--perfect!) and make bookmarks for my 5th graders to have over the summer!
i already made my pencil stamps and tested them out!!!
Oh, wow, what a great idea. Awesome!
So stinkin' cute Ez! Love the freebie as well - thank you!!!
I am just finishing up a project for a soon to arrive baby girl and thought I need to make a cute tag for the care instructions. Thanks for the inspirations!
i LOVE this idea. Manila tags are so classic and can be hard to find so thank you so much for the printable file. And I've been thinking a lot about making my own rubber stamps and this seems so do-able.
Thanks for sharing!
this is so fun + delightful. thanks for sharing!
xo Alison
This is so freaking cute and actually doable for someone craft-challenged like me, so thank you!! P.S. The newsletter was wonderful. :)
Genius idea. LOVE it. Thanks for sharing.
xoxo
OMG cuteness. Genius. (as usual)
I love this! What a great idea. I am making my own tomorrow-thanks!
Super cool! I also love to carve into wine corks and you can stamp with that too...it has a cool texture :)
I love this, adorable, thanks for sharing! I can't wait to make some.
What a great tutorial... and I loved the first newsletter!
What a great idea.