


DIY Fabric Peony Flower Accessories + Gift Toppers
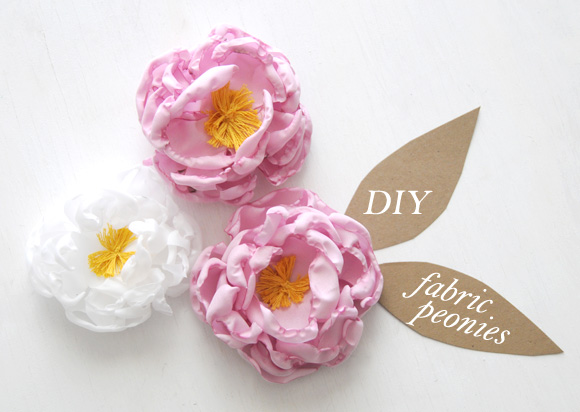
Hi friends! Today I'm excited to share a follow-up to my DIY Fabric Poppy Flower Gift Toppers that I posted this past November. For this project we'll use the same basic process that I shared last time, and then add just a few more steps to create some gorgeous Peony Accessories and Gift Toppers that are perfect for Springtime!
-------------------------------------------------------------------------------------------------------------------
This DIY post was sponsored and made possible by Method..."Clean Happy." Check out their brand spankin' new 'Cleans Like a Mother Video' featuring Noah, the official spokesinger of Method (isn't he awesome), for a closer look at their playful mission:
U.S. Residents be sure to download your $1 off coupon by visiting the "Perks" section of Method's Facebook page (limited coupons available, so be sure to gets yours soon). And Canadian residents, you can get in on the $1 discount action when you shop for Method products at Well.ca. Just use promo code "CLEANME" to redeem.
-------------------------------------------------------------------------------------------------------------------
Here's what you'll need to make your own Fabric Peony Flowers: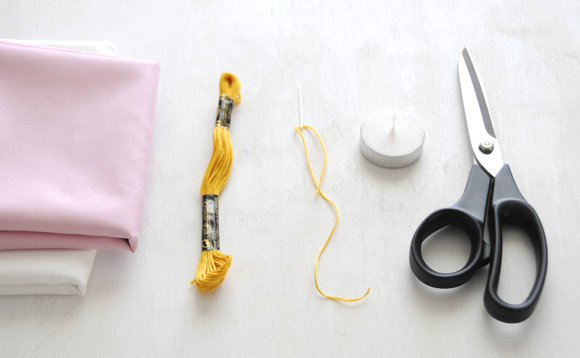
- A ventilated work space
- Candle
- Lighter or matches
- Chiffon or lightweight satin (available at fabric stores) - your fabric needs to be 100% polyester in order to work properly | peonies come in colors of white, soft to bright pinks, and vibrant fuchsia
- Fabric scissors
- Embroidery thread in yellow
- Sewing needle
- Barrette, hair comb, or headband (optional) — for hair accessory
- Blank pin back (optional) — for brooch
- Double-sided adhesive dots (optional) —for gift topper
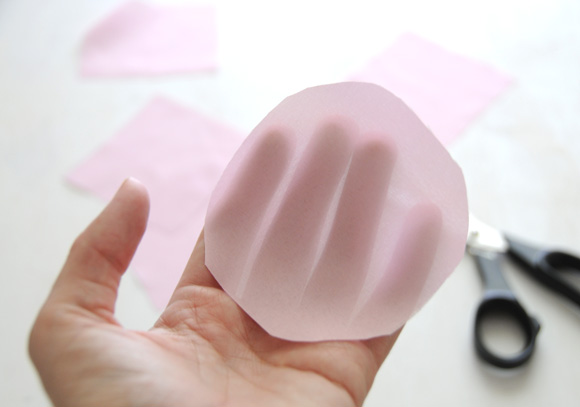
Step 1: Prep your fabric. Cut out 5 squares of chiffon (per 1 complete flower). Four should measure around 3.5 to 4 inches across and one should be a bit smaller. Snip around the edges to round them into rough circles. They don't need to be perfect.

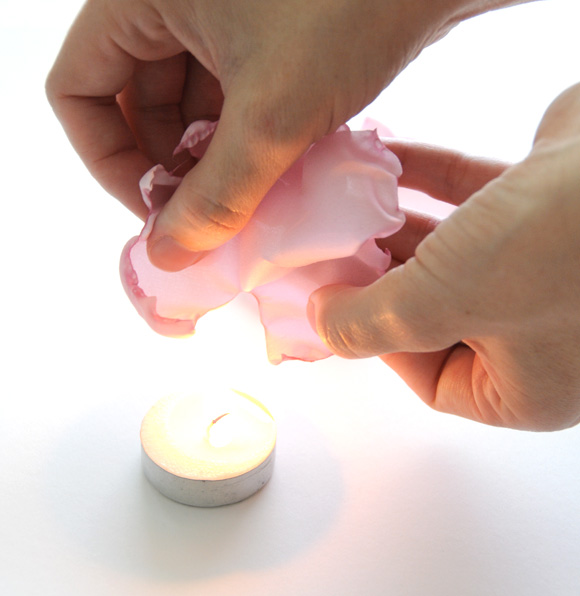
Step 2: Creating the petals. Hold one circle of chiffon close to the side of your flame moving your hand back-and-forth slowly until the edges curl up. Rotate the circle around until all edges have been curled. Be sure not to hold the fabric too close to the flame or it may burn. The fabric does get hot, so use caution as you work. It's a good idea to keep a glass of water close by just in case you need to dunk a burning petal in it. I've never needed to do this, but it's always wise to be prepared. Repeat this process with all 5 petals.
It's a little bit difficult to describe the petal making process in words, so if you'd like you can watch my quick video tutorial here for the complete process. I have done my best to write all the steps out (and illustrate them with photos here within this post, but some things are just easier to understand in action. Even without the sound on, the video should make sense. I added notes throughout the video for those of you who need to watch with the sound off. If for some reason you need extra help on any of the steps, please be sure to let me know. I'm happy to help.
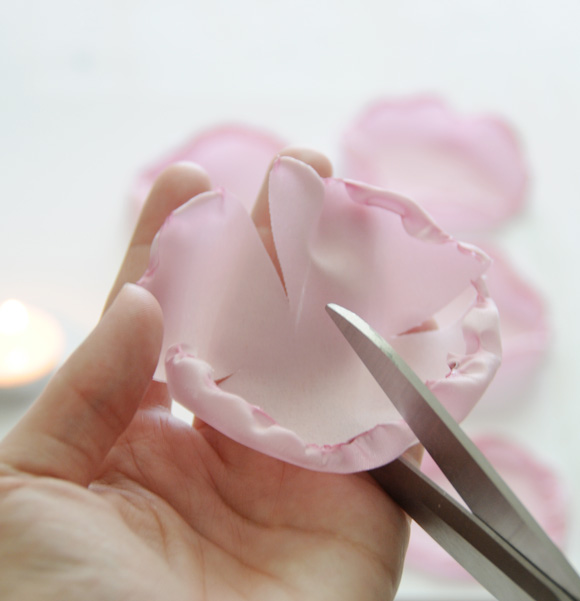
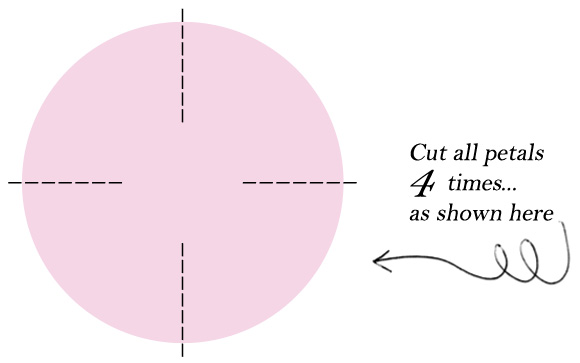
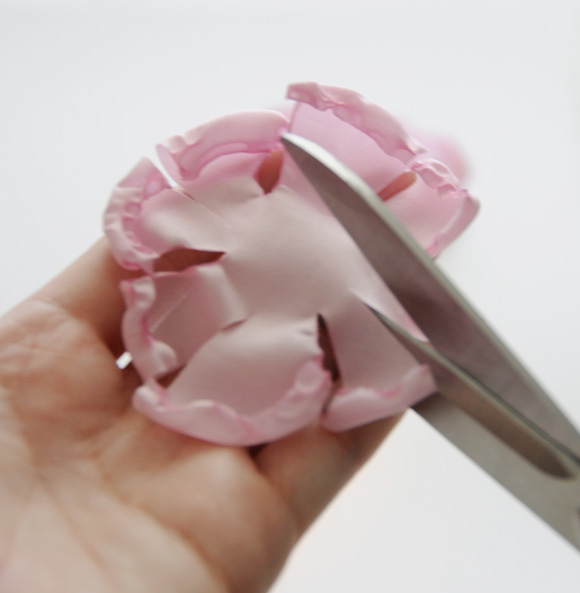
Step 3: Use your fabric scissors to snip all five of your petals in 4 sections as shown in the diagram here. Be sure that you don't cut all the way across, or your petal will fall apart.
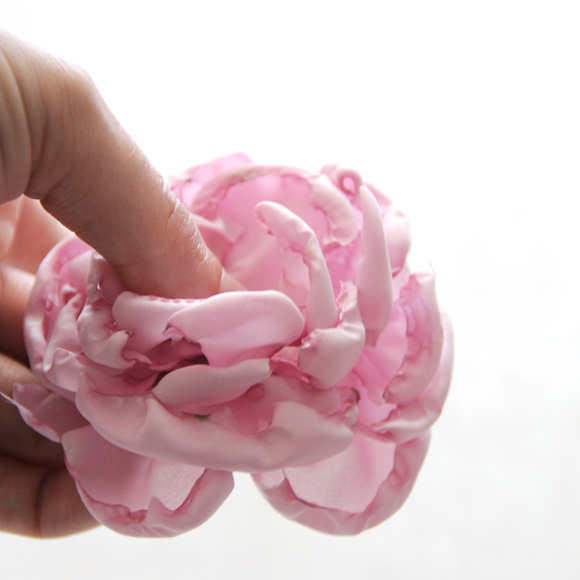
Step 4: Use your flame to curl up the sides along each newly cut edge. This time around it will help to hold the fabric above the flame, using two hands to hold the cut edges apart from one another as you work. If the petals stick together after curling you can pull or snip them apart. Repeat with all five petals. Set two larger petals and the smallest petal aside.
Step 5: Create the middle layer. Take the remaining two petals that you prepared in the last step, and snip them in four sections again...like seen in the diagram here. The black dashes are your new snip lines, and the grey ones show where you snipped last time. Curl the newly cut edges of your two remaining petals up with your candle and set aside.

;)
Step 5: Prepare a small yellow pom pom out of embroidery floss. For a quick how-to, you can check out my DIY Pom Pom video tutorial here...or follow these steps: A. Wrap a length of embroidery floss around pointer and middle finger tips approximately 8 times. Use a small piece of floss to tie around the entire looped area. B. Carefully pull looped floss off fingers and tighten knot to create a secured bundle. Knot once more for extra security. C. Snip through all loops and trim them to similar lengths as needed. D. Hold your pom pom with ends facing up and down (not side to side) and then use your fingers to flatten it down. Set aside.
Step 6: Assemble your flower. Begin by stacking the two large layers that have only four petals each inside of one another. Next, stack the two layers that have eight petals each on top of the bottom two layers. Finally, add the small layer with only four petals on top.
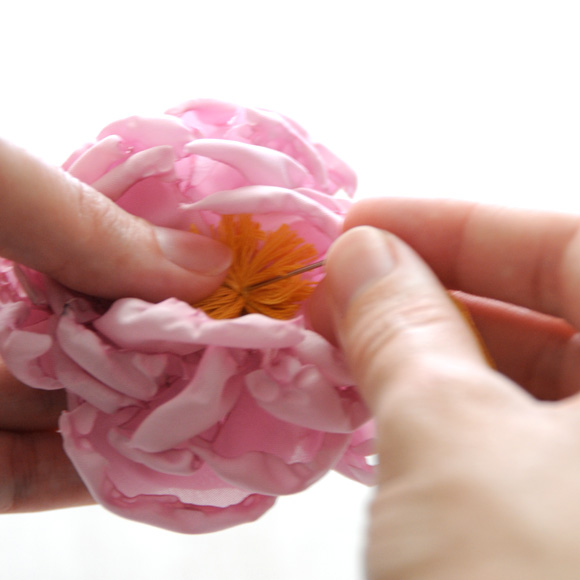
Step 7: Place your pom pom inside the center of your flower and stitch it in place. Sew through all layers several time until it is secure. And now you have a gorgeous fabric peony!
You can use your peonies for all sorts of lovely things! For example, you can use them to dress up the table at your next party...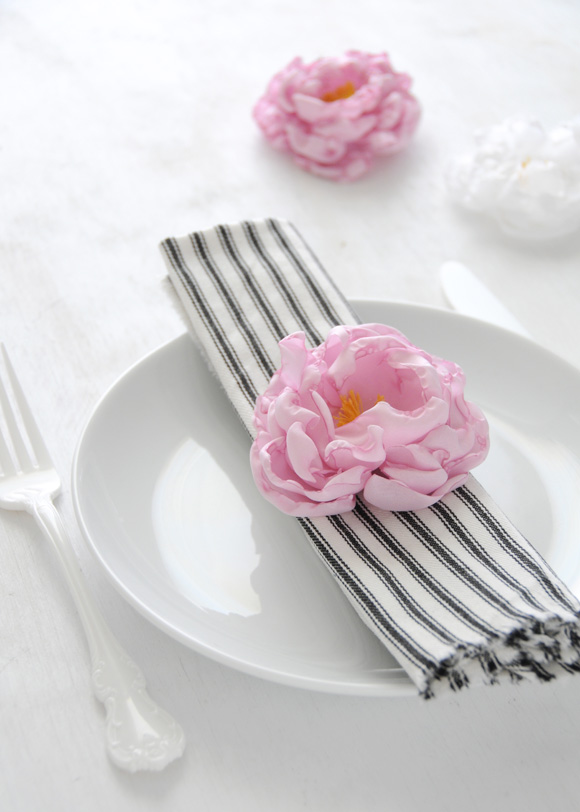
Attach one to a hair clip (stitch it on or glue it with a dab of hot glue), or add a pin back to create a cheery brooch...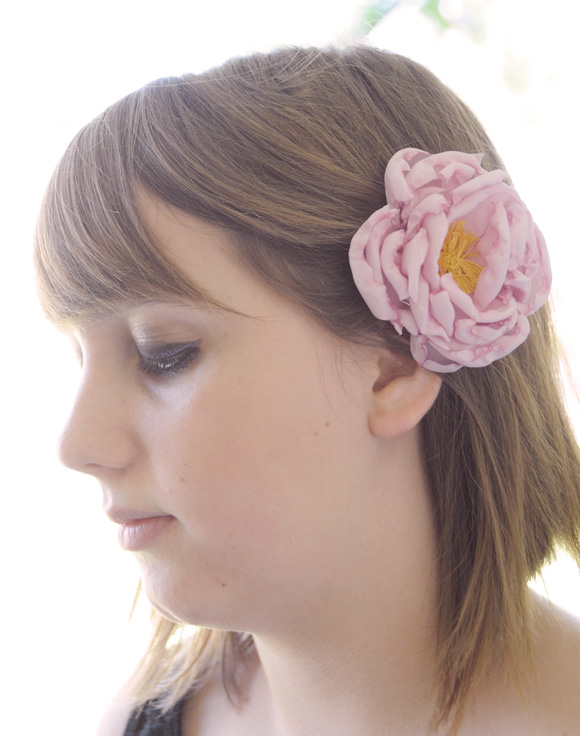

Use a couple to dress up an Easter basket:
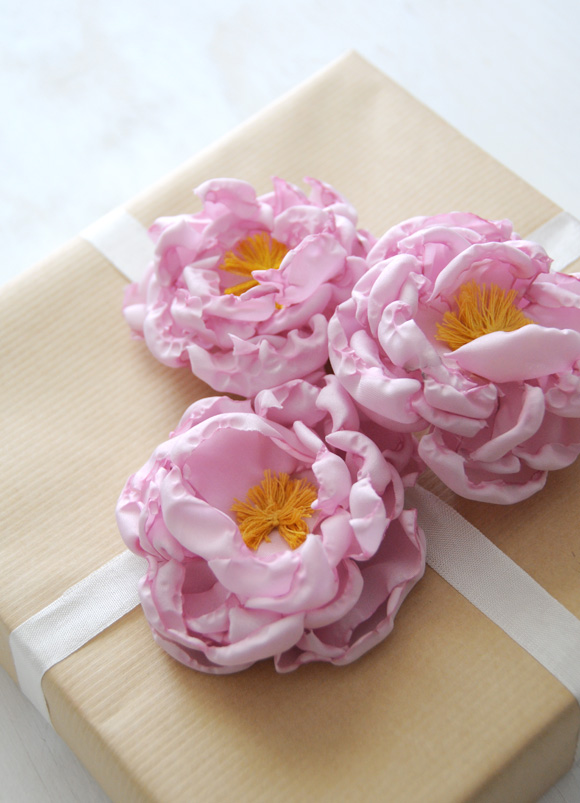
Or you can use them my favorite way...as gift embellishments! Just adhere double-sided sticky dots to the back of your flowers and attach them to your gifts: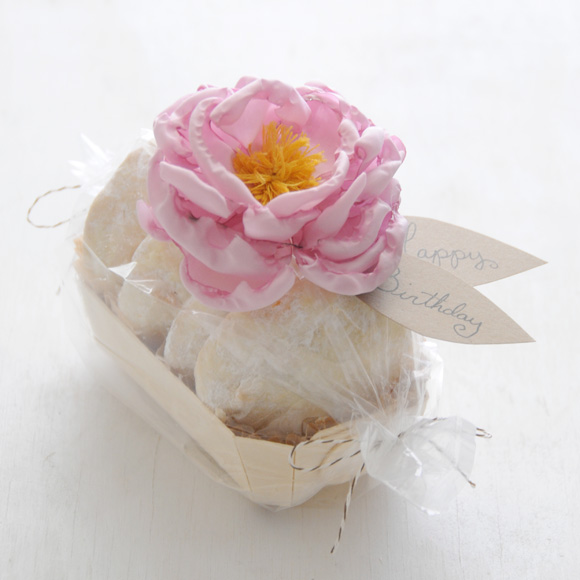
Please note: This project is not intended for young children. Please work in a ventilated work space. Never leave candles unattended and use caution near open flame. For safety, keep a glass of water or extinguisher close by in case of a flare up (this has never happened to me...but I want everyone to be safe).
-------------------------------------------------------------------------------------------------------------------
Full disclosure: This DIY post was sponsored and made possible by Method. The project and any opinions expressed are my own. If you'd like to read a little bit more about my partnership with Method, I've posted some more thoughts about it right here.
 76 Lovely Comments | Email Article | found in D.I.Y. + Projects, Gift Giving / Wrapping Ideas, Tutorials Print Article | Share This |
  | by Ez
Reader Comments (76)
LOVE this. I made one today and just posted on my blog about it. Linked back to you because your awesomeness made it possible :) Thanks so much, this tutorial is fantastic!!!
http://bebookbound.blogspot.com/2012/04/homemade-raspberry-peeps.html
My goodness these are pretty! I'm definitely going to try it out... cross your finger my house doesn't burn down :)
This is super gorgeous!
Peonies are one of my favorite flowers. Since I can't seem to get mine to grow, I think I'll follow your DIY and makes some!
i love all your diy and this is soo prety!!
Seriously pretty! I've seen this method used to make fabric poppies, but never such a realistic-looking peony! Thanks for posting it!
Wow!! ... Really beautiful!! ...Even if I never get to make the flowers, it's so pleasant just to look at your beautiful pictures... Thanks for sharing. I'm a fan of your blog!
That looks stunning! Great project.
Love the this. I am going to do some of these.
These are gorgeous!
What a wonderful tutorial, very good directions, organized, beautiful pictures in sequence, = excellent teacher.
Thank you for your ideas...your TIME.
BEAUTIFUL !!!
Directions are excellent !!
What a great tutorial- thanks for sharing this beautiful flower1
The result is pretty amazing! Thanks for the tutorial Ez =)
What a great tutorial! :D Thank you for posting. Can't wait for the daisy tutorial too. :D
They look so real!
-Lindsey
Et tu, tutu?
These are gorgeous! Making one real quick to add to my daughter's Easter dress!
Just wanted to stop back in and let you know I linked to this tutorial on my blog post today. I hope that's ok. :) http://tutusandteaparties.blogspot.com/2012/04/my-fabric-peony-flower-from-creature.html
Thanks again! Love it!
LOVE this idea. Thinking about flowers for a DIY wedding and this could be a great option for things to knock off your list in advance. Thanks EZ
Beautiful! Thank you for the tutorial!
Beautiful! I love white dishes! Can you please tell me---Where did you get the white fork? :)
Thanks Jill! The fork is by Kikkerland and was sold in a set called "Orleans Flatware." I bought them several years ago, so I'm not sure if it's available any longer. I wasn't able to find any on their site.
xo Ez
Beautiful tutorial!! The flowers are stunning. Did you use chiffon or satin? I love how your edges curled!!
Goodness, they look like they are real!!!!
maravilloso!
saludos desde monterrey mexico