


A DIY S'mores Kit
I don't know if s'mores are as synonymous with camping and Summertime in other parts of the world as they are here the U.S., but when I realized that my mom's birthday would fall during our Colorado wilderness vacation (that we are currently on) I knew I wanted to have a special surprise camping-appropriate birthday dessert for her...and decided that the best way to celebrate would be by packing along a homemade s'mores kit. Today is her actual birthday (happy birthday Mom), and my daughter and I can't wait to pull this little surprise out of our backpack later tonight (we also brought ribbons along with us to festoon the trees around our campsite so that she awakes to a birthday-worthy surprise).
On a side note: Did you know that you can make s'mores in an oven (directions found at the bottom of this post)? Neither did I! It's a good thing too, because we discovered the day before our trip that campfires are currently banned in the state of Colorado...and we just happen to be bringing along a toaster oven (yes we are really going to be roughing it... sleeping in a tent, but cooking via an outlet outside - wink).
If you want to make your own s'mores kit for your next camp out here's how I put mine together. These kits would also make really cute favors at a party or a great holiday gift (include directions for making them in the oven and your gift recipient will be especially happy). Please note that our kit was made to be gluten free, but you can substitute any of the ingredients with your personal favorites.
Ingredients needed: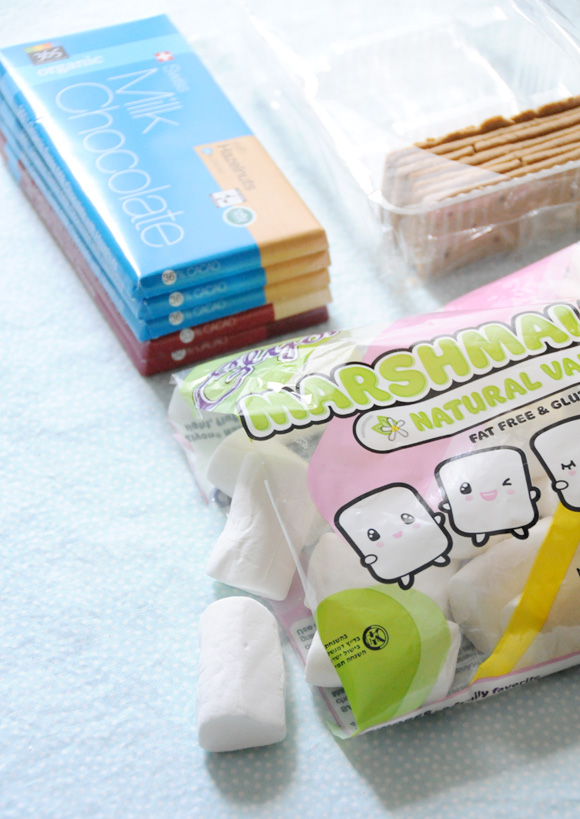
- Marshmallows — We used the gluten free, kosher Elyon Marshmallows variety (purchased at Whole Foods).
- Milk, dark or white chocolate candy bars — Ours are the Whole Foods 365 brand with both hazelnuts and almonds.
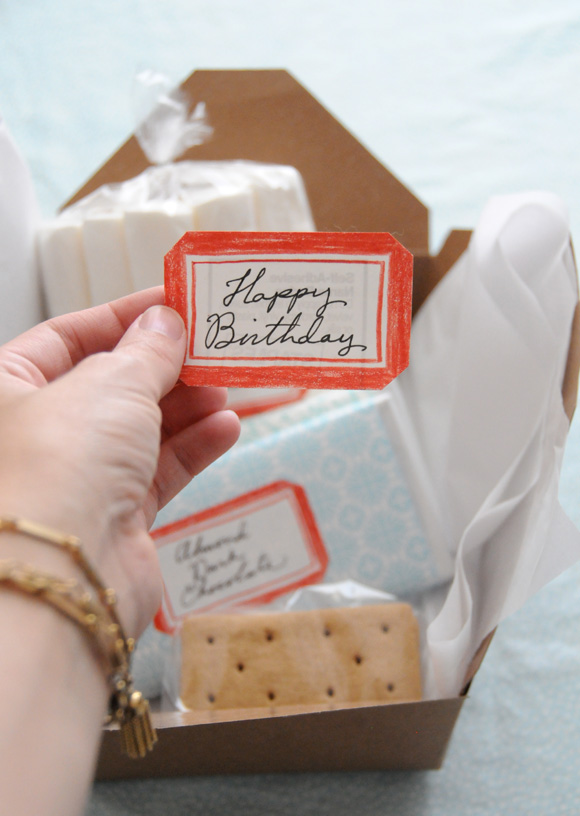
- Graham Crackers — Ours are S'moreables Gluten Free Graham Crackers (also available at Whole Foods). As you can see from the almost empty container, these were tastier than expected and I had to run to the store for a second box to finish the kit. Oops!
Additional supplies:
- Plastic food-safe bags with twist-ties — I purchased mine from Michael's craft store in the cake decorating isle. You could also use regular sandwich bags if you want to.
- Labels or adhesive-backed sticker paper — I used some name badge labels that I had laying around.
- Color pencil — I used red, but you can use any color you like.
- Ball-point pen
- Decorative paper — Standard weight paper will work best for this project. Mine is from an old set of Martha Stewart papers.
- Double-sided permanent tape (standard crafting tape will also work)
- Scissors
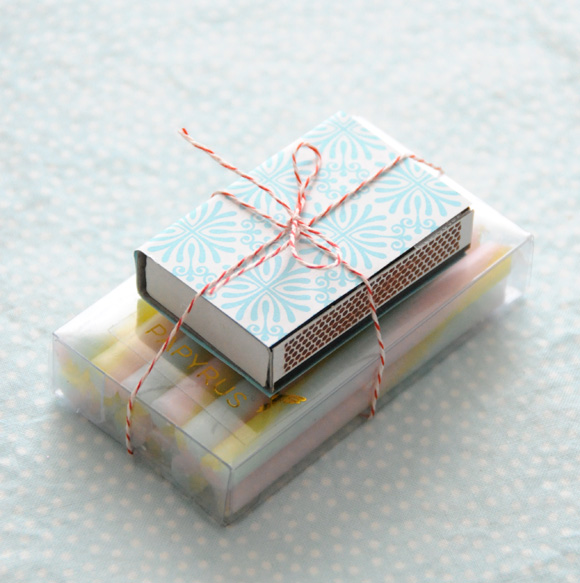
- Baker's Twine or ribbon (optional)
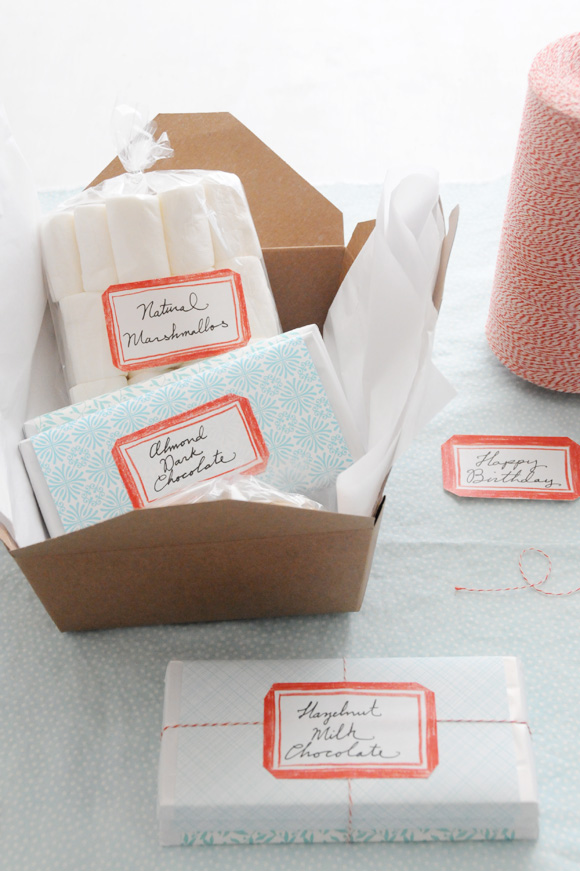
- Gift box — I used a Recycled Paper Takeout Container (similar to the kind used at Whole Foods) but you could use anything from a Cardboard Takeout Box to a basket for your kit.
Making the labels:
I had so much to do on Sunday to prepare for our trip, so making fancy labels wasn't really a possibility. Instead I just decided to used what I had on hand and quickly made up these little vintage-inspired labels by tweaking some adhesive name badges that I had in my craft closet.
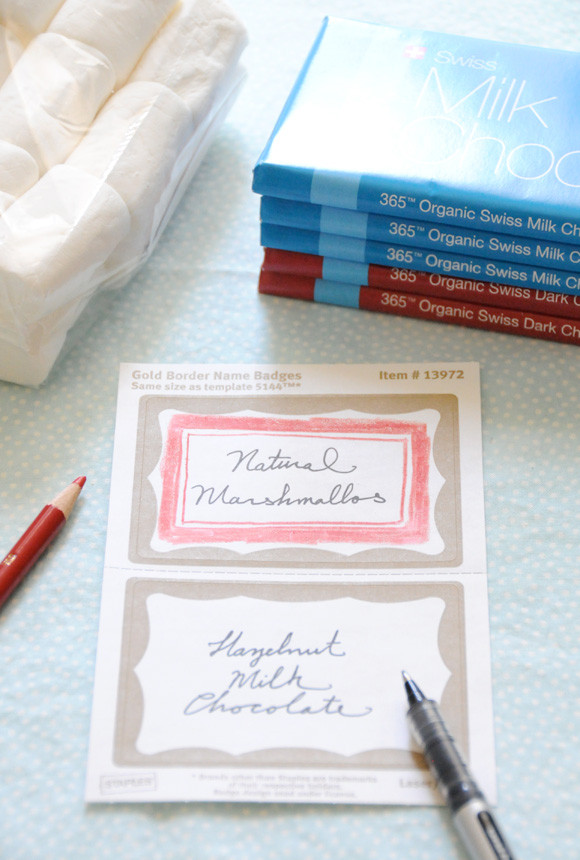
To make something similar, Just write your desired text in the center of your tag using a ballpoint pen (yes, I misspelled marshmallows - ugh). Then draw a rectangle around it using your colored pencil. Color in around the outside of the line to create a wide enough border (don't worry about being too precise, you'll be trimming around the outside edges soon). Draw a thinly-lined frame on inside of your large border (optional).
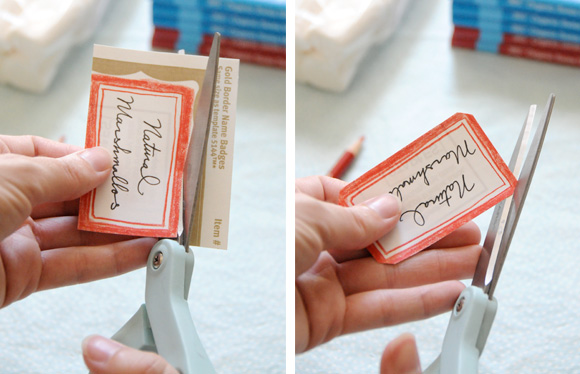
Use your scissors to cut around the outside of your label. If you'd like you can trim off the corners of each rectangle to create a more bevelled tag look.
Wrapping the chocolate bars: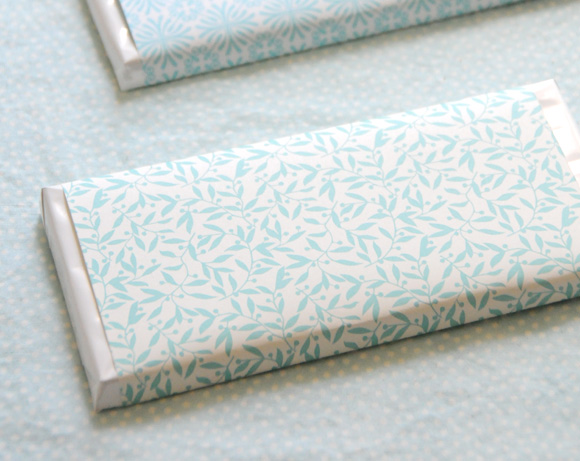
You don't have to wrap your chocolate bars in decorative paper, but if you're making a gift out of your kit, it really helps to bring the whole thing together and make it feel gift-worthy. Because this kit was for my Mom, I decided to remove the exterior paper manufacturer labels on the chocolate bars and wrap my decorative paper bands just around the white interior packaging for a more uniform look. If you are creating kits for people who may have dietary concerns or allergies, it is best to either wrap the entire bar (original packaging intact), or cut out the ingredients portion of the wrapper and include it somewhere within your kit. The same thing applies for the other food elements of your kit.
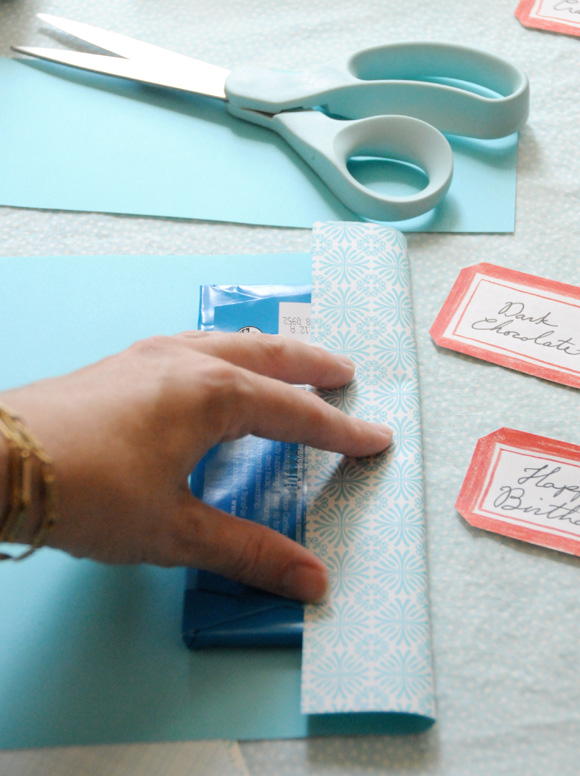
To create your chocolate bar wrap, lay a candy bar face down onto the back side of your paper. Fold one side of the paper up and and around the edge of your bar, and crease. Hold in place as you fold the opposite side in until it overlaps your first fold. Use scissors to cut off excess paper. If you are covering multiple candy bars for your kit, use your first paper band as the template so that you can quickly and effortlessly cut out your remaining wraps.
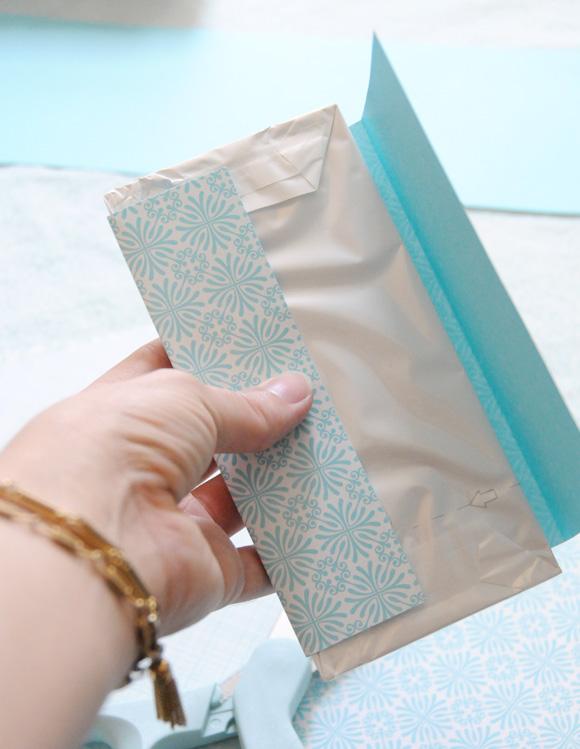
Using a piece of double-sided tape, attach one side of your paper band to the back of your candy bar (lining the creases up along the edges of the chocolate). Bring the opposite side across so that if is wrapped tightly around your candy bar, and then secure with double-sided tape. Attach your handmade labels as you go so that you don't lose track of which flavor is which (that happened to me in the beginning).
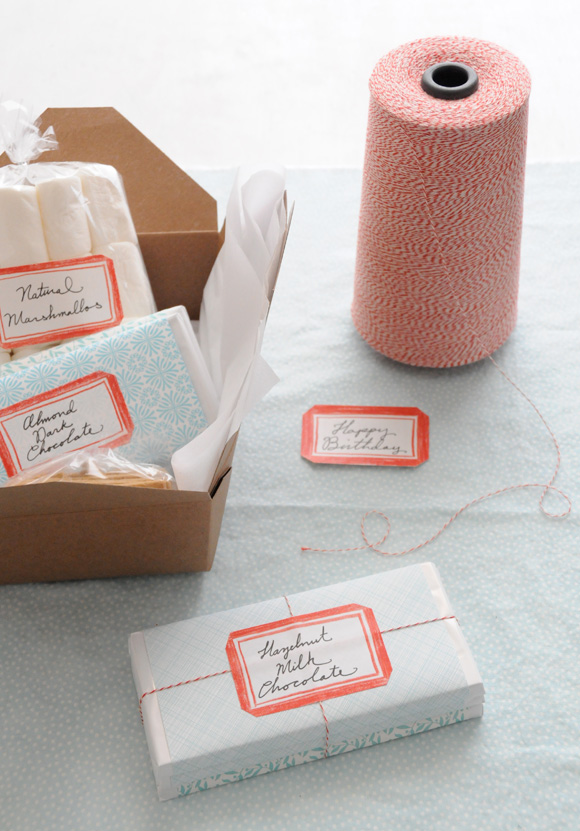
To finish your kit, use baker's twine to group together the chocolate bars if you'd like. Repackage marshmallows and graham crackers in food-safe plastic bags and seal with twistie ties. Label all bags with your remaining decorative labels and arrange all items inside your gift box or gift-giving container. Attach a gift label (maybe even include some birthday candles and matches) and you're done!
I'll let you know how my mom liked the s'mores kit next week when I'm back from my trip. And I hope you'll have fun creating a kit like this for a sweet tooth in your life sometime soon. xo Ez
Directions for oven-baked s'mores:
- Pre-heat oven to 350ºF.
- For each s'more, set down two graham crackers onto a baking tray (I covered mine with non-stick aluminum).
- Top one cracker with a square of chocolate and the other with a marshmallow.
- Place in the oven and heat for 1-3 minutes, or until marshmallow is lightly browned and puffy and chocolate has begun to melt slightly.
- Remove from heat and allow to cool for a moment. Place the marshmallow-topped cracker onto the chocolate-topped cracker and eat.
Additional Sources: Papyrus Birthday Candles (purchased at Whole Foods), Mini Matchboxes from our local grocery store (covered in coordinated decorative paper).
 27 Lovely Comments | Email Article | found in D.I.Y. + Projects, Food / Recipes, Tutorials Print Article | Share This |
  | by Ez
Reader Comments (27)
I would love to be able to make s'mores but as someone else said you can't get graham crackers here and no one can tell me what an Australian equivalent would be
I may be a bit late in sharing this information but digestive biscuits are the same as graham crackers and are readily available in the UK and Aus. Hope that helps!