


DIY Simple Custom Painted Mugs for Teachers + More

If you've been wanting to try your hand at customizing dishes using the permanent Porcelaine paint markers (made popular by Martha Stewart), then here's a fairly simple little project that you might enjoy: Custom Painted Mugs:

All you'll need for this project is a light-colored oven-safe mug (it will usually say on the bottom of the mug)—I bought mine at Target for a few dollars. You'll also need Pebeo Porcelaine 150 paint markers in assorted colors (fine or broad tip). You can either purchase the air-dry or bake-dry version (my directions are for the baked type). My pens were purchased at a local Michael's Craft Store, so check your local craft store for availability.

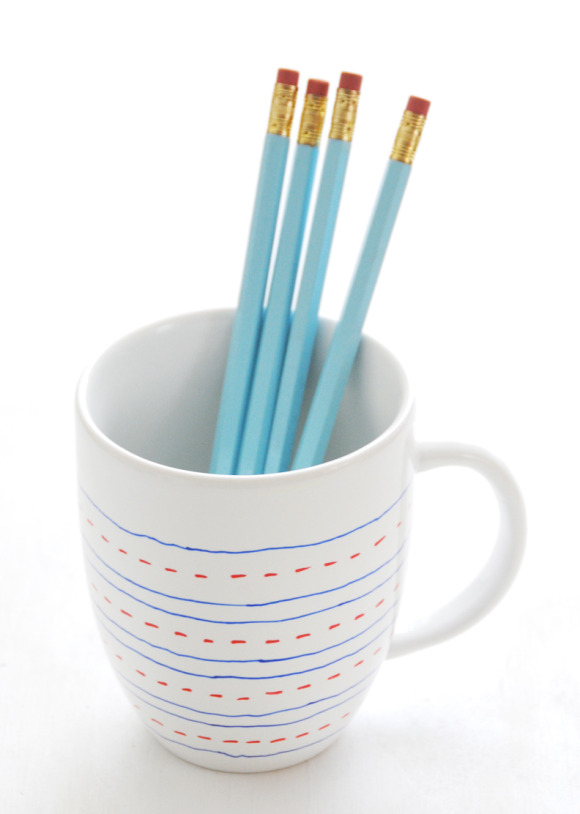
After priming your pen (according to directions on the side of the pen) begin drawing your design on your mug. I decided to create something reminiscent of handwriting paper (graph paper would have been cute too), and it was super easy to draw (just lines and dashes). If you mess up you can quickly wash the design away with a bit of warm soapy water and start again. I purposely left my designs loose and kid-like—as that seemed to fit the whole "teacher gift" theme best (also because it's hard to draw perfectly straight lines on a rounded surface). You can be as precise as you'd like. It may help to hold your mug upside down while you draw your design, or put your hand inside the mug to hold it and keep your fingers from smudging your design.
Of course your mug can look however you'd like. Simple designs/patterns will be easiest to achieve and the effect is still really nice. These would also make awesome Father's Day gifts (kids can sign their own names or contribute to the design), graduation gifts, etc. On the teacher's mug you could also have your child write the teacher's name along the lines (I recommend drawing the lined-paper design, allowing it air dry for a few hours, and then handing it over to your kiddo to write on with a contrasting colored marker (like black).

Bake (or air dry) according to the directions on the side of your pen (they may be different than the ones I noted above in my illustration). The most important tip I discovered is that when cooking your mugs it is safest to allow them to heat up along with your oven (as opposed to putting the cold mug directly into a hot oven). Once the cooking time is over, turn off your oven, open the door and allow your mug to cool down with the oven until it is a comfortable temperature to handle. Fill with an assortment of goodies such as handmade sweets, gift cards, etc. and enjoy giving a gift that is one-of-a-kind. xo Ez
Looking for a few more gift ideas for teachers? Check out my related posts right here (includes free printables).

 23 Lovely Comments | Email Article | found in D.I.Y. + Projects, Tutorials Print Article | Share This |
  | by Ez
Reader Comments (23)
This is lovely! I can imagine these being lovely done by younger children for family, and also with embroidery-like flowers drawn on to stash sewing supplies in.
Awesome! Thanks for the idea!
Oh wow, love these! I'll be heading to Michael's this weekend, and these pens must be on my list! Thanks, Ez!
Just a thought--if you want to draw a straight line, you could always use some painters' tape or a flexible ruler.
That said, I'm a big fan of the slightly imperfect, hand-drawn squiggly line.
i love your sweet illustrations for this tutorial. what a great gift idea for well deserving teachers!
Thanks for your comments guys.
@Katie - That's a great tip! I actually bought painter's tape to use for this project, but ended up going without once I realized how long it would take to tape-off all the lines. ;-) But for precision, it would be awesome! Thanks! xo Ez
LOVE! Great idea for Father's Day....I think I'll work on some with my kiddos this weekend: one for the 1st grade teacher, one for the preschool teacher, one for Dad, one for each of 3 Grandpas...and one for ME. I'd better get out there and get some mugs! P.S. - I adore your hand drawn lines, gives it such a delicate, illustrative quality.
Want to do this today. Thank you...I didn't know there was such a thing as a porcelain pen.
A strip of cardstock wrapped around the mug for straight lines?
Great idea and easy enough for older kids to get in on the action.
Ooooo I love it! I'm going to have to get some of those pens now :)
What a fun idea! I want some for myself...
This is fantastic!!!
great great idea, I like a lot!!!!
congrats and greetings from Spain,
elena
I adore this post! Thanks for sharing!
Happy day, friend!
Thanks for the great idea!
Pens are very powerful yet so creative! Good job, it was so impressive!
These are beautiful! I can't wait to try this myself...
Thanks for the inspiration!
do you have a trick for keeping your pen flowing smoothly? I've tried using these pens for several projects, and I never get beautiful, even ink flow like in your photos above!
I love this idea, and tried to make it for my little sister's graduation (as an elementary school teacher!), but my first attempt was not giftworthy. I'm going to try again though :)
Wonderful, as you always do! I featured your DIY on my blog!
http://blog.shopdirtylaundry.com/posts/2011/6/10/19-the-dirty.html
I love your mugs and thanks for the tutorial! I am always looking for nice plain white mugs. Can you tell me where your are from?
Love it - so subtle and great for back to school !
http://graciediver.com/diy
I think this is a wonderful idea! I thought this would also be great for Christmas, with snowmen and snowflakes and all that jazz.
Seems great and easy! Have been thinking of doing something like it ! Didn't know about the markers!
Thanks!!
How do you know if a mug is oven safe? Are most mugs oven safe? Thanks!