Partners

Newsletter Sign-up


Lovely Sponsors


Currently Obsessed

Subscribe

Lovely Press

Disclaimer

From time to time Creature Comforts may include affiliate links to products featured in their posts and/or affiliate banner ads. However posts and featured products seen on Creature Comforts are never controlled or selected by advertisers or affiliates. Featured items are products that we personally like, and would share regardless of affiliate partnerships. If you choose to purchase an item that has been featured from an affiliate link or ad banner, we may receive a small commission on that sale.

Privacy Policy
Hosted by

Friday
Jan302009

Valentine Freebie: Iron-on Pillowcase Transfers

Hello lovelies and happy Friday!
I thought it would be fun to leave you all with another Valentine's Day freebie / project so that if you feel inspired, you will have time to make it for your special someone over the weekend.

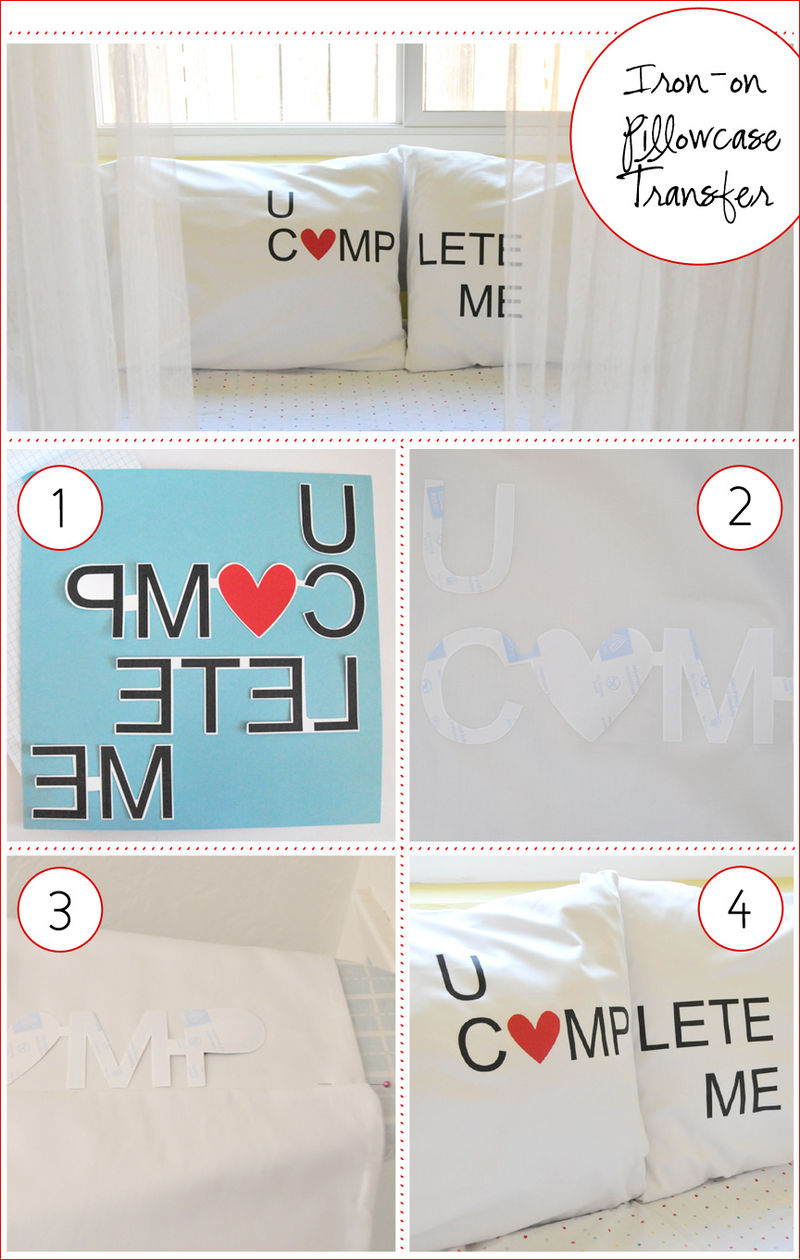
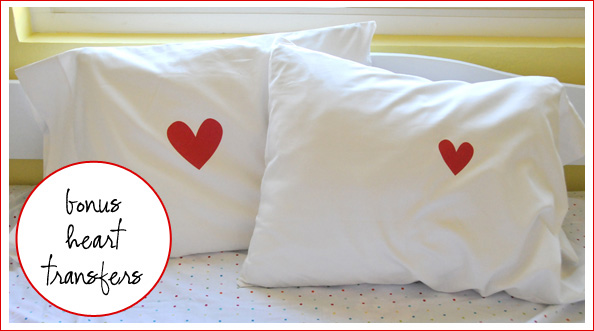
What is sweeter than loving words to rest your weary heads upon... especially when they spell out something as endearing as "U COMPLETE ME" when placed side by side.  All you  have to do is print the PDF file onto iron-on transfer paper and adhere them to your pillowcases.  Two additional hearts (one large and one small) included with the text file can be ironed onto the reverse or onto anything else that you wish.

You will need:

  • Two pillowcases (light colors will work best)
  • Iron-on Transfer Paper for light colored fabrics. (tee-shirt transfer paper).  Be sure that it is the correct type for your color printer.  You will need two sheets.
  • Color printer
  • Scissors
  • Iron (no steam)

How to:

Download Free Printable Valentine Iron-on Transfer

  1. Print the PDF onto transfer paper.  Cut out carefully around the text, leaving the letters attached with a small amount of the transfer paper (see image one for how I did it).  Be careful not to scratch the surface of your transfer paper while working.  Note: the text will print backwards.  It will read correctly when applied to your pillowcases.

  2. Lay your pillowcases out on a flat surface and line the words and letters up on your pillowcases with the paper-backing facing up (be sure that both sides of your text will line up to read correctly once the pillows are in use).  To give yourself an easy guide for lining up the two sections of text simply fold pillowcases in half lengthwise and insert a pin to mark where the center is.

  3. A trick for ensuring that your text is straight before ironing, is to fold the lower half of your pillowcase up to the center (where you inserted the pin).  The bottom edge is now a nice straight guideline for you to arrange your words along.  I arranged my letters approximately 2 inches away from the outside edge so that when the pillowcase was stuffed the text would still be visible.  Once everything is straight iron your text following directions for use found inside your iron-on transfer paper packaging.

  4. Allow design to cool for 2 minutes before carefully removing the paper backing.  For optimum usability and softness, wash before use.

I had a lot of fun making this for you all and hope you will love it as much as I do.  Have a wonderful weekend everyone!  xox Ez

Reader Comments (57)

we are heading to a snowy cabin upstate valentine's weekend. i might just have to sneak these on our pillows, just 'cause.

thnx for the inspiration.
January 31, 2009 | Unregistered Commenterlenny
these are adorable! who wouldn't love to walk into their bedroom and be greeted by them!
January 31, 2009 | Unregistered Commentersecond storie
This is the absolute best download ever. I love.
January 31, 2009 | Unregistered CommenterMelanie
this is awesome.and how cool would that look on two tshirts?
January 31, 2009 | Unregistered Commenterelise
So adorable! Thank you so much for sharing!!! I love freebies!

-Kristamissmackdesigns.blogspot.com
January 31, 2009 | Unregistered CommenterKrista
this is the coolest! you're so sweet!!!
January 31, 2009 | Unregistered Commentermandie segura
This reminds me of the Hershey's Kisses bed sheet I had as a tween. One case said Hers and the other said Hey's and it was neat how the two made up the whole pattern!...

um... sorry for the flashback...kind of weird that I had chocolate themed bed linens but they were a birthday gift. : )

January 31, 2009 | Unregistered CommenterKatherine McKamey
Oh no way! Gorgeous and so, SO creative! Thanks so much for sharing this amazing project and pattern. I'll be linking.
January 31, 2009 | Unregistered CommenterRachel
This is an adorable concept. Well-done!
January 31, 2009 | Unregistered CommenterAt Home with Kim Vallee
Hello and thank you for this fab DIY posting!

This is a perfect V'day pressie idea, how unique!

xx
just found your blog thru twitter. love the iron-ons. you've earned the "found objects" on my little blog :) and added you to my link love page. thanks!
February 1, 2009 | Unregistered CommenterAimee
this is brilliant!!
February 1, 2009 | Unregistered Commenterclaudine hellmuth
LOVE IT!! Too cute, stopped in with one pretty thing, will be back for sure :)
February 1, 2009 | Unregistered CommenterTricia
so sweet! love it!
February 2, 2009 | Unregistered CommenterLayersofMeaning
eeek! Ez this is SOOO cutE!!
February 2, 2009 | Unregistered CommenterEleanor L.
These are so cute. I'll have to link to this for sure!
February 2, 2009 | Unregistered CommenterAmy @ Living Locurto
You are incredibly creative and precious. Thank you for sharing this with the world. what a great surprise to throw back the sheets and see this!
February 2, 2009 | Unregistered Commenterdiana
That ROCKS! So cute :)
February 2, 2009 | Unregistered CommenterAim
This is so lovely that I think I have to post a link to it before Valentine's! Thanks for sharing!
February 4, 2009 | Unregistered CommenterKat
THANK YOU SO MUCH! I was hoping to do something cute (and cheap) for my hubby for Valentines and this is perfect! I especially appreciated your directions for lining everything up straight - I am horrible at that sort of thing.Thank you, thank you, thank you!!!
February 5, 2009 | Unregistered CommenterCourtney@BooksnBoys
Wonderful project!It kinda reminds me of the gift I just got my sis from http://www.snaptotes.com - photo pillows - though it doesn't quite have the same DIY appeal! I had a photo that was just perfect for it though and I think she was happy about it. I'll be trying your project for Valentines' Day, so thanks for the tip!

February 5, 2009 | Unregistered CommenterMValenti
I love this. I use iron-on often, but this is a new idea for me. And now I have a Valentine's day gift for my sweetie. Thanks!
February 6, 2009 | Unregistered CommenterKristi
DONE! in fact it is really nice and I am so very happy I made it. Not sure if I can keep it a surprise till valentine's day :P
February 8, 2009 | Unregistered CommenterMarie in Singapore
so cute!!
February 8, 2009 | Unregistered CommenterMelissa
I am SO making these - Thank you!
February 10, 2009 | Unregistered CommenterXazmin

PostPost a New Comment

Enter your information below to add a new comment.

My response is on my own website »
Author Email (optional):
Author URL (optional):
Post:
 
Some HTML allowed: <a href="" title=""> <abbr title=""> <acronym title=""> <b> <blockquote cite=""> <code> <em> <i> <strike> <strong>
« Valentine's Day - Winter Lodge Edition | Main | Today I Love: affordable art - guys edition »
Related Posts Plugin for WordPress, Blogger...