


DIY 5 Minute Tinsel Garland Wreath

A few Winters ago I was staring at a bland paper bag full of old embroidery hoops that I had picked up at the thrift store months before for a few quarters, when it occurred to me that they would make perfect wreath frames. I quickly nixed the idea of wiring greenery to them (too lengthy of a project and they would only last for a short while) and then thought of the tinsel garland I had wound up the stair banister the previous day. Perfect! What I didn't know then, was just how simple this project would turn out to be. With literally just a few minutes of your day and two supplies (tinsel garland and an old embroidery hoop or wreath frame) you can have your entire home hung with merry wreaths in no time (and you'll get to bring them out to enjoy again year after year). Have fun! xo Ez
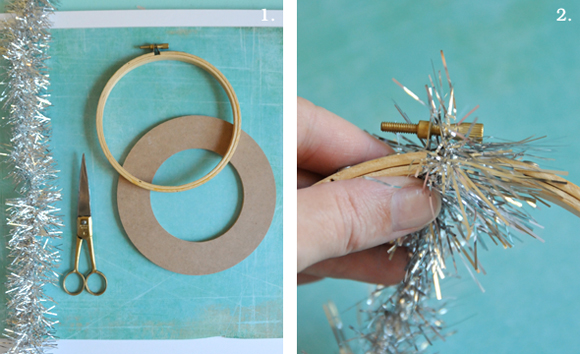
1. Gather your supplies. You will need embroidery hoops in various sizes or a floral wreath ring (from craft stores), store-bought tinsel garland (a 6” embroidery hoop uses approximately 12’ of garland), and a pair of scissors. Tip: you can use both the inside and outside of an embroidery hoop separately to create two wreaths.
2. Begin by tucking one end of the garland under the metal latch at the top of your embroidery hoop. If you are using the inner hoop or form with no latch you may wish to secure the end with a piece of tape or hot glue (optional). 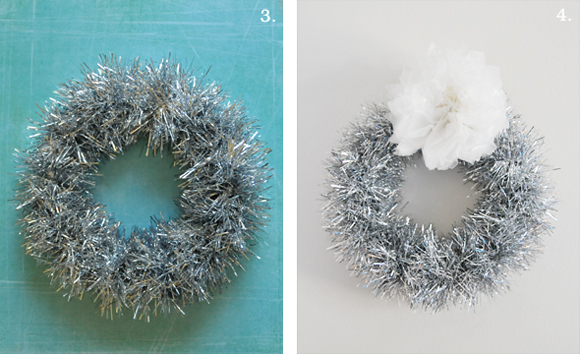
3. Scrunch up the loose side of your tinsel garland (there will be a lot of it) into a messy ball so that it is easier to work with. Begin wrapping the tinsel garland around the embroidery hoop making sure to keep the garland taught as you go. Every few passes you will want to push the newly wrapped section up towards the completed portion so that it fills in nicely and does not look sparse. Continue this process until your entire embroidery hoop is covered and you've used the full length of garland. Secure the loose end by tying it to another segment of garland along the back. Tip: if you happen to run out of garland along the way you can easily tie on additional segments and continue wrapping.
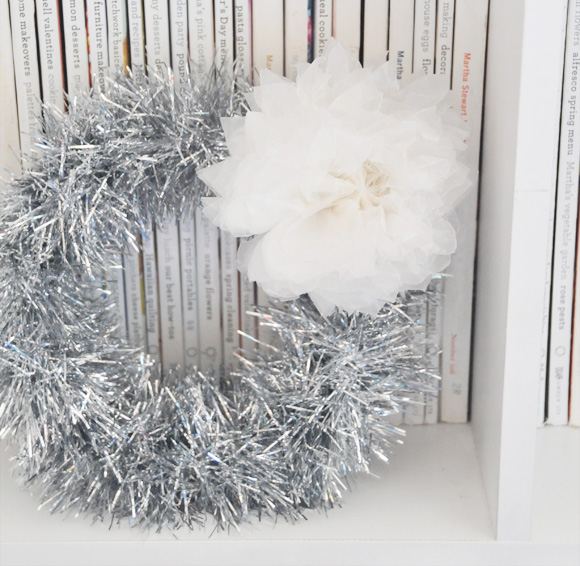
4. If you'd like to add a Waxed Paper Pom Pom to your wreath like I did here you can find my tutorial for creating your own over on our Nice Package blog. Hang your wreath and enjoy!
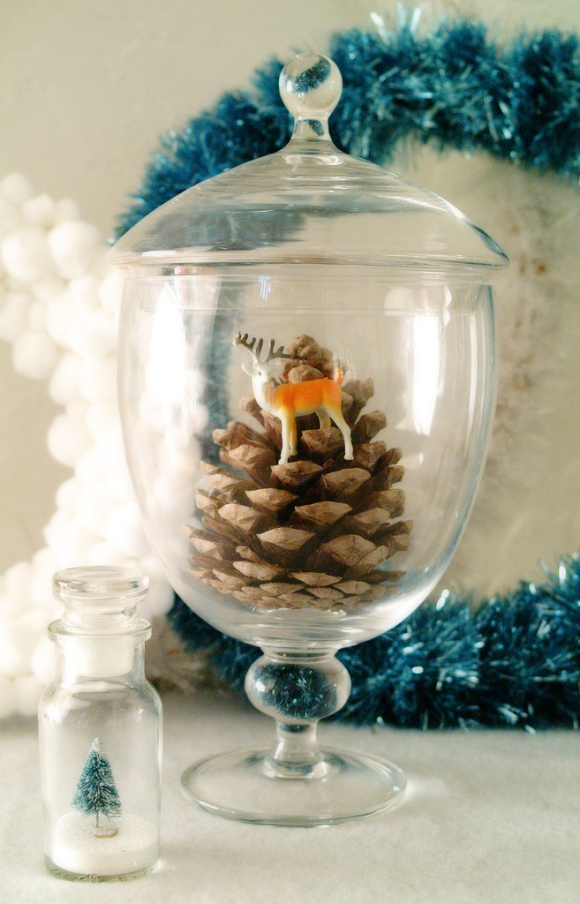
And finally, here are a few additional images of some of the original 5-minute Tinsel Garland Wreaths I made a few years ago:

 43 Lovely Comments | Email Article | found in D.I.Y. + Projects, Holiday Inspiration/Projects Print Article | Share This |
  | by Ez
Reader Comments (43)
Yey, tinsel!! It must be nearly Christmas :)
Thanks for posting this! I spotted it on Apartment Therapy yesterday and ran right out for supplies:
http://diy-my-home.com/2010/11/tinsel-wreaths/
Cute idea, but I think I'm more smitten with the tiny tree in the jar!
Lovely! Inspirational!
These are incredible! Brilliant!!!!
I just decided this past week that I'm going to make a felted garland this year to replace our old, dusty gold tinsel garland, and was wondering what the heck to do with the old one! What a great idea. Thanks!
I really love the look of this wreath and just how easy it is (or looks to make)! My tree will be a mix of silver, gold & turquoise so this will go perfectly with everything. Thanks so much, really love this!
What a great idea! Thanks for posting it.
very nice...
My take on your idea:
http://ministryofdeco.blogspot.com/2010/11/mi-corona-navidena-blanco-y-morado-para.html
Hope you like it!
Hi! I just posted my version of your wreath on my blog. Thanks so much for the idea!!
This is BEAUTIFUL! I will have to try this out for my home this Christmas. Thanks for sharing this lovely DIY!!!
This project is super fab! :) Love it! I linked at the Dollar Store Crafts facebook page: http://www.facebook.com/pages/Dollar-Store-Crafts/161233564682#!/
I love a bling-ing wreath! Was going to go full-silver garland for this one, but couldn't find any that were suitable.... and in the end really enjoyed this combo: http://candyskitchen.blogspot.com/2010/12/wishing-you-very-hippie-holidays-peace.html
I LOVE this! Simple but so pretty. I had to try it...here's my take! http://adventuresinsemiadulthood.blogspot.com/2010/12/diy-tinsel-garland-wreath.html
Thanks for sharing this wonderful project!
Christmas Holiday is coming. This project will surely help DIYers. Keep on posting!
I love how sparkly they look! I featured this on my blog today!!
I love this idea! I shared it on my blog today with a couple of other great DIY wreaths. Thank you so much for the great tutorial. I love how cute and easy this looks.