


DIY Leather-wrapped Vases and Votive Holders

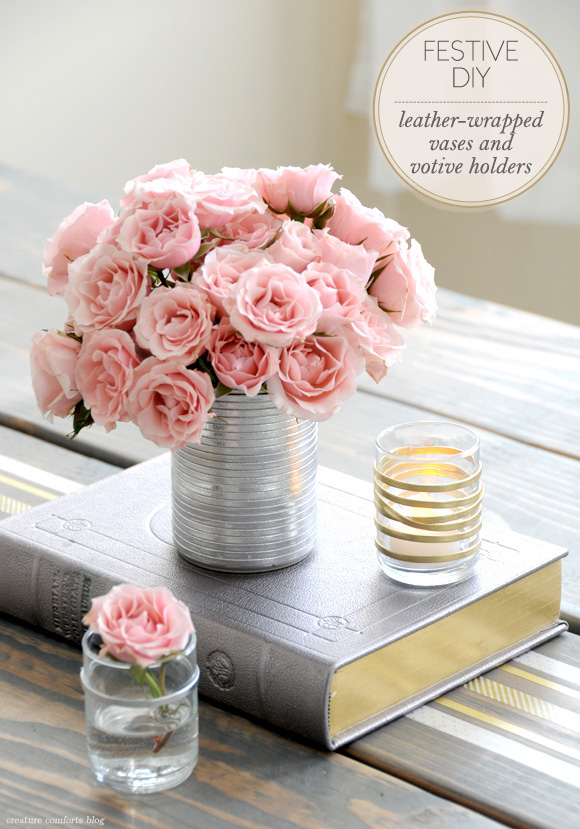
Hello lovelies! Today I'm back for another fun DIY that I created in partnership with my friends at Waverly. This time I thought it would be nice to create some table decor that will look just as lovely at a festive party this season, as it will in-use all year 'round.
Let's make some easy DIY leather-wrapped vases and votive holders!
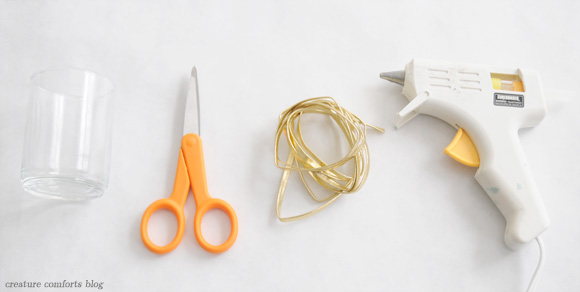
DIY Leather-Wrapped Votive Holders
Gather your supplies. You will need:
- Small glass votive holder(s) | The variety used here were purchased at Michael's
- Sharp craft scissors
- Realeather Craft Lace in Metallic Gold and / or Silver | Available at Michael's and Hobby Lobby (find additional suppliers here). Be sure that your leather cord has two flat sides (like a fettuccini noodle...not round like a spaghetti noodle).
- Hot glue gun (low heat) and glue stick(s)
- Battery-operated candles
;)
Plug in your glue gun and allow it to get hot. Begin by squeezing a small line of glue somewhere within the top 1/3 of your votive holder. Immediately place one end of your leather down into the glue and press to adhere. If the glue dries too quickly, you can easily peel it off the glass and try again.
Once the end is glued in place, wrap your leather cord around the top of your votive holder until it meets back at the starting point.
;)
Squeeze a drop of glue on top of the end of your cord (where you first started) and lay the loose end of your cord through it. Be sure that you have pulled the cord taught so that it is not drooping. Once this dot of glue has hardened (it should take just a few seconds) continue wrapping your cord around your votive holder.
You can keep your lines parallel or overlap them like I did here. If you want to create the overlapped look, just be sure to add a dab of glue under the cord anytime you will have two pieces laying on top of one another. Keep your cord nice and tight while you work.
;)
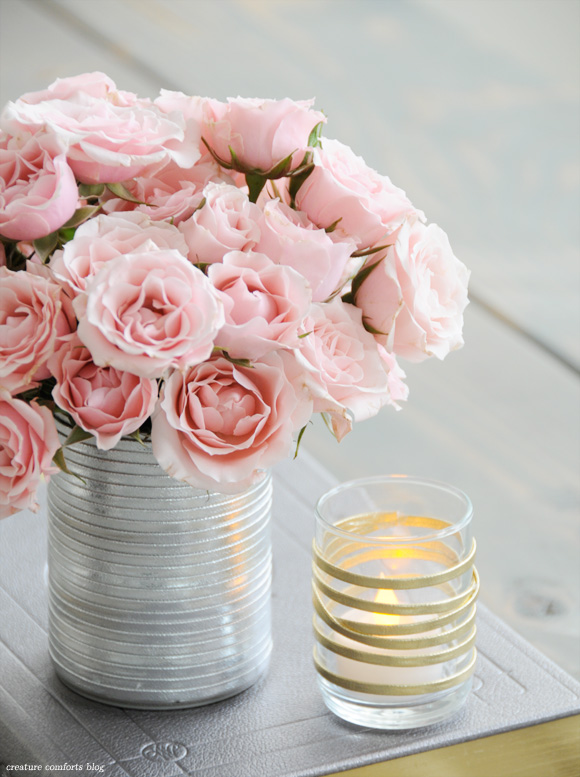
When you get to a good stopping point, add a dot of glue on top of a portion of leather that is already wrapped around the votive holder, and lay the end of your cord through it to adhere. Use a pair of scissors to trim off any excess cord. If there are any bits of dried glue on your votive holder, you can use your fingernail or the tip of your scissors to carefully peel it off. Place a battery-operated candle in your new holder, and you're done!
Now on to creating a pretty DIY Leather-Wrapped Vases!
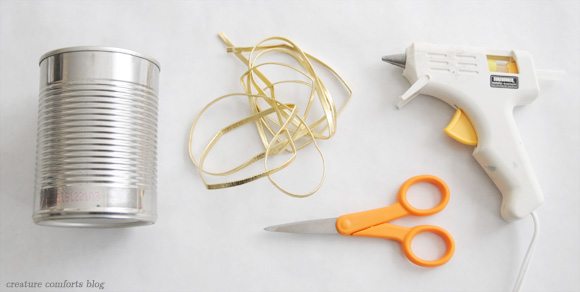
Gather your supplies. You will need:
- Tin can(s), emptied, cleaned, and dried | Make sure to use the variety with the pull-off top so that you are not left with any sharp edges. You can also use a glass cup in place of the can if you prefer.
- Sharp craft scissors
- Realeather Craft Lace in Metallic Gold and / or Silver | Available at Michael's and Hobby Lobby (find additional suppliers here). Be sure that your leather cord has two flat sides (like a fettuccini noodle...not round like a spaghetti noodle).
- Hot glue gun (low heat) and glue stick(s)
- Fresh flowers (and water)
;)
Plug in your glue gun and allow it to get hot. Begin by squeezing a small line of glue beneath the top lip of your can. Immediately place one loose end of your leather cord into the glue and press down to adhere. If the glue dries to quickly you can easily peel it off and try again.
;)
Now apply another short line of glue just slightly below the top lip of your can, and directly following the portion of cord that is already attached. Don't place the glue too close to the edge or you will have a messy vase top. Place your leather cord into the hot glue, making sure to pull your cord tight as you are working so that there is no slack in the cord. Continue to work in small sections, adding glue, and placing leather cord, until you have made your way back to your starting point.
Now add a small dot of glue on top of the cord end (where you started) and overlap the loose end of your leather cord over it, angling it down slightly (as seen in the photo).
;)
Continue to wrap your leather cord around your can, keeping the cord taught as you work, and the top edge of your cord snug against the bottom line of the cord above it. You will not need to glue the cord down along every row. If you'd like to apply a small dab of glue every few rows to make it extra secure, you can. The very top row is the only one that need to be glued down completely.
Continue wrapping cord around your can until it is completely covered. Glue the loose end atop the last wrapped row and snip off excess cord. You'll see that the leather on the back of the can angles down just a bit (nobody will notice when there are flowers inside it)...
;)
...but the front is nice and straight.
Use your fingernail or the tip of your scissors to carefully remove any excess glue along the edges. Fill with water (carefully so it doesn't leak on the leather) and a bouquet of beautiful blooms!
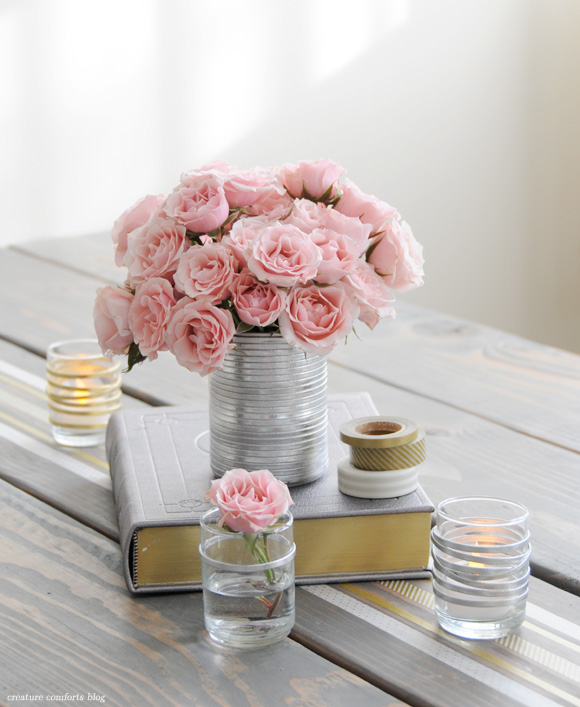
Doesn't it look lovely?!
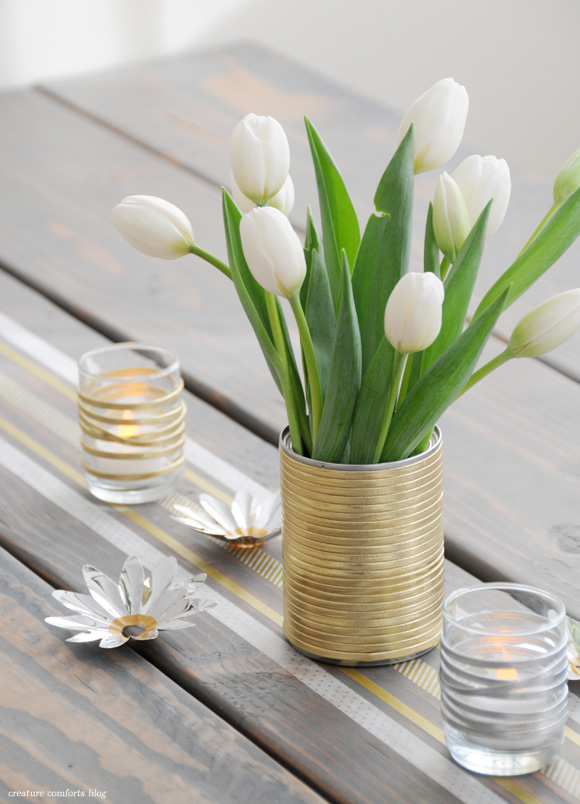
And here it is in gold!
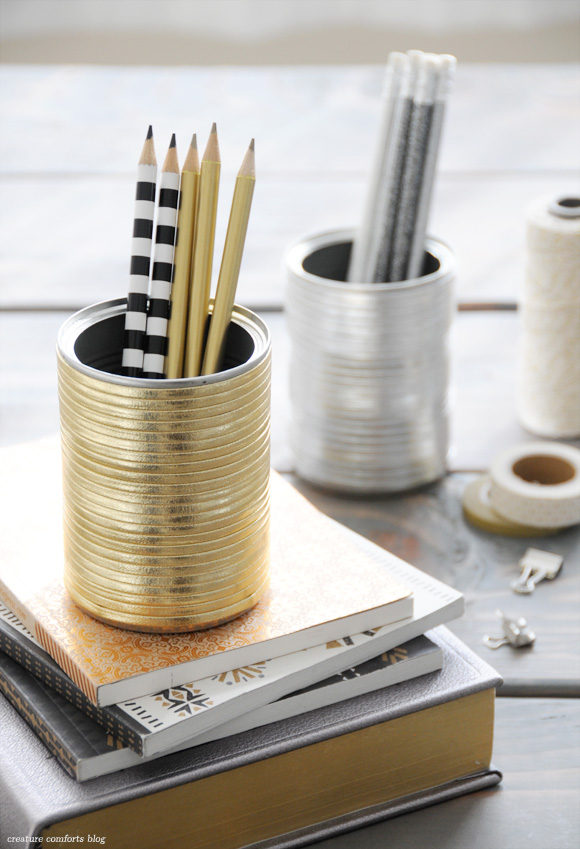
Bonus...these vases can also double as snazzy pencil holders! I have the gold one on my desk right now!
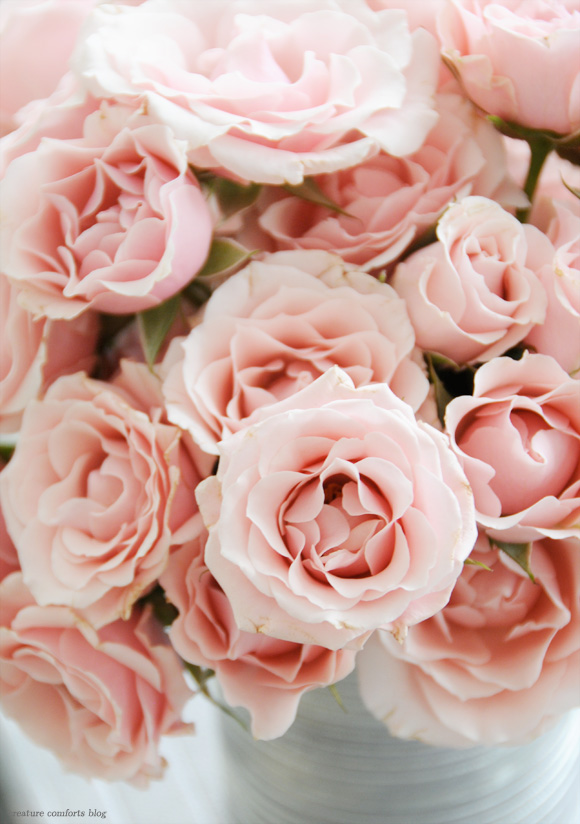
And one last gratuitous rose photo...because I just can't help myself. xo Ez
Prop sources: Pencils - Target | Journals - Delphine Press (from a trade show), Sparrow & Co. | Silver Dictionary - received as a gift | Japanese Masking Tape - etsy | Metallic Flowers - vintage Christmas decor |
---------
This post was kindly sponsored by Waverly. Follow them on Twitter, Pinterest, and like them on Facebook. The DIY content, images, and opinions shared in this post are my own.
 23 Lovely Comments | Email Article | found in D.I.Y. + Projects, Holiday Inspiration/Projects, Weddings + Events Print Article | Share This |
  | by Ez
Reader Comments (23)
adorable idea!!!!
I Like!! Very nice idea!!
This is genius!! LOVE it so much!
excellente idée. j'aime beaucoup
So beautiful, such a wonderful idea. And gorgeous photos as always!
These are solo pretty and elegant Ez! I especially love the gold!
The pink looks lovely with the silver. An idea- wrapped red leather vase, filled with Christmas pine foliage. Options are endless. Thanks for sharing!
What a beautiful idea! And your photos are as always just lovely!
xo Zoe
That was a pretty DIY! Really liked it!
amazing idea!
So beautiful!!!
This is beautiful! Great idea and perfect gift for a hostess. This would also look nice with twine or raffia but the shiny leather is much more modern.
You are amazingly talented! Thanks for constantly inspiring me :)
Me encanto tremenda idea WOW
Me encanto tremenda idea WOW
Such a great idea! I'm doing this to a few jars I can't get the annoying glue off!! Thanks for sharing!
such a cute idea! the gold may be my favorite! :)
I love this post, I feel inspired to create my own vases and candle pots! Such a lovely idea and simple to create. Definitely on my to-do list for this year!!
This is SUCH a great idea for the tins! Pinning it right now. :D
Very pretty and lovely and....words aren't really enough. but you do a wonderful job of explaining and photographing.
Yay i finally found the source of the gorgeous pic of the roses! Saw this posted on someone's florist page and thankfully my keen eye could read the tiny watermark. Beautiful work and gorgeous blog! New follower in me :)
So pretty!!! Where are the pencils from by the way?
This is very simple yet artistic and pretty! Would love to try this one out. Thank you for sharing :)