


DIY: Pretty Fabric Scrap Gift Tags
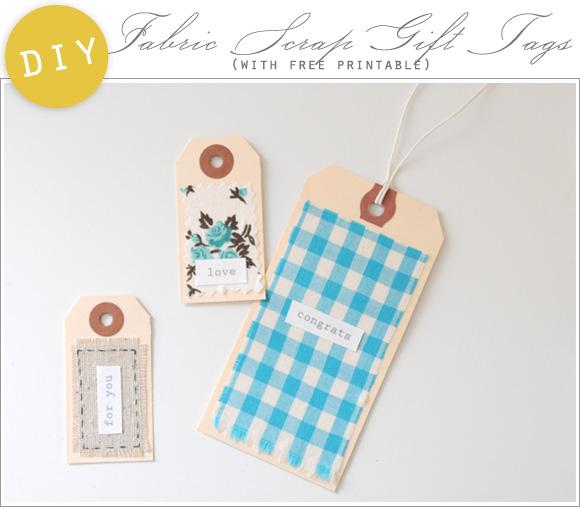 Hello lovelies. I thought I'd share a little tutorial with you for these simple and sweet Fabric Scrap Gift Tags. They are such a great way to give new life to any fabric bits and pieces you have laying around that you just can't throw away. I started making these a while ago as a way to display fabric clippings on my inspiration wire and they always make me smile. It would be easy to whip up a batch to keep on hand for gift wrapping...or perhaps you might assemble a special box filled with the tags you create and give them to someone who loves beautiful packaging supplies.
 Supplies needed:
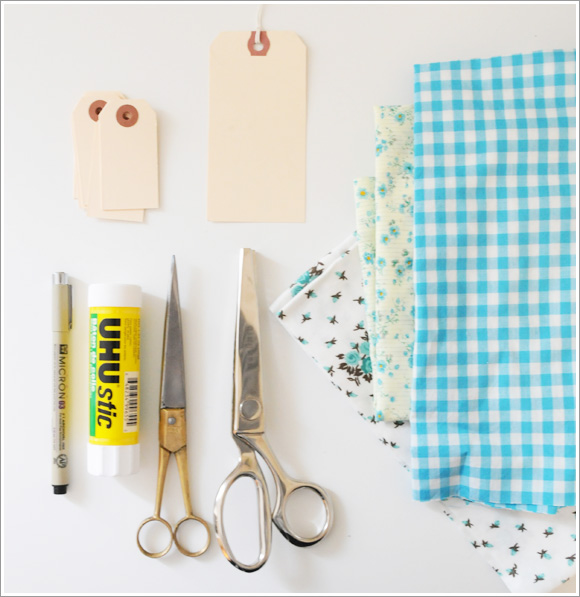
- Fabric scraps in various sizes and patterns (light-weight woven fabrics work best). For this project, fabrics in lighter colors should be used.
- Manila hang tags - found at office supply stores (alternately you can use my free printable version found here).
- Glue Stick such as Uhu brand (I do not recommend liquid glue for this project)
- Scissors
- Pinking shears (optional)
- Fine tip permanent pen in a dark color such as black (optional - used for creating faux stitches)
- Printable Word Labels (click to download)
 Step 1: Cut out fabric slightly smaller than the size of your tags. Your edges don't need to be perfectly straight. Finish the fabric pieces by trimming around them with a pair of pinking shears or pulling out a few loose threads on all four sides of your fabric to give the edge a vintage frayed look.
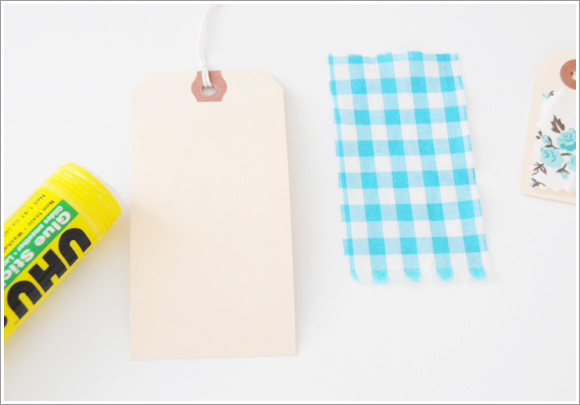 Step 2: Using your glue stick apply glue to the surface of your tag. Adhere your fabric to the tag and press down to smooth and secure.
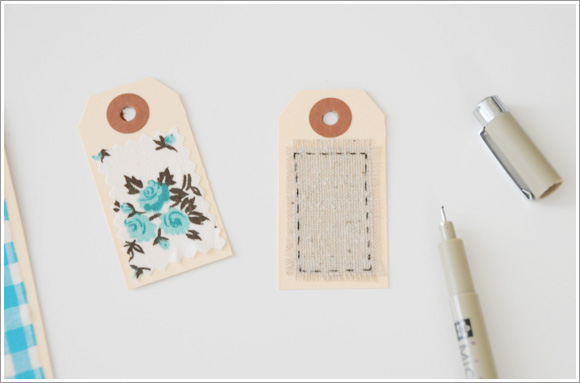 Step 3 (optional): Create faux stitches on your fabric using your fine tip permanent pen. This is not necessary but may add a little extra something to your tags.
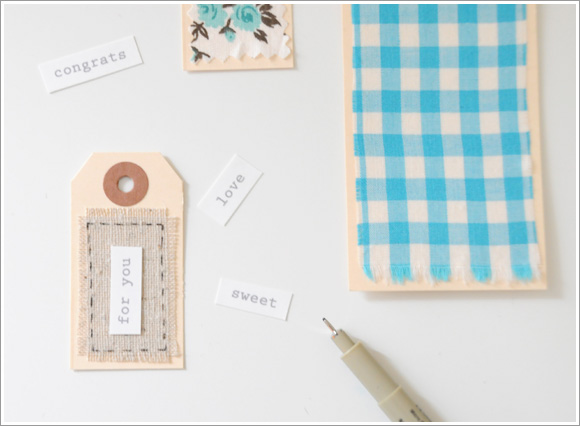 Step 4 (optional): Download and print the Word Labels created for this project. Cut out around each word as desired and glue onto fabric tags to complete. All finished!
More ideas for your tags:
- Print your own word labels to customize as you wish
- Use as seating tags for parties or weddings
- Hang tags on bins and containers to add some charm to organization
- Use as "business cards" for your indie business
- Clip on to inspiration wires/boards for everyday enjoyment
- Use in your next scrapbooking project
I hope you'll give this wee project a try and let me know how you like it. Enjoy! xo Ez
 39 Lovely Comments | Email Article | found in D.I.Y. + Projects, Downloads + Printables, Gift Giving / Wrapping Ideas, Tutorials, Weddings + Events Print Article | Share This |
  | by Ez
Reader Comments (39)
excellent work! will be fallowing your works its gives me really good inspirations.. thank you!
What an awesome idea! I have a packet of tags that I bought for labeling some baskets in my clothes closet, and now I'm inspired to make them even prettier with this project.
What a great idea! I am thinking these could be really cute for table assignments for a wedding, perhaps dangling from a tree branch.
This is such a lovely idea - just so simple and effective. I hate wasting small scraps of fabric and this is a perfect use for them. I have done this with scrap paper before but didn't think to use the fabric.
these are beautiful! thanks for sharing!
I love the simplicity of this! Thanks for sharing.
I love this DIY! Thank you so much for sharing!
I did have some trouble printing off your free manila tag template. The "FOUND HERE" hyperlink above links to your "Pencil Eraser Stamp DIY" post which has the "PRINTABLE MANILA TAGE DOWNLOAD" link in it. When I click that link, it leads to the Prinable Word Labels instead. Any suggestions?
Hi Deanna! I'm so sorry about that. I've uploaded the correct PDF link now. Please let me know if you are having any more trouble with it. xo Ez
I love the design and colors of that tags. It is sweet. I think my wife is going to love that kind of tags. I just wish that I can make it properly.
Thanks so much! Can't wait to get started!
This is adorable!!!!! You amaze me. XOXO
Loved this post.. so inspiring.. I did some today.. what do u think? see my post here,
http://www.bonitarose.com/2012/01/fabric-gift-tags.html
thanks for all the inspiration! I added some stitiching to mine!
This is a great tutorial , got lot of scraps in stash. I am trying to download the pdf but not able to do so.
I just see a flash of the pdf and then its kind of turns blank. Any idea on how to view the pdf and print it.
i can use this, thank you! i love the "stitching" detail :)