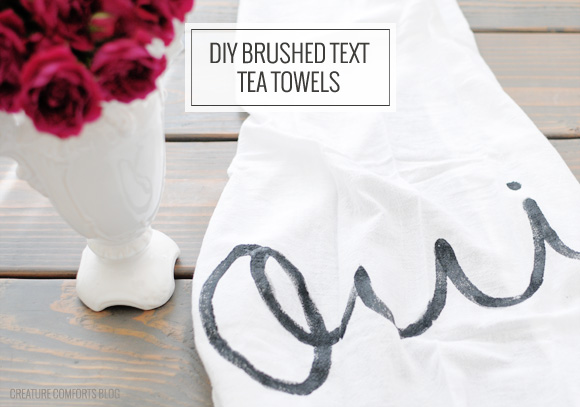
Sometime last year, on a whim I decided to see what it would look like to paint text onto a tea towel...or if it would even work at all. In the process I played around with some random patterns as well, and my two favorites from the project ended up being the "Oui" text and painted polka-dotted versions. They aren't especially professional looking, but I think the imperfections make them charming.
A few weeks ago, several of you spotted the "Oui" towel in my instagram feed and asked about it, so today I thought I'd share a quick how-to in case you're interested in creating your own. Be sure to experiment with different brushes, colors and patterns...that's half the fun!
;)
Tea Towel Supplies:
- Masking tape
- Solid work surface
- Scrap cardboard or thick paper (such as an old grocery bag)
- Fabric paint - I used Tulip brand Soft paint (it dries flat, not puffy)
- Paint dish - I just used a small saucer
- Coarse paint brushes - I found that the kind with the rounded tops tend work best for writing text
- Flour sack kitchen towels - I bought my set at Target. They are not super high quality, but they work perfectly for this project and are very affordable.
- Iron and ironing board (optional) - You may want to iron your towels before use. I didn't for mine, but it probably would have been a good idea.
;)
Protect your work surface with your scrap paper. Open your towel and place it across the papered area (you can pre-iron your towel if you'd like to). Tape all the corners down onto your work surface, making sure to pull the material somewhat tight in the process so that you are left with a smooth "canvas" to paint on.
;)
This is the shape of the brush that I have gotten the best results from when painting text. You might find another brush you prefer. These are just the cheap-o brushes that you can find at any craft store. Don't feel like you need to spend a lot.
;)
Pour a decent amount of paint onto your paint dish. You will want the brush to have a nice saturation of color on it as you work, so more is better than too little.
;)
Dip your brush into the paint, making sure to pick up quite a bit of paint. It shouldn't be dripping off...but you don't want it to be too dry either. Find a good starting position on your towel, and begin painting the first letter in a slow but steady movement. Don't worry if you are running out of paint on your brush as you come to the end of your stroke...you can add more paint in a second layer later on (if you'd like).
;)
Dip your brush in paint again and paint the rest of your letters, one at a time. Add a second layer of paint if you'd like to make your text darker. Allow your towel to dry for 24 hours (or according to the time noted on the paint bottle) and then launder before use. You're done!
Tip: If you'd like a little bit of a guideline to follow as you paint your text, use a dark permanent marker to write your chosen word or phrase onto the scrap paper before placing it beneath your towel. Your handwritten text will now show through the fabric and give you a clear line to trace. Now you can feel confident that you'll get the towel looking just how you'd like it to.
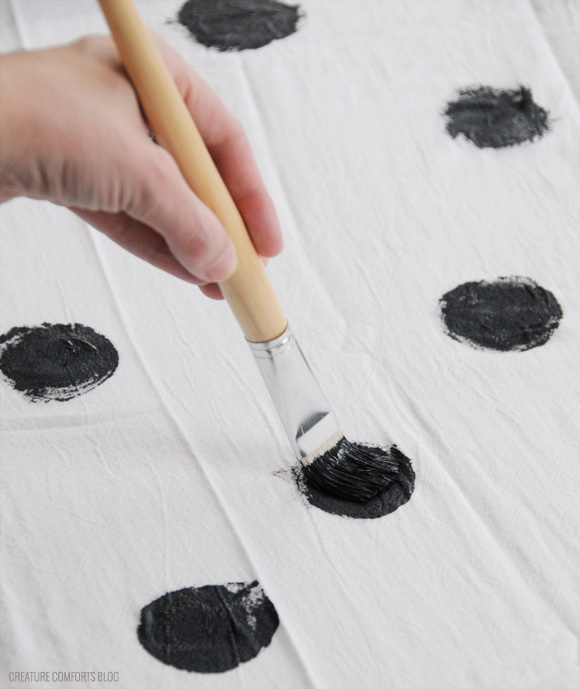
For the polka dotted towels, I used a large flat-headed coarse paint brush. Be sure to saturate your brush with a lot of paint for each dot. Press the brush down onto the surface of your towel and without lifting the brush at all, begin to pivot the bristles in a circular motion. This will fan the brush out a bit and distribute paint in a circular pattern. The circles will not be perfect (I like them looking handmade and not manufactured), but you can always go back in an add more paint if you feel that they need to be improved upon.
If you'd like you can use the method shown on the tote bag below for smaller more uniform dots on your towel. Allow your towel to dry for 24 hours (or according to the time noted on the paint bottle) and then launder before use.
Tip: try different brush sizes and shapes for different effects. You can test them on a scrap piece of paper first if you are concerned about ruining a towel. You can also paint stripes across your towel, as seen in this old post here.
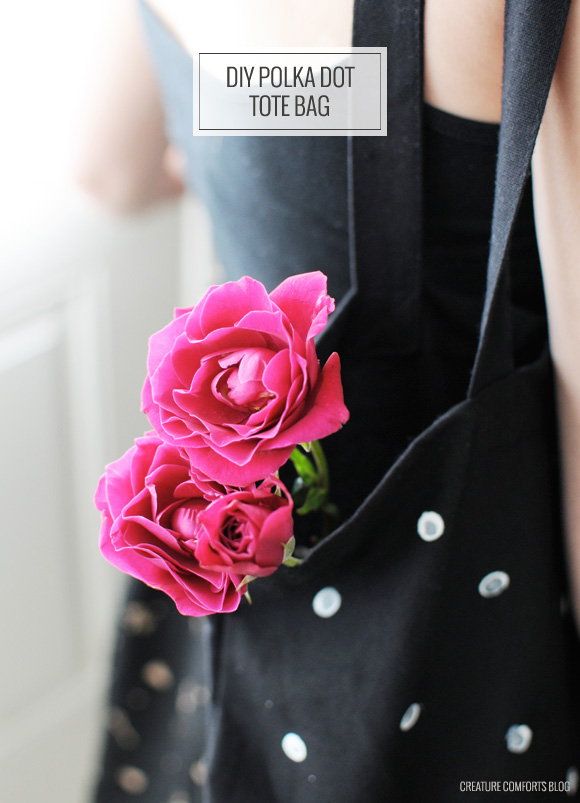
Isn't this bag the cutest! I think it took all of about 5 minutes (not including the paint-drying time) to create. All you'll need to create a similar bag is:
- Cotton tote bag
- Solid work surface
- Scrap cardboard or thick paper (such as an old grocery bag)
- Fabric paint - I used Tulip brand Soft paint (it dries flat, not puffy)
- Paint dish - I just used a small saucer
- Standard pencil with eraser intact
- Iron and ironing board (optional) - You may want to iron your bag before use if it is wrinkled.
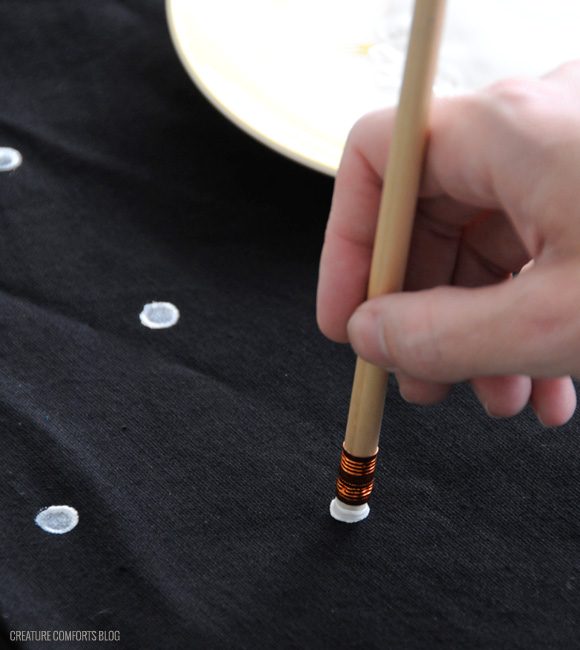
Pour a small amount of paint onto your paint dish. Dab the end off your eraser into the paint. If you get too much paint, you can simply dab it on a clear portion of the paint dish once or twice to remove some of the excess. Press your pencil eraser down firmly onto the tote to stamp.
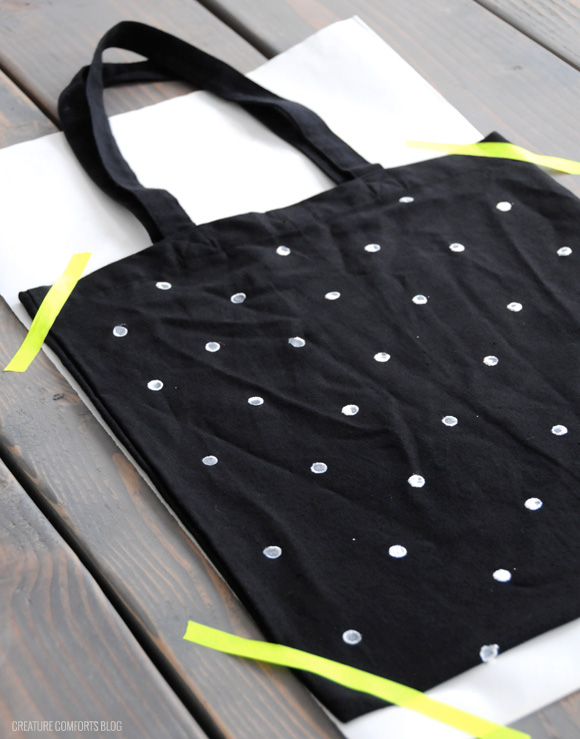
Repeat all over the bag in a random pattern (like I did), try your hand at a shape (such as a heart), or simply fill in one portion of the tote with dots (like the bottom-half or the straps). Allow your tote to dry for 24 hours (or according to the time noted on the paint bottle). You can launder the bag if you'd like, or just fill it with goodies and go!
