


DIY Fabric Gift Wrap: Cozy Parisian Holiday
Hi guys! So a little while back Waverly got in touch (exciting right) to ask if I would like to participate in their special month-long 12 Bloggers of Christmas feature. Of course I said yes...
...and today I am pleased as punch to finally be able to share my little project with you. Here's my take on a Cozy Parisian Holiday:
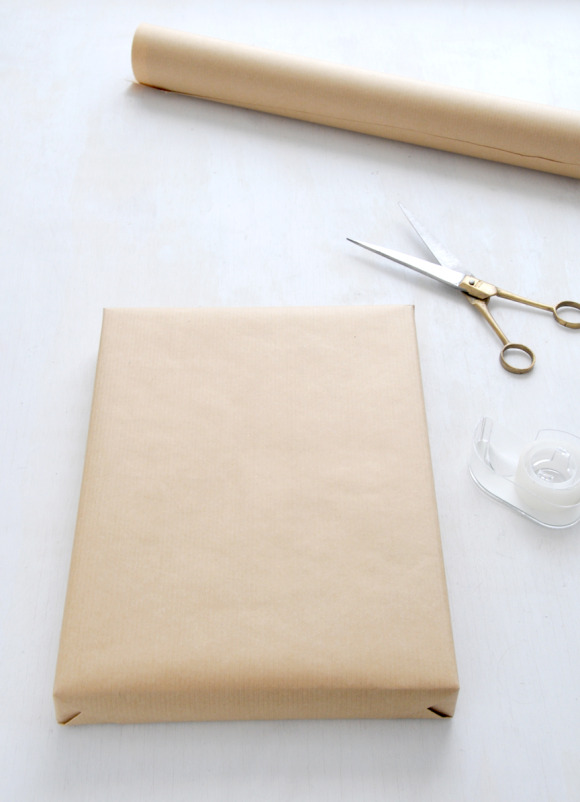
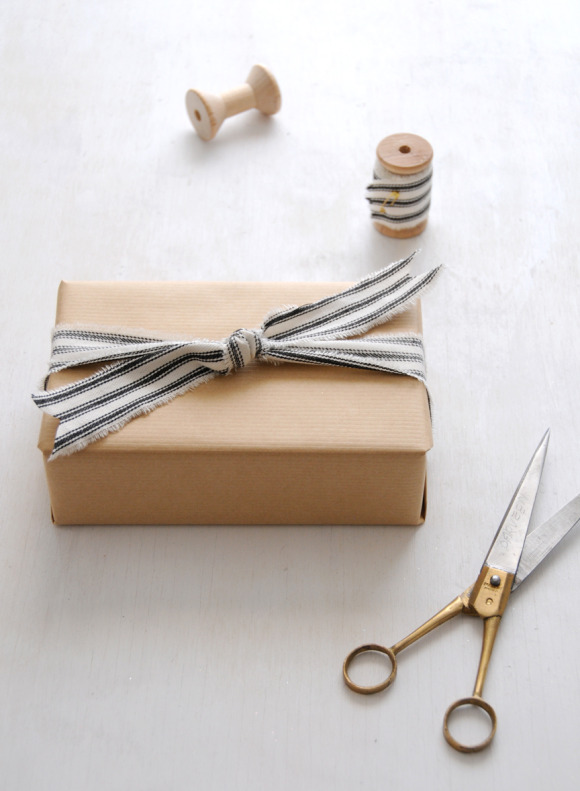
I like to keep the paper simple on most gifts that I give, so as to allow the adornments to really shine. In this case I wrapped everything up in basic kraft paper that can be found in stores such as Target and Michael's Craft Store. Affordable and classic!
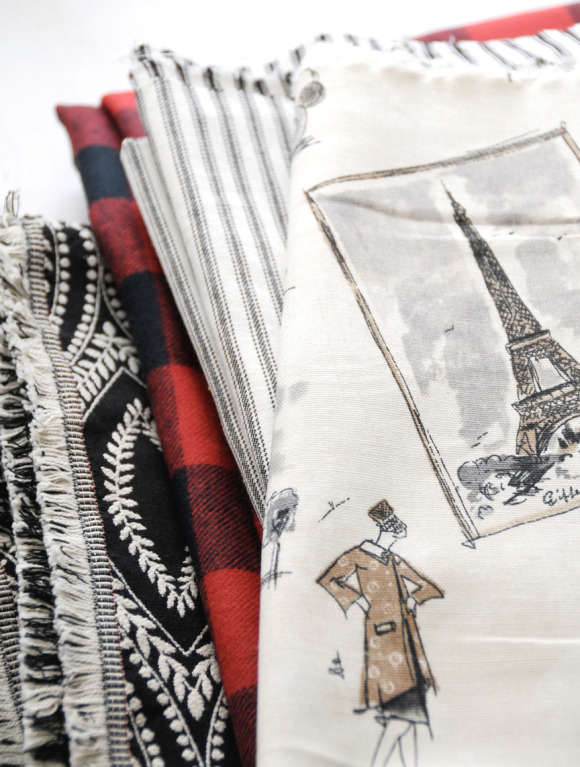
Next I picked out a Waverly fabric with a whimsical Tres Chic Parisian print that I knew would look adorable topping a gift. If you don't have the same fabric available to you, you can easily substitute any other heavier-weight printed fabric that inspires you. Maybe you won't end up with a Parisian theme, but that's totally fine. Have fun looking through your local fabric store (JoAnn's carries Waverly fabrics, including the Tres Chic version used here - online only) or thrift shop and see where your imagination takes you.
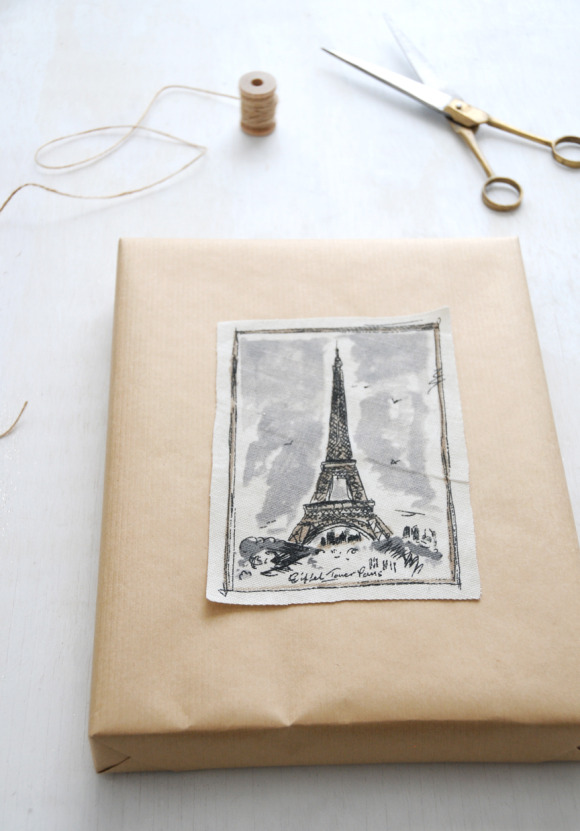
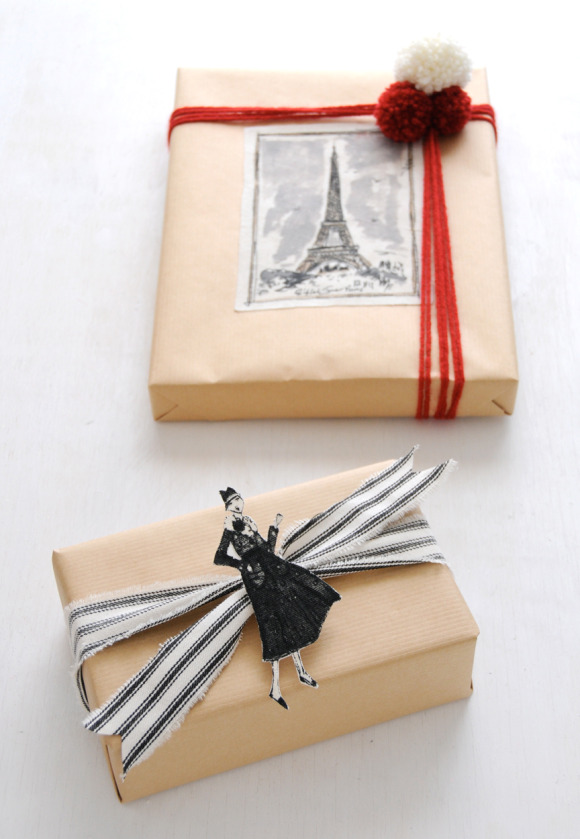
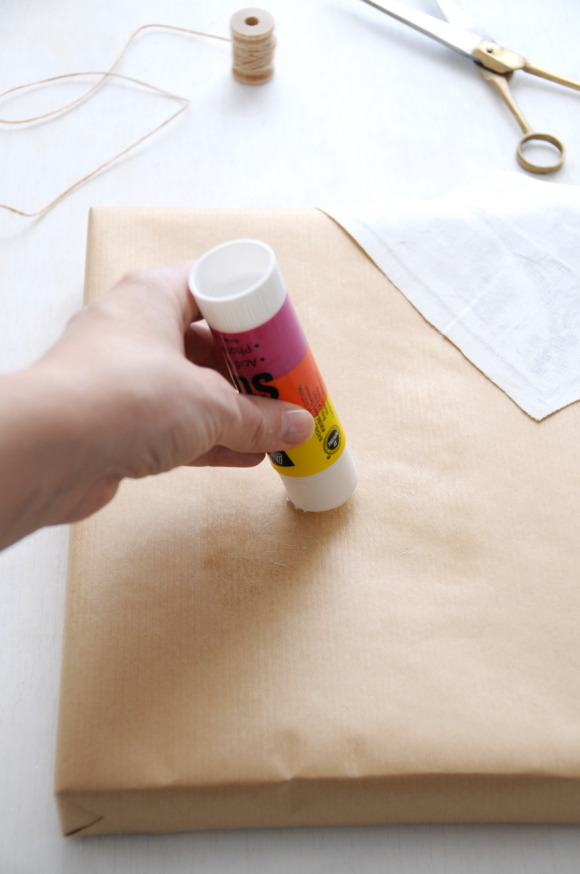
Next (for my version) I cut the Eiffel Tower "photograph" out of the fabric and attached it to my wrapped gift using a standard glue stick (applied directly to the wrapping paper).
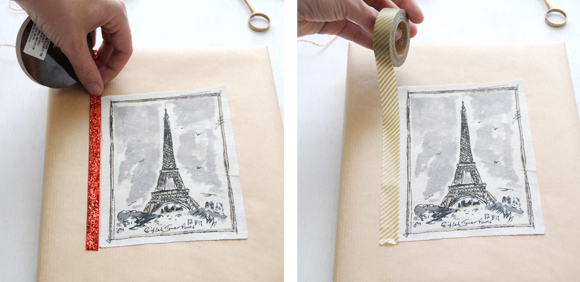
Once the main "image" is attached you can really go nuts adding any sort of adornment you like, such as Glitter Velvet Ribbon (left) or Japanese Masking Tape (right). The key is to let the main element shine.
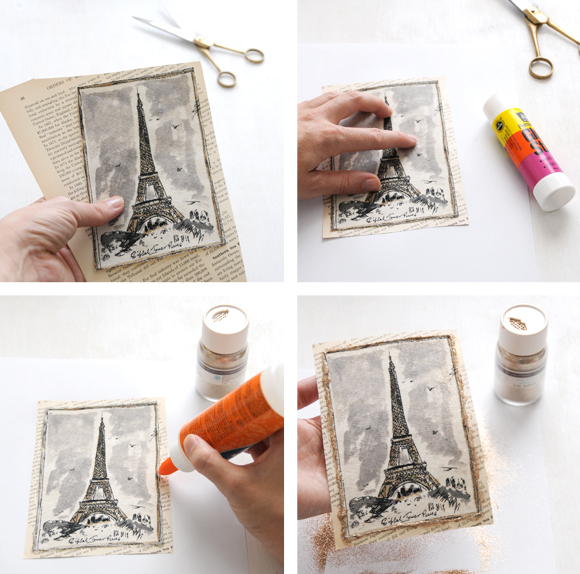
For a vintage sparkle, you might also enjoy gluing the fabric element to an old book page, sheet music, or map. Cut out around the image with enough of a paper border so that it shows nicely. Use as-is, or take it a step further by adding a line of glue topped by a dusting of Smoky Quartz Glitter. Let it dry and attach it to your wrapped gift with a glue stick.
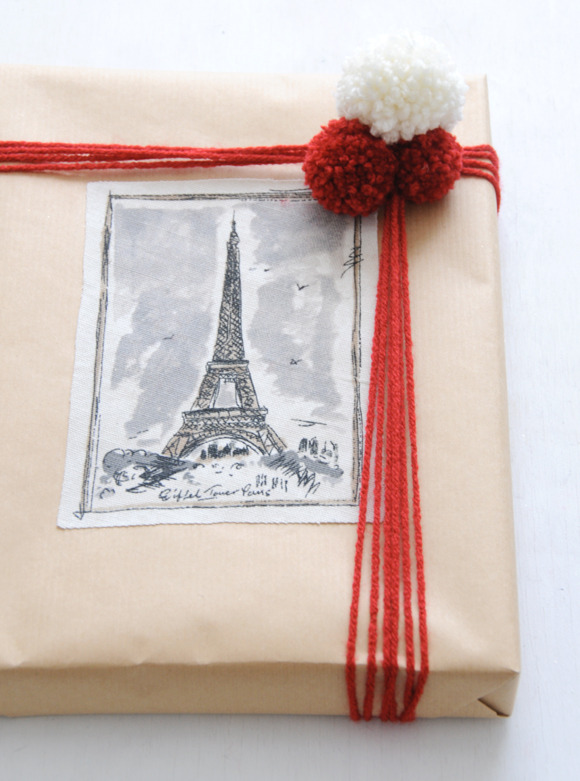
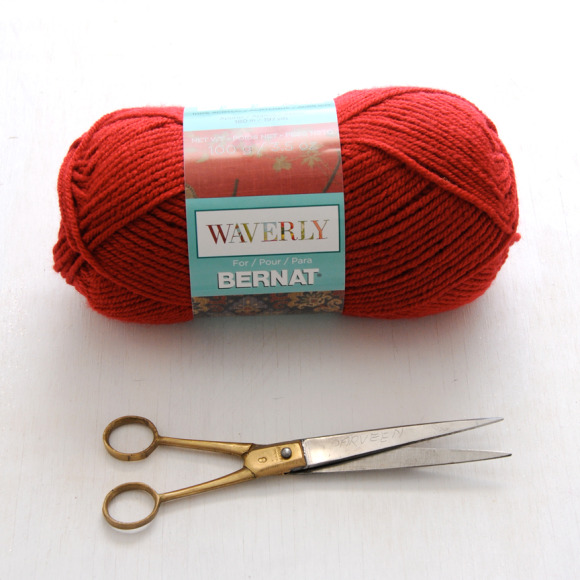
There are so many creative options, but in this case I decided to keep it cozy by finishing my gift with a wrapping of red yarn along with a few yarn pom poms. Remember how I told you there would be a project coming up where you would want to know how to make them? If you missed my quick 5 Minute DIY: Yarn Pom Poms video tutorial, you can find it here.
Be sure to leave the tails on your pom poms (as seen in the tutorial video) so that you'll have a way to easily attach them to your gift...like so:

Next I decided to make some easy ribbons by quickly ripping some gorgeous black ticking into long 1.25" wide strips. You can also cut the fabric into the widths/lengths that you want, but I personally love the raw edges of the torn fabric, as I feel that they look so much more time-worn and charming that way.
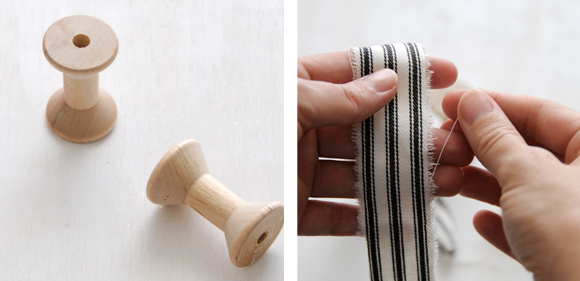
After I prepared my ribbon I wrapped it around wooden spools for easy storage. I also plan to give a few as little stocking stuffers this year!
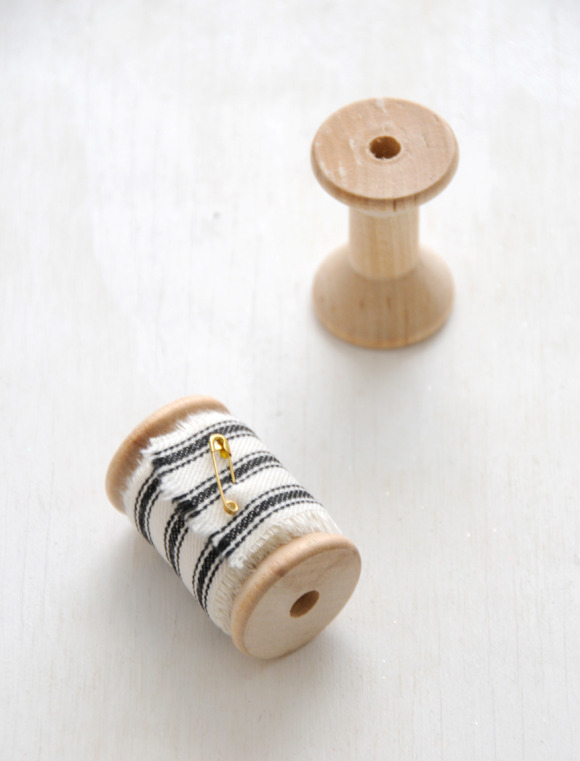
This method of creating ribbon should work with just about any woven cotton material. Just think of what you could create with scraps from your fabric stash, the thrift shop, or a quick trip to the fabric store (of course the Waverly fabrics work perfectly for this particular project too).
After tying a ticking ribbon around another wrapped gift I decided to add an extra touch of charm with a fabric element from the same Tres Chic fabric that my original gift was wrapped with.
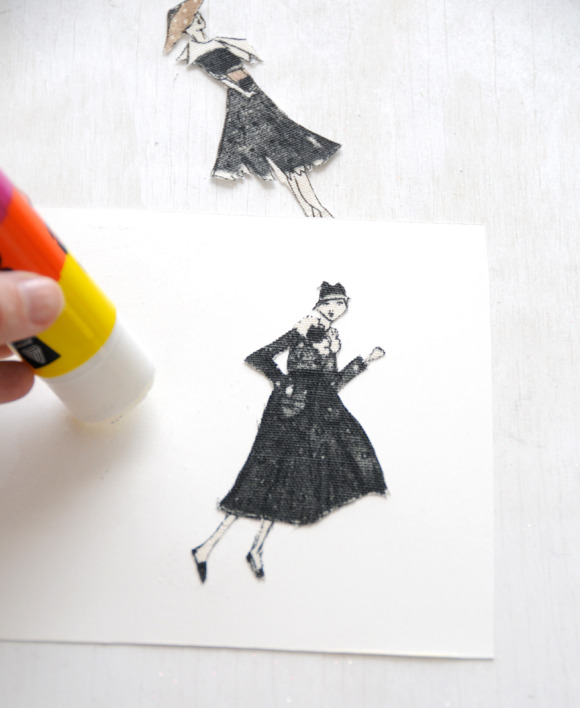
I carefully cut out the images I wanted (aren't these fashionable ladies so great), applied a layer of glue to a piece of heavy-weight cardstock, placed my fabric cutout on top of the glue, and smoothed it down with my fingers.
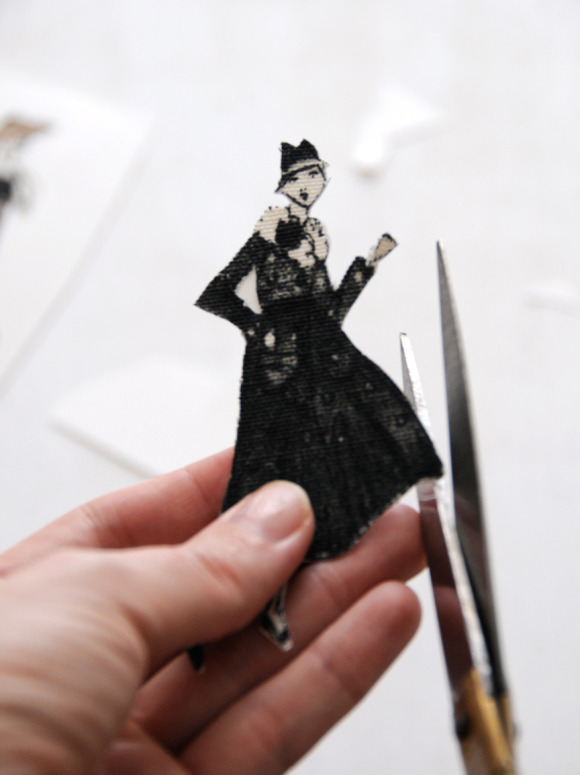
I then carefully trimmed around the image to remove the excess paper, leaving a nice sturdy paper-backed cutout.
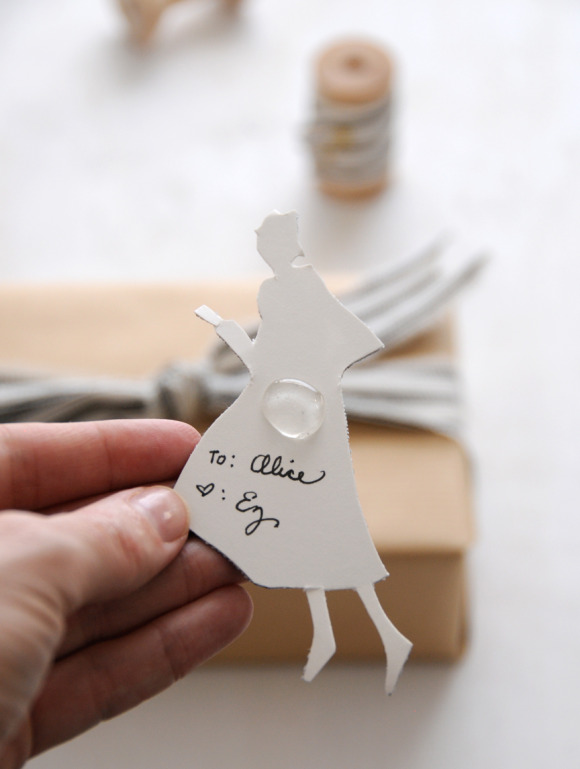
It's easy to personalized the toppers by simply writing a note on the back with a fine-tipped pen. When you're ready to use it, just attach a 3-D glue dot to the middle and stick your fashionable lady onto your gift. You can also add additional touches to your toppers using glitter, sequins, or beads (not shown).

I hope my little projects will inspire you to include fabric in your gift wrapping this holiday season. There's no wrong way to do it, so just dive right in and have fun! xo Ez
Supplies used with these projects:
- Waverly fabrics: Tres Chic | Ticking in Black
- Waverly yarn: Tibetan Red & Birch White
- Kraft gift wrap | Target
- 3-D glue dots | Michael's
- Glue Stick | Craft or office supply stores
- Paper Craft Glue Gel | Michael's
- Glitter Velvet Ribbon | Hobby Lobby
- Japanese Masking Tape
- Wooden spools | similar versions available at JoAnn
Check out the other eleven amazing bloggers who are a part of this great month-long series:
- Bryn Dunn of Bryn Alexandra Interiors
- Kierste Wade of Brown Paper Packages
- Maggie Brereton of Smashed Peas & Carrots
- Kate Riley of Centsational Girl
- Cyd Converse of The Sweetest Occasion
- Heather Baird of Sprinkle Bakes
- Alicia Lund of Cheetah is the New Black
- Anneliese of Aesthetic Nest
- Cindy Hopper of Skip to My Lou
- Christine Martinez of Miles to Style
- Elsie Larson of A Beautiful Mess
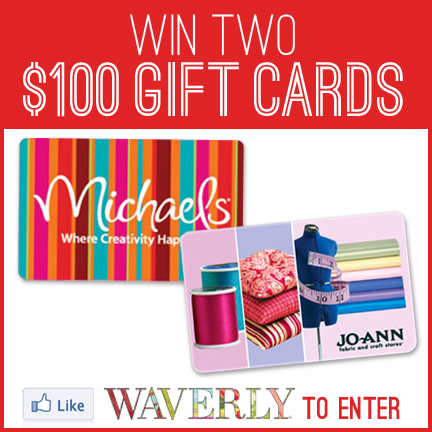
And finally, a quick heads up before you go. If you visit the project page for Waverly over on Facebook you can enter to win $100 from Michaels and JoAnn's. I hope one of you guys wins!
-----------------
Full disclosure: Waverly provided the fabric and yarn for my use with this project along with compensation for the additional supplies I chose to use in the completion of my designs.
 16 Lovely Comments | Email Article | found in D.I.Y. + Projects, Gift Giving / Wrapping Ideas, Holiday Inspiration/Projects Print Article | Share This |
  | by Ez
Reader Comments (16)
Love this! I've been in such a parisian mood lately!
Love these ideas! My favorite version is the one where you use the fabric for a tag. Definitely going to incorporate that technique into my gift wrapping this year.
Thanks so much Cori and Katherine! xo Ez
I really like the idea of fabric ribbon and toppers. I actually used to work for Waverly lol.
This is gorgeous. Absolutely love the style of this.
I really like how you use different materials, just combine them and make it look like they always belonged together. Super inspiring.
December wishes to you
Annika
I'm also using brown paper wrapping for my presents and using other items to embellish the wrapping. I just love the idea of cutting out bits of fabric! I'll have to remember that for next year.
Girl, this rules. I love the little fabric cut-outs. And how great is plain brown paper? Seriously best invention ever.
Thank you for this tutorial! These are all such cute ideas and definitely makes any present even more special. I love the Eiffel Tower one!!
I JUST was asking on Twitter if anyone knew of how to get wrap up some gifts THIS I can do w/out it looking like my 4 yr. old did it! I love it
Thank you guys so much for all your lovely comments! I hope you have the chance to use some sort of fabric element in your gift wrapping this year. It's so much fun! xo Ez
EZ. You are truly amazing. I love the Parisian ladies.
C'est MA-GNI-FIQUE !
This tutorial is amazing! I love the materials you used, the red yarn above all! Well done!
www.silkchocolate.blogspot.com
All great ideas! Thank you!!
I love fabric ripped into ribbons, and this was an extra nice version. Really inspirational post all over!
very good creativity really i loved it and i would like to introduced my own creation of fabric.you may like it.